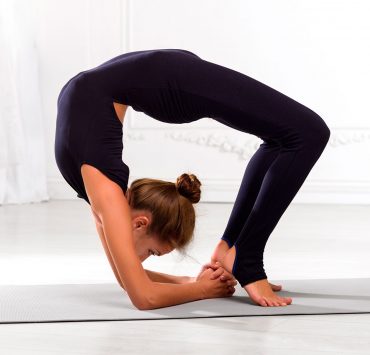
Many of us spend so much of the day sitting that we’ve grown accustomed to tightness across the hips. Sometimes this restriction makes itself known everytime you get up to move, and other times you don’t even realize how tense the hips are until you’re trying to get into pigeon pose. This stress leads to decreased mobility in the hip flexors, lower back pain, poor posture, and it’s also connected to our mental state. We’re believed to hold negative thoughts and emotions in our hips, causing the constriction to build up when we don’t take the time to release the related muscles. Actively moving energy through the hips is the solution to several mental and physical ailments, plus it’ll feel incredible to let go of all that excess baggage.
Ardha Kapotasana — Pigeon Pose

Perhaps the most notorious hip-opening posture is pigeon pose, and for good reasons too. It’s a restorative posture with many variations that can be exceptionally challenging mentally. It brings forth emotions and sensations that trigger our natural responses to pull away. The trick is to listen to what the body’s saying by moving into whatever feelings arise and greeting them with curiosity. Starting with a traditional pigeon pose, come to a low lunge with the right leg forward and begin walking the front foot over towards the left hand. Slowly come to the pinky toe edge of the right foot as you drop the thigh and shin down. Be mindful of the limitations imposed by the right knee as you ease down; keeping the foot flexed is one way to reduce risks of injury. Extend your left leg straight back with the top of the foot resting down and both hips points facing forward. Taking a block or bolster under the right hip can make this shape more accessible if you’re feeling extra tight. A few other excellent options are reclined pigeon pose and seated pigeon; both yield a more gentle expression of this hip opener. Wherever you find yourself, make sure to stay connected to the breath and embrace whatever comes up with an open mind.
Mandukasana — Frog Pose

Some hip openers, like frog pose, take a little getting used to before you can start fully enjoying their benefits. It’s an intense posture that can feel awkward and uncertain in the body at first, but over time you’ll become more comfortable with the shape. Find your way to all fours with wrists under shoulders and knees resting on a mat or blanket. Slowly widen the knees, keeping them in line with the hips, until you feel a good stretch through the inner thighs. Flex the feet and try to keep both ankles in line with the knees. Lower to your forearms and let each inhale invite space into the body while each exhale serves as a deeper surrender. Modify this pose by bringing a bolster under the torso or blocks under the forearms and hold for at least 30 seconds.
Anjaneyasana — Low Lunge Pose

Low lunge is a simple and effective way to open the hip flexors and increase the range of motion through the hips. Start in downward facing dog and step your right foot forward between the hands, stacking the ankle under the knee. Bring your left knee down to the mat or a blanket for added support. Using blocks on either side of the front foot is an excellent way to warm up in this shape and explore any held tension. As you feel ready, bring both hands to the right thigh by engaging the core and squeezing the inner thighs. Stay here as long as you’d like with the pelvis moving down and forward and the chest lifting up. If it feels appropriate, bring both arm bones up by the ears and perhaps lift the gaze. You can add in a quad stretch for the back leg by bending at the knee and grabbing your foot. Stay wherever you’re comfortable and feeling a proper release without overdoing it.
Malasana — Garland Pose

Inner and outer hips are the target in this low squatting posture with several great modifications. Start standing with feet as wide as the mat and toes slightly turned out. Slowly descend the hips on an exhale, bending at the knees and keeping the chest upright. Continue to engage through the core to keep the spine straight and the knees stacked over the ankles. Let the hands rest in prayer at heart with elbows encouraging the thighs to open. If the heels lift, try placing a towel or blanket under them for additional support. Another gentle option is to bring a block or two under the sit bones to ease the release. Try holding for 20-30 seconds, breathing intentionally to feel the softening as it relates to your exhales.
Utthan Pristhasana — Lizard Pose

Lizard pose is a fantastic stretch with room to customize and feed your needs as they change. Find your way to a low lunge with the right foot forward and the back knee lifted. Begin walking the front foot to the outside edge of the mat, bringing both hands inside the right leg. From here decide what variation will best suit where you’re at today, perhaps lowering the back knee down or releasing to the forearms. Blocks can be helpful under the hands or forearms if you’re feeling stuck, remember to stay conscious of your limitations as you move further. An option for deepening the stretch is bending the back leg and reaching with your right hand to grab the foot, or making sawing motions with the body to loosen the hip flexors. Hold for at least 30 seconds on each side and try to release any areas of stored tension.
Gomukhasana — Cow Face Pose

Although the name doesn’t allude to its hip-replenishing properties, cow face pose is an excellent way to bring space to tight hips and shoulders. For now, we’ll focus on the lower body portion of this posture. Start seated with feet planted and knees bent and start sliding the left foot under the right knee, bringing it towards the right hip. Cross your right leg over the left, stacking both knees, and bring your right foot towards the left hip. Try to root down through both sit bones, using a block or bolster if needed to support them evenly. A gentle forward fold will bring you deeper into the stretch if that’s where the body wants to go. Hold for about a minute before switching sides, acknowledging that the other side may feel very different from the first and that’s totally normal.
Virabhadrasana II — Warrior II Pose

Invite strength, power, and resilience into the body with the familiar warrior II posture. This shape is empowering and highly beneficial for releasing the hips while energizing the legs. Standing at the front of your mat, take a wide step back with your left foot. Keep your right toes facing forward as you turn the left foot out, lining up the front heel with the back arch. Inhale to extend the arms out to the sides, and exhale to bend deep into the right knee. Be mindful of your alignment and make sure your front knee stays over the ankle, gently drawing towards the right to open the hip. Reach equally through both hands to remain upright in the spine while softening the tops of the shoulders. Gaze beyond the front fingertips and notice the energy radiating through the body as you proudly stand your ground.
Ananda Balasana — Happy Baby Pose

Happy baby pose is as much fun as it sounds and offers wonderful relief for tightness in the thighs and hips. Lie on your back and inhale both knees towards the chest, grabbing ahold of the inner or outer edges of the feet. Draw the knees towards the sides of the body while keeping the feet flexed towards the ceiling. Create resistance between the hands and feet while plugging the lower back down and breathing deeply. Stay here for at least 30 seconds, taking any rocking movements that feel natural.
Supta Baddha Konasana — Reclining Bound Angle Pose

This traditional restorative posture offers a simple, yet effective, stretch for the inner thighs and hips with ease. Begin lying on your back with feet planted on the floor at hips distance. Let the knees go heavy towards the outer edges of the mat as the soles of the feet meet in the middle. Allow the eyes to shut down and rest as you focus on the gentle movement of breath moving through the body. Arms can go heavy by the sides or perhaps rest one palm on your heart and the other on your belly. Bring blocks or a blanket under the knees for additional support. Stay here as long as you’d like, perhaps drifting off and allowing the body to receive.
Prasarita Padottanasana — Wide Legged Forward Bend Pose

Forward folds are the excellent for increasing flexibility while bringing length and space to the entire back line of the body. This variation allows a release for the inner legs and hips while being highly customizable to fit all needs. Take a wide stance with the feet, place both hands on your waist, and pigeon the toes in slightly. Inhale to draw the tailbone down and lift the heart up, then exhale and hinge at the waist and fold forward with a straight spine. Let the arms rest wherever it feels most beneficial, maybe experimenting with grabbing your ankles, or opposite elbows. Take 5-10 full breaths here, pulling the inhale up from the feet into both hips points, and tracing the exhale from the pelvis out through the crown of the head.