Many people who do yoga and physical therapy are attempting to release their psoas. The psoas major muscle is a bilateral deep core muscle. You have one on each side and it connects each leg to the torso.
This muscle can become tight when sitting a lot. Tight psoas lead to a weak core. Additionally, they can cause back pain and other muscular-skeletal problems.
But yoga poses can strengthen and lengthen the psoas.
They help move the legs in relation to the trunk. Balancing poses can increase core strength. And backends stretch and lengthen this important muscle.
What Is the Iliopsoas?

The iliopsoas is the only muscle that tethers the legs to the back. It starts at your lower back. Then the psoas major runs through the bowl of the pelvis. There, it picks up the iliacus just inside the ilium.
The psoas minor originates at the lumbar spine. It runs along the front of the psoas major. And it inserts at the top of the pubic arch. The merged psoas major and iliacus then connect to the inner top part of the femur.
The iliopsoas plays a big role in your posture.
It supports your lower back. But its main job is to flex the hip. It contracts to move the thighs toward the spine. And it does this more powerfully than any other hip flexor.
The psoas muscle is also important for walking and running.
It contracts to bring the front leg forward. And it lengthens to extend the back leg. When we sit, the iliopsoas is short and inactive. Sometimes, we become so used to this position that when we stand, it forgets how to lengthen.
But be careful of overusing these muscles. Crunches, dancing, and sports that involve the legs can cause tight psoas.
But yoga practice emphasizes movements and poses that contrast the iliopsoas. And it does this without countering them with poses that stretch it.
Follow the poses below to lengthen and strengthen your psoas.
#1 Vrksasana – Tree Pose

Tree Pose is a basic standing balance pose. And it is a great way to work the psoas on the side of the lifted leg. All balancing poses require you to use your core muscles for stabilization. And this pose is no exception.
Vrksasana strengthens your legs and core while opening up your hips. It stretches your inner thighs and groin muscles.
Take a moment to feel both of your feet root into the floor. Keep your weight equally distributed on all four corners of each foot. Begin to shift your weight into your right foot.
Lift your left foot off of the floor and keep your right leg straight. Don’t lock your right knee. Bend your left knee and bring the sole of your left foot high into the inner right thigh. Press your foot into your thigh and your thigh back into your foot with equal pressure. This will help you keep your hips squared to the front of the mat.
Focus your gaze on something that doesn’t move. This will help you keep your balance.
Take 5 to 10 breaths here. Then lower your left foot to the floor and repeat on the other side.
#2 Utthita Hasta Padangusthasana – Standing Big Toe Pose
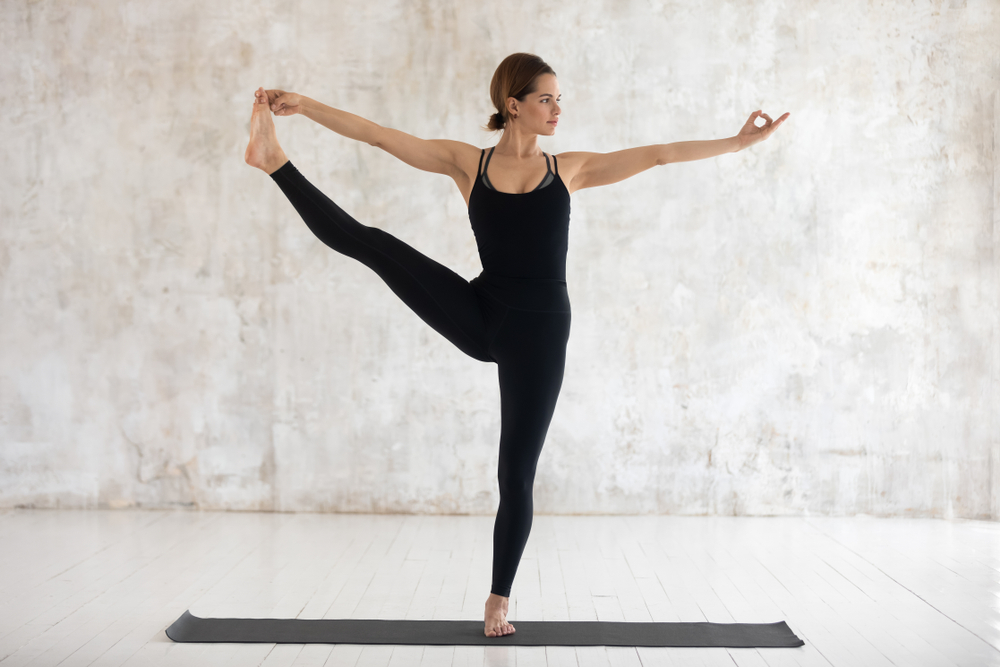
This pose is particularly appropriate for the psoas. It combines challenging your balance with moving your lifted leg towards your body. You can use a strap around your lifted foot in this pose. This will also prevent your back from rounding forward and your shoulder from reaching out of its socket.
Standing Big Toe Pose strengthens the legs and ankles. It stretches the backs of the legs and improves one’s sense of balance.
From Tadasana, bring your left knee toward your belly. Reach your left arm inside of your thigh. Cross over your front ankle and hold the outside of your left foot.
If your hamstrings are tight, hold a strap looped around your left sole.
Firm the front thigh muscles of your standing leg and press your outer thigh inward. Inhale and extend your left leg forward. Straighten your knee as much as possible. If you feel steady here, swing your leg out to the side.
Hold here for 30 seconds. Then swing your leg back to the center with an inhale. Lower your foot to the floor with an exhale.
Repeat this on the other side for the same length of time.
#3 Natarajasana – King Dancer
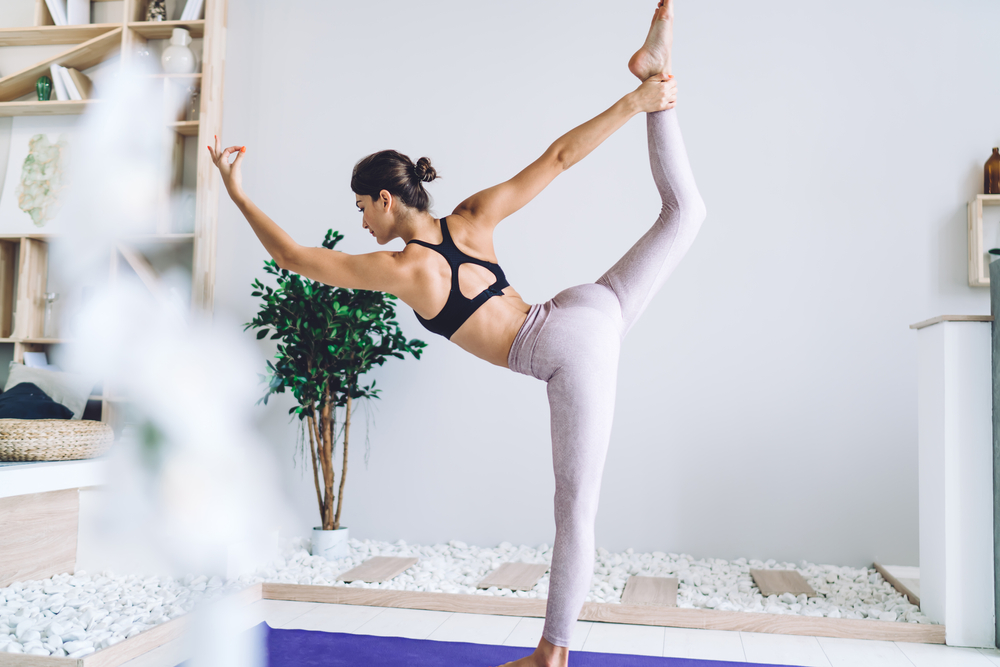
This is another standing balancing pose. As you lift your back leg into position, the psoas gets a nice stretch. Remember to keep your shoulders down and away from your ears. And avoid locking your standing knee.
King Dancer strengthens the legs and improves balance and core strength. It stretches the shoulders and opens the hip flexors as a counter to tight hips.
Begin in Tadasana with your weight equally distributed in both feet. Shift your weight into your right foot. Bend your left knee to lift off of the floor. Keep your left knee hugging toward your midline throughout this pose.
Grasp the instep of your left foot with your left hand. Your thumb should be resting on the sole of your foot and should point in the direction of your toes.
Lift your right arm straight up to the ceiling. Lift your left leg behind you as you bring your torso forward as a counterbalance. Remember that your left knee should not splay out to the side. Your right arm will also move forward here.
Kick your left foot strongly into your left hand.
This will lift your leg higher and deepen your backend. Keep your left toes active. And fix your gaze on something not moving for balance.
Hold here for 5 to 10 breaths. Keep kicking your left foot into your left hand.
Then release and repeat this pose on the other side.
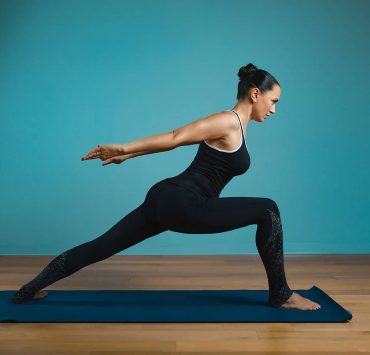
#4 Virabhadrasana I – Warrior I

Warrior I is also a bit of a balancing pose. If you feel wobbly or have trouble turning your hips forward, take your feet a little bit wider towards the sides of the mat. Overall, this pose provides an excellent stretch for the psoas.
The psoas lengthens on the back leg as the torso stretches away from that leg.
This pose stretches the whole front side of the body while strengthening the thighs, ankles, and back. It develops your stamina, balance, and coordination. And it stretches your chest and lunges, improving your breathing.
Begin in Tadasana. Your feet should be hip-distance apart and your arms should be at your sides.
Turn to your left. Exhale as you step your feet wide apart, about 4 to 5 feet. Turn your right foot out 90 degrees so that your toes are pointing to the top of the mat.
Pivot your left foot inwards at 45 degrees.
Align your front heel with the arm of your back foot. Keep your pelvis turned toward the front of the mat. Press your weight through your left heel. Then exhale as you bend your right knee over your right ankle.
Your shin should be perpendicular to the floor. Lift through the arches of your feet while rooting down through your ankles. Reach your arms up strongly, broaden across your belly, lengthen the sides of your waist, and lift through your chest.
Keep your palms and fingers active and reaching.
Gently tilt your head back and gaze up at your thumbs. Keep your shoulders dropped away from your ears. You should feel your shoulder blades pressing firmly inward.
Press down through the outer edge of your back foot, keeping your back leg straight.
Hold here for up to one minute.
Release by pressing your weight through your back heel and straighten out your front leg. Lower your arms and turn left. Then reverse the position of your feet.
Repeat on the other side for the same length of time.
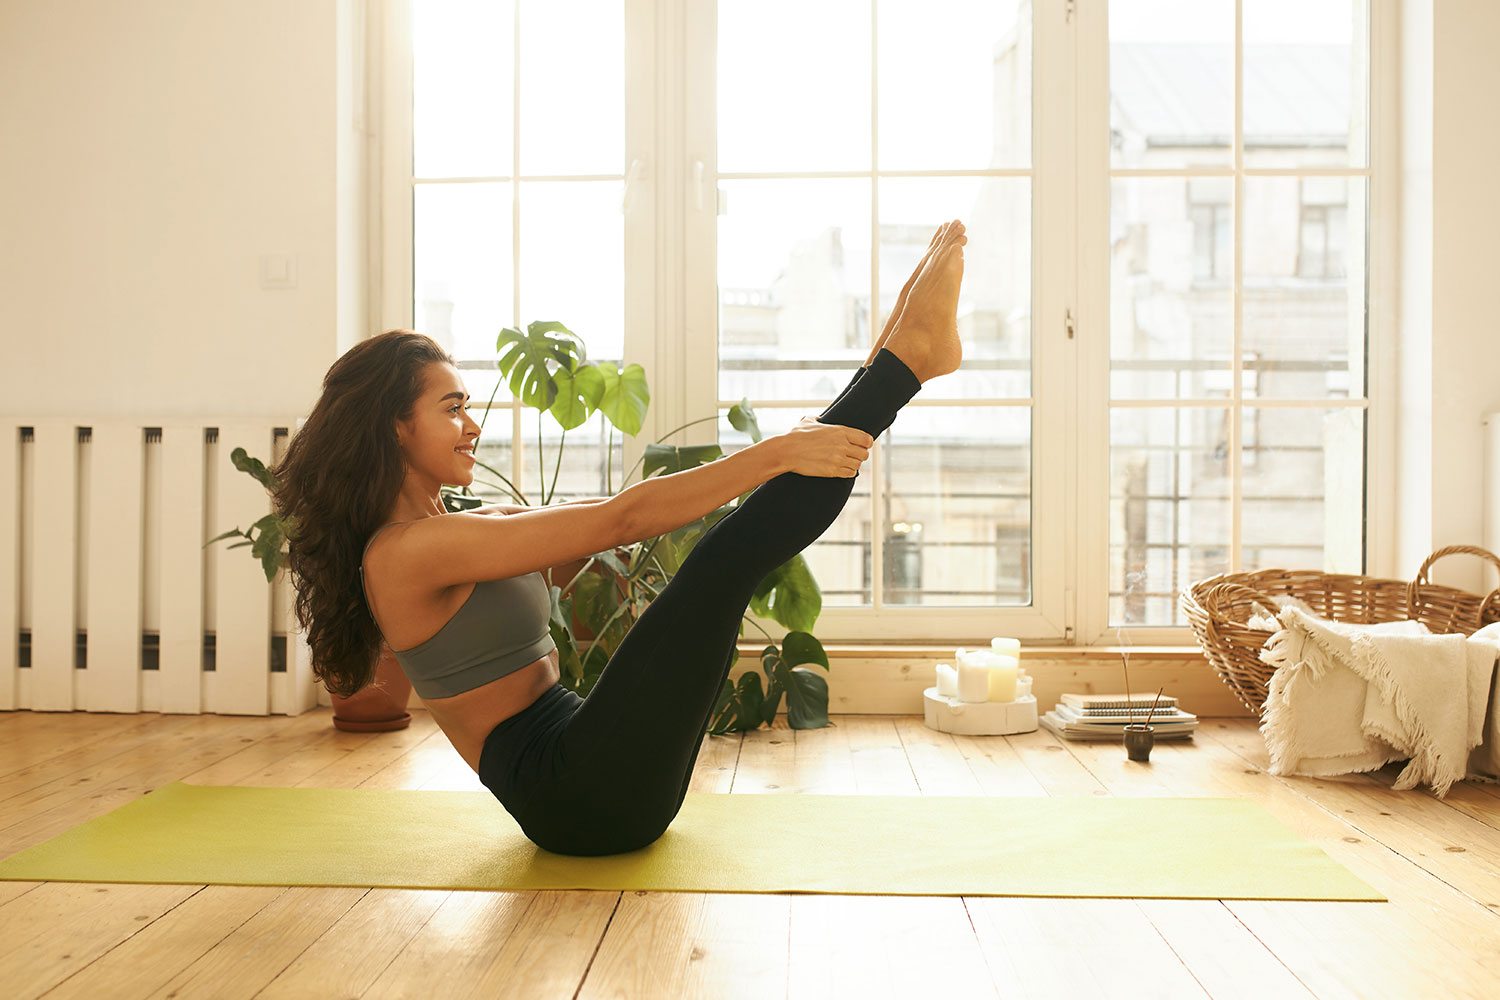
#5 Navasana – Boat Pose
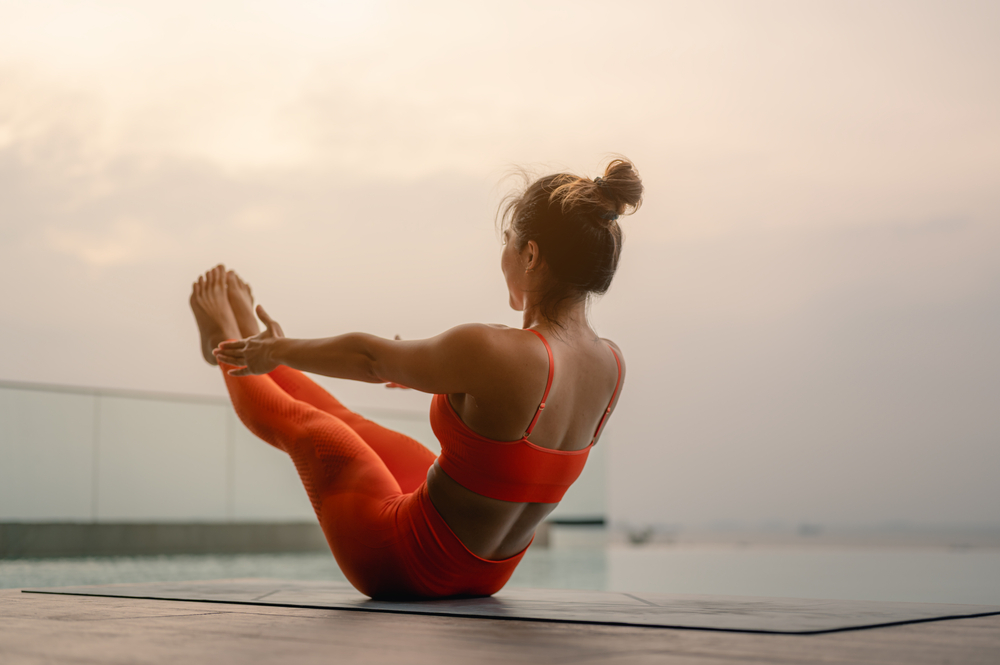
The psoas works on both sides in this pose to bring the legs and spine into a V position. It also keeps your spine long and your legs straight.
Boat Pose builds your abdominal and core strength. It works the deep hip flexors and helps to build your balance overall.
Start in a seated position with your knees bent and your feet flat on the floor. Lift your feet off of the floor and keep your knees bent at first. Bring your shins parallel to the floor. This is half boat pose.
Straighten your legs to a 45-degree angle. Roll your shoulders back and straighten your arms to be parallel with the floor. Keep your palms facing up. Balance here on your sit bones and focus on lifting your chest.
Hold here for at least five breaths. Then release your legs on an exhale.
#6 Ustrasana – Camel Pose
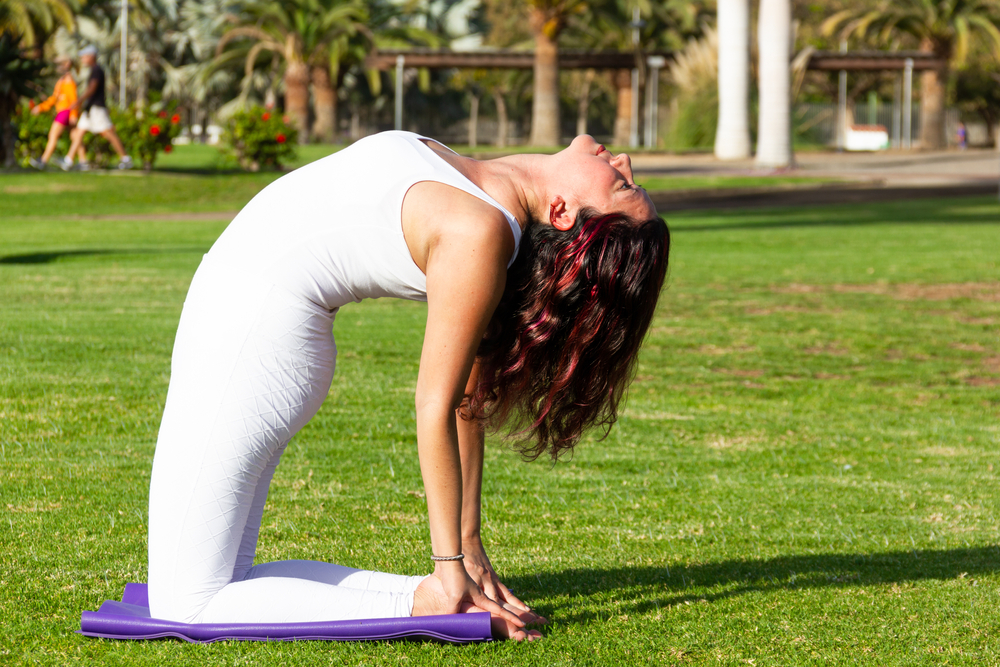
The psoas works on each side to support the lower spine in this pose. They also lengthen through the backend. Get the full benefits of this stretch by making sure your thighs stay perpendicular to the floor.
Camel Pose stretches the front of your body including your chest, abdomen, and quadriceps. It improves spinal mobility and opens your heart chakra.
Kneel with your body upright and hips stacked over your knees. Draw your hands up the side of your body until your palms reach the sides of your rib cage. Let your thumbs rest on the back of your ribs as the other four fingers wrap around the sides and front of the rib cage. Use your hands to lift the rib cage up for support. Start to open your chest toward the ceiling.
Maintain this position in your chest. Then reach your hands back one at a time to grasp your heels. If you can’t reach your heels, tuck your toes under.
Bring your hips forward so that they stay over your knees.
Here, you can let your head come back and open your throat.
Release by bringing your chin toward your chest and hands to your hips. Firm your abs and support your lower back with your hands.
Then slowly bring your body back to an upright kneeling position.
#7 Supta Virasana – Reclined Hero Pose
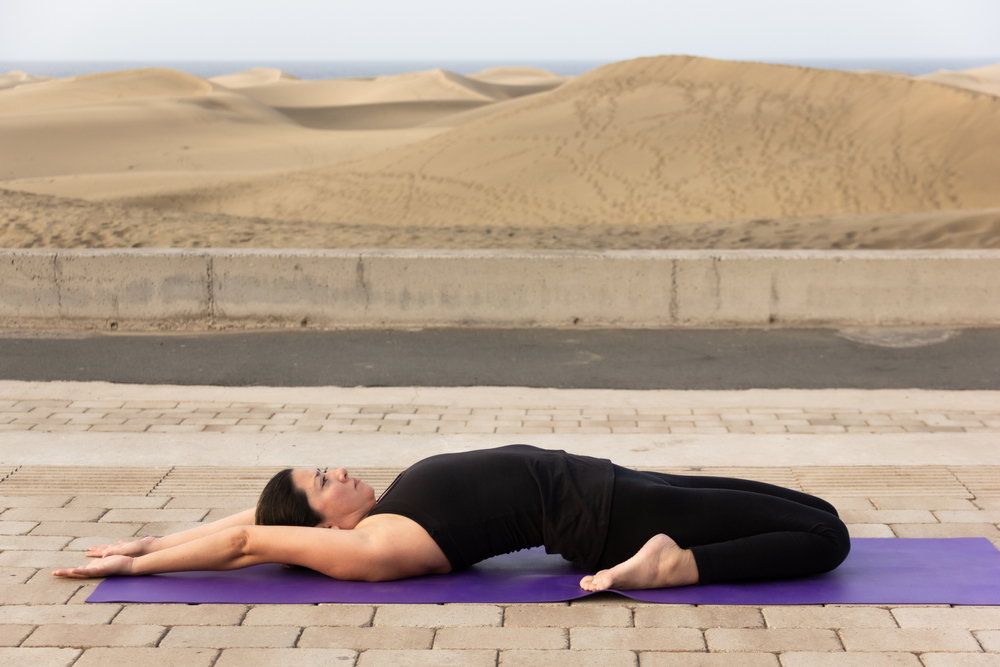
The forward motion of the lower body counters with the backward motion in the upper body in this pose. This makes for a good stretch for the abdominal region and psoas.
This pose can be quite intense on the thighs and knees. So approach it with caution.
Begin in Hero Pose. Your upper body should be upright and your legs should be bent back at your knees. Keep your feet on either side of your upper thighs. Bring your hands down to the floor on either side of your thighs.
Walk your hands back toward your buttocks as you lean your torso back. Bend at your elbows to come down to your forearms. Then try continuing to release your back toward the floor.
If you feel any pain in your knees or lower back, this is a sign that you’ve gone too far.
Return to your forearms instead of lowering.
Make sure that your knees stay close together. Don’t let them separate. Stay in this reclined position for five to ten breaths. Come out by raising yourself onto your forearms.
Then press into your hands to return to a seated position.
#8 Bakasana – Crow Pose
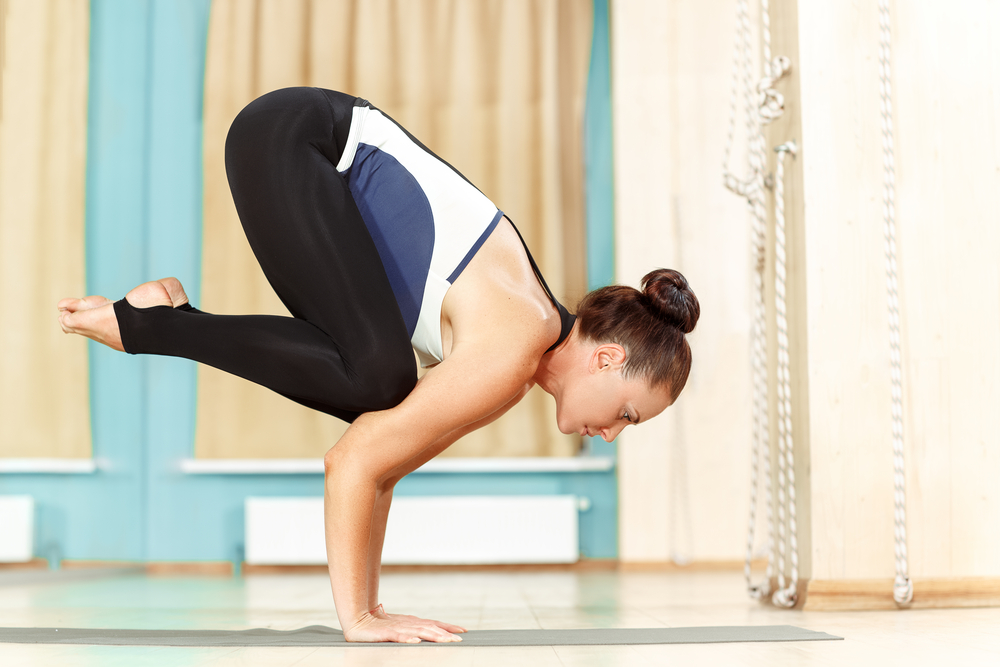
The psoas works to hold the spine in its correct position.
Crow Pose strengthens the wrists, forearms, and abdomen while stretching the upper back. It improves balance and core strength.
Begin in Tadasana with your arms at your sides. Bend your knees slightly so that you can bring your palms flat on the floor. Keep them about shoulder’s distance apart. Plant your palms firmly on your mat about a foot in front of your feet. Spread your fingers wide and press into the top joint of each finger.
Bend your elbows straight back. Come up onto the balls of your feet. Open your knees so they lineup with your upper arms. Then place your knees on the backs of your upper arms.
Begin to bring your weight forward into your hands.
Lift your head as you go. Come up onto your tiptoes. Then lift one foot and then the other off of the floor. Engage your inner thighs for support while keeping your knees on your arms. Hug your feet towards your buttocks.
Focus on the feeling of your body lifting.
Come out by exhaling and transferring your weight back into your feet on the floor.
#9 Urdhva Dhanurasana – Wheel Pose
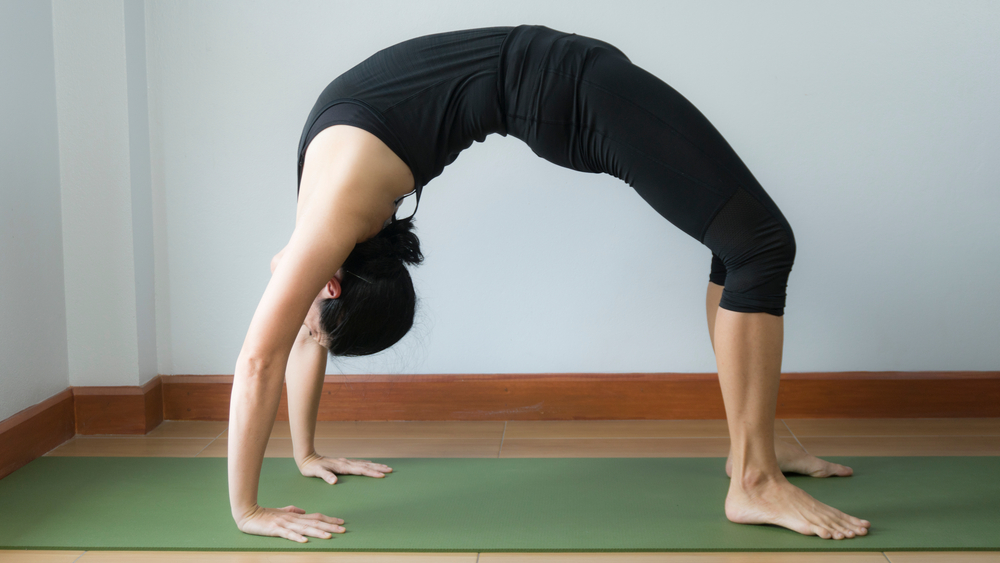
Full Wheel provides a strong stretch across the whole midsection. It also requires a lot of back and shoulder flexibility and strength.
If it gets too intense, you can get a similar stretch in Bridge Pose.
Lie down on your back and bend your knees. Bring the soles of your feet onto the mat close to your buttocks. Reach down with your fingertips and make sure you just graze your heels.
Your feet should be parallel and hips distance apart. Bend your elbows and bring the palms of your hands overhead. Place them under your shoulders with fingertips pointing towards your feet. Inhale and press down into your palms and feet. Lift your shoulders and hips up off of the floor.
Bring the crown of your heat to the mat.
Make sure not to put too much weight on your neck. Then use your hands and feet for leverage. Pause here as you make sure your elbows are staying parallel and not splaying out to the sides.
Straighten your arms as you lift your head off of the floor. Make sure you keep your feet parallel and knees in line with your feet. Reach your chest towards the wall behind you. Begin to straighten out your legs.
To come down, tuck your chin into your chest and lower down slowly.
#10 Adho Mukdha Vrksasana – Handstand
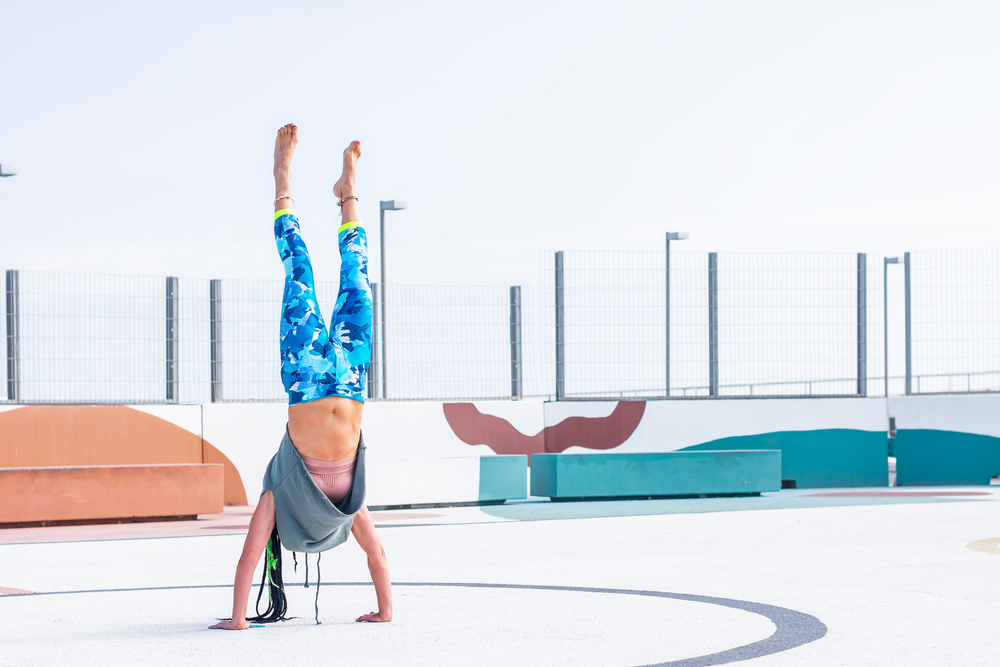
Psoas is one of the key muscles keeping the spine in its upright position in this pose. It builds strength in your shoulders, arms, and core.
Come into Downward Facing Dog with your hands about 6 inches away from a wall. Walk your feet in closer to your hands. Bring your shoulders over your wrists and if possible, your hips over your shoulders.
Keep your right foot on the ground, lifting onto the ball of your foot. Begin to bend at the knee. Lift your other foot off the floor straightening your lifted leg behind you.
Take a few hops here.
Jump off your bent leg and lift your straight leg towards a vertical position. Flex your lifted foot the entire time. Try bringing both heels to the wall. Keep your head down between your upper arms and breathe deeply.
Practice taking your heels off the wall and balancing. You need to strongly engage your legs and reach up through your heels. Also start to work on bringing your gaze to the floor.
Bring one leg down at a time and rest before trying to kick up with the opposite leg for balance.
Final Thoughts
Internal awareness developed through yoga is an important tool for learning how to release the psoas. Releasing psoas will bring new freedom, ease, and structural integrity to your practice. It can be difficult to access at first.
But pay attention to those subtle sensations.
The psoas is buried in the body. It is engaged in habitual patterns of holding when sitting or standing. It is also deeply linked to your emotions. So psoas is best approached with quiet attention, patience, and perseverance.
Awareness is the first key.