Yoga is commonly associated with becoming more flexible, relaxation, and getting stronger. However, there have been multiple studies that provide evidence that yoga can assist in relieving or helping people manage chronic pain. While traditional yoga classes are anywhere between 45 and 90 minutes, a regular ten to 15-minute practiced daily can provide extraordinary results.
Tips for Practicing Yoga for Chronic Pain
When yoga is primarily practiced to help manage pain, one key factor that is required is awareness. Awareness encompasses being aware of how the poses are being practiced and noticing when the mind has wandered.
As you practice the postures or stretches, especially postures that seem to be relatively simple like Tadasana, becoming aware of how you are holding your body is important. The physical benefits of each posture cannot be attained if the body is not actively engaging the muscles for postures and transitions. When the alignment of the bones is an afterthought, there is the possibility of bringing misalignment to the body or even injury.
Additionally, chronic pain is a cycle. Besides the actual pain as a result of an injury or disease, recent research provides evidence that thoughts, emotions, expectations, and memories can induce pain. By tuning in to your body and becoming aware of the poses versus the pain or the rhythm of the breath instead of your condition, you can begin to train the mind to refocus its attention to something other than pain.
Finally, well-rounded sequences help manage pain because it keeps the body from becoming out of balance. For the feet, stretching and strengthening the feet is not enough to manage pain. No single body part is isolated. Often when we are feeling pain or discomfort somewhere, the source of pain is often a direct result of another area of the body. For example, in the case of Plantar Fasciitis, while it could occur due to flat feet or high arches it could also be a result of overuse of hamstrings and calves. Having a well-balanced practice can help manage pain while contributing to overall health and wellbeing.
A yoga sequence to relieve feet pain
This simple practice can be practiced daily to help manage pain in the feet through stretching and strengthening. It includes other areas of the body that can contribute to foot pain. Before starting out with the actual poses, it can be incredibly beneficial to practice joint freeing exercises in advance to both warm up the body and pay attention to the joints which can be a source of foot pain.
Joint Freeing Exercises for the Feet
Joint freeing exercises help increase mobility in the joints. These are simple exercises that can be practiced before the more traditional yoga poses. They can also be practiced throughout the day. Doing these exercises while you are working behind a desk, lying in bed, or watching television can have a profound impact on your body and managing pain. To help keep the body balance, there are several movements that are not centered around the feet but will help for a well-balanced practice.
Toe Stretches

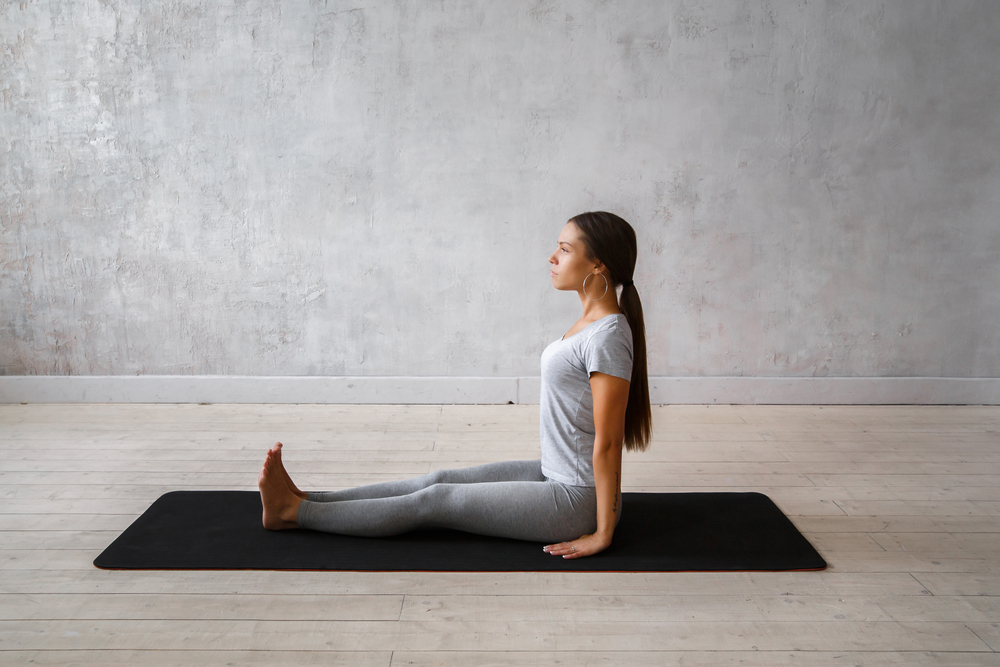
In Staff Pose (Dandasana), keep the legs stretched out with the back of the heels on the ground and wave the toes by widening them away from each other. Gently and smoothly bring one toe away from you and then the next on each foot simultaneously, starting with the big toes down to the small toes and then reverse the movement from the small toes to the large toes. In other words, curl the toes in sequence. Do several rounds of this to bring mobility to the toe joints.
Ankle Stretches
Again, start in Staff Pose (Dandasana). Point both feet forward as you exhale, and as you inhale flex the feet towards you. The back of the legs should remain on the ground. This helps stretch the ankles and the calves which can contribute to pain in the feet if the muscles are tight. Practice for 20 breaths.
Ankle Circles
Ankle circles are exactly as they sound. From Dandasana, circle both ankles to the right for approximately thirty seconds and then towards the right for thirty seconds. As you practice, pay attention to the range of motion, trying to make the circles larger as you continue the rotations.
Knee Bends
From Staff Pose, bend the right knee towards the torso. Interlace the hands underneath the right thigh as you lift your foot off the ground. Extend and bend the right leg, inhaling as the foot lifts up and exhale as the foot releases down. Practice for ten breaths on the right side before repeating on the left side.
Child’s Pose Circles
Move into Child’s Pose (Balasana). Press the palms into the ground as your hips shift towards the left. Left the hips up into a table position. It is okay if your shoulders overextend the wrists. Then, sink towards the right and then back into Balasana, creating a circular motion. Complete ten circles rotating towards the left and then switch the rotation for another ten rounds to the right.
Shoulder Rolls
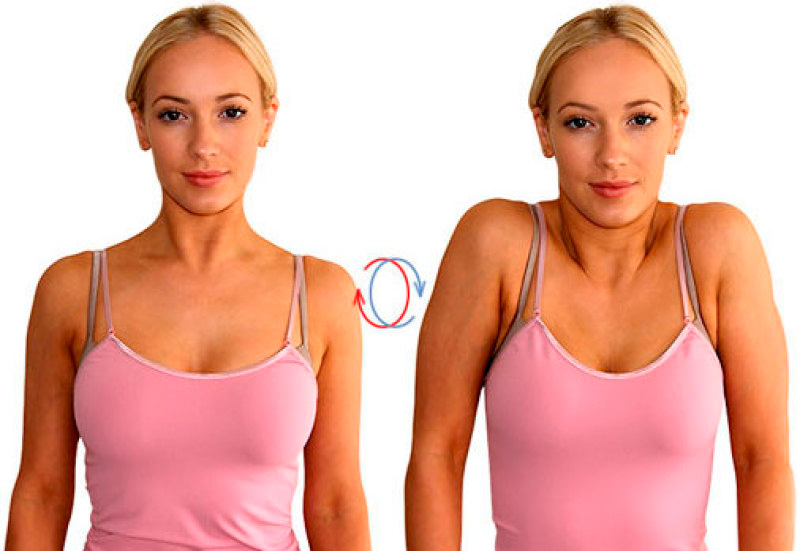
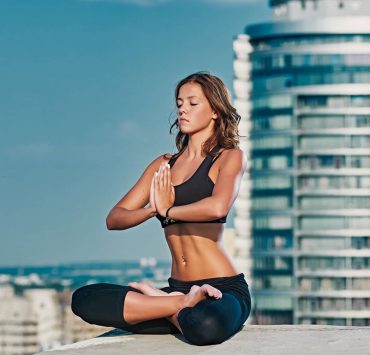
Start in Easy Seated Pose (Sukhasana). The arms can dangle along the side of the body with the palms facing you. Lift the shoulders up and start making small circles forward. Gradually let the circles get bigger with each roll and practice for about thirty seconds. For the next round, roll the circles backward. Again, starting with small circles as you move towards larger circles.
Neck Rolls
Staying in Sukhasana, sit up tall. Release the chin down towards the chest. Let the left ear move towards the left shoulder. Release the chin back to the center. Then bring the right ear towards the right shoulder. You can move side to side with the neck rolls. If it feels comfortable in the neck, you can incorporate full neck rolls releasing the head all the way back. Practice for 30 seconds.
10 Yoga Poses and Stretches for the Feet
After completion of the joint freeing exercises, you’ll be ready to practice a simple sequence for your feet. This sequence should take anywhere between eight to ten minutes but you can also practice for longer periods of time by extending how long you practice each pose.
Tadasana – Mountain Pose
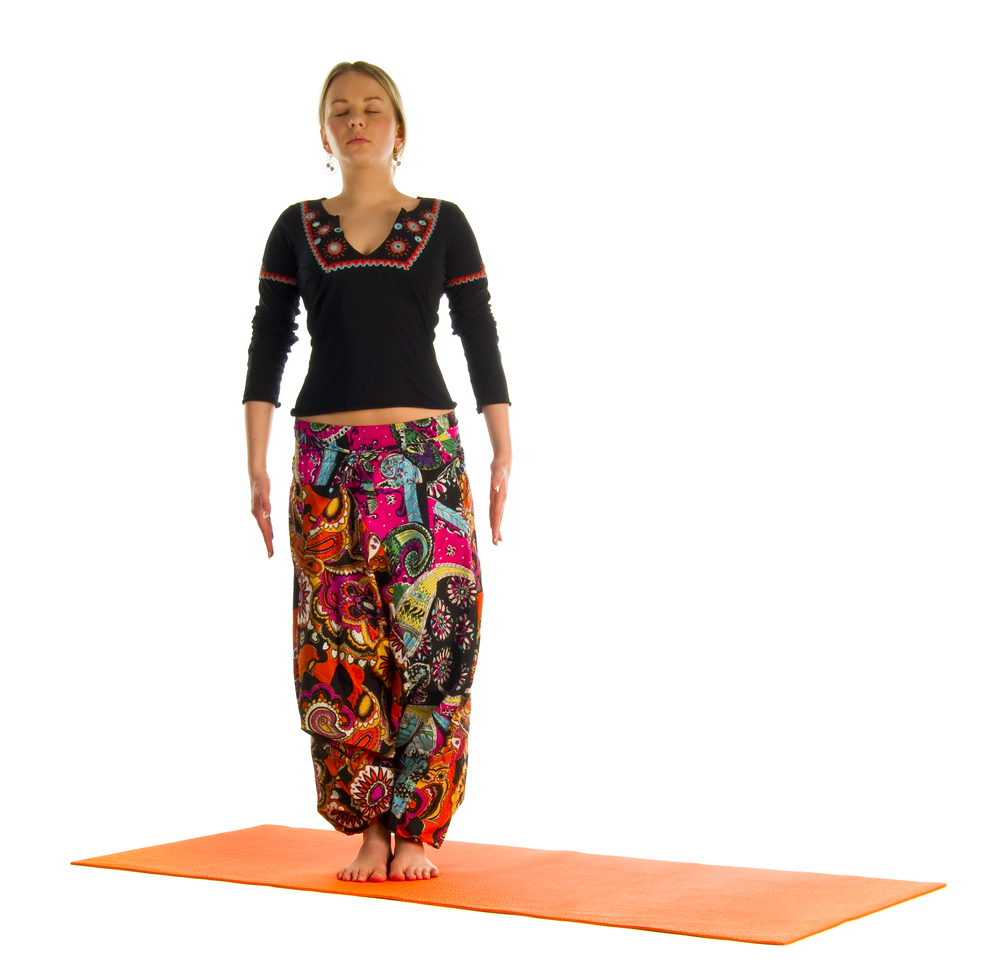
Mountain pose (Tadasana) is the foundational posture for all of the standing postures in yoga. This posture helps improve posture, strengthen the thighs and ankles, support the knee joints while toning the abdomen and the glutes. It also helps the practitioner strengthen and bring awareness to the feet.
To practice:
- Start in a standing position.
- Bring your feet together. If you need more space for the body or balance, separate the feet a few inches away from each other
- Bring the arms along the side body while rotating the palms forward.
- Press down evenly into all four corners of the feet.
- Engage the leg muscles so there is an upward lift, lifting pressure off of the knees.
- Let the tailbone down while the crown of the head simultaneously lifts upward.
- Bring the navel in towards the spine while lifting the ribcage
- The shoulders relax away from the ears.
- Keep the chin parallel to the floor.
- Release any tension in the jaw and forehead.
Hold Mountain Pose for approximately one minute. Stay present to how you are holding the body, with careful attention to the feet.
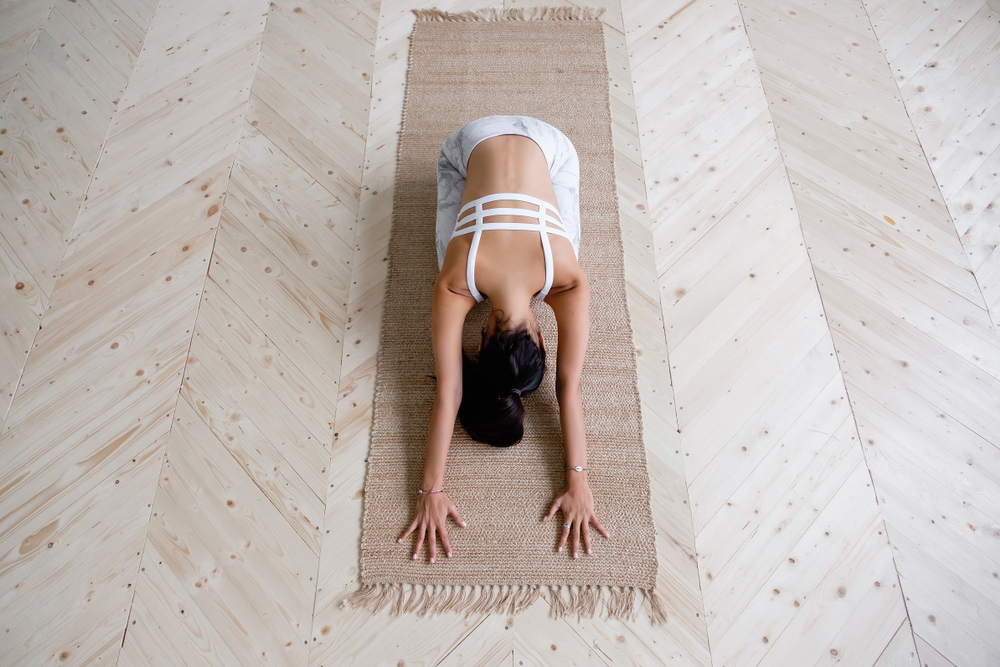
Adho Mukha SvanasanA – Downward Dog
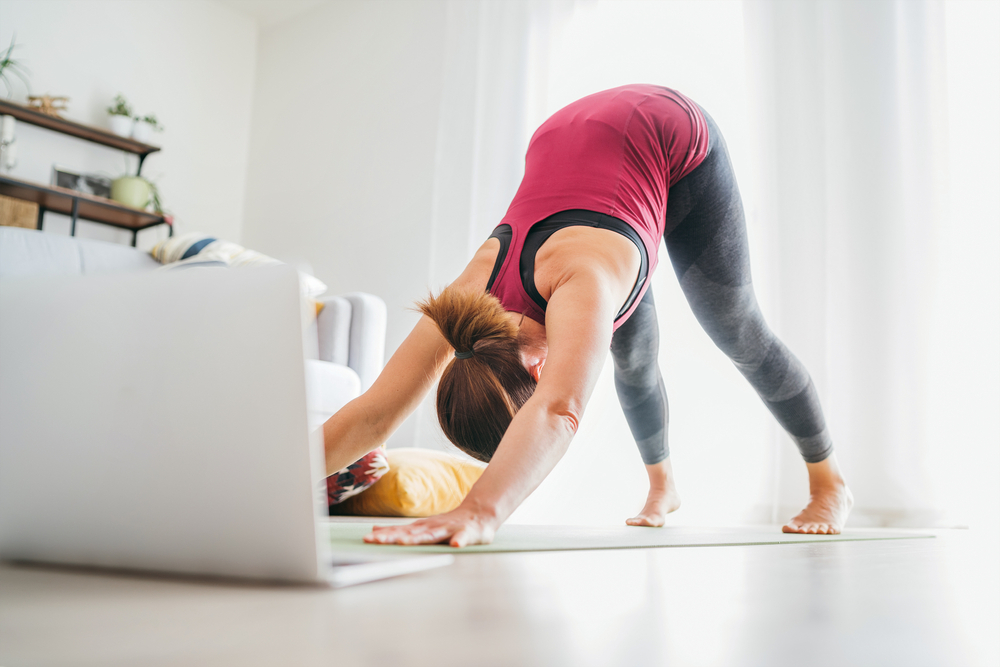
Downward Facing Dog (Adho Muka Svanasana) helps stretch the arches of the feet and the calves. The pumping of the legs can help increase blood flood while getting a deeper stretch in the feet. Practice slowly bringing attention to how the muscles are engaged.
To practice:
- Start in Table Top (Bharmanasana) on the hands and knees.
- Walk the hands two to three handprints forward.
- Spread the fingers wide and keep the hands shoulder-distance apart.
- Step the feet towards the back of your mat. The feet are hip-width apart.
- Lift the hips up while straightening the legs.
- Press the hands into the floor while pressing the hips back, creating a lengthening in the spine.
- Relax the head.
- If you do not feel a stretch in the back of the legs, walk the feet back further for a longer Adho Mukha Svanasana.
- As you inhale lift the heels higher and as you exhale lower the heel.
Practice for 10 to 15 breaths.
Tree Pose – Vrikshasana
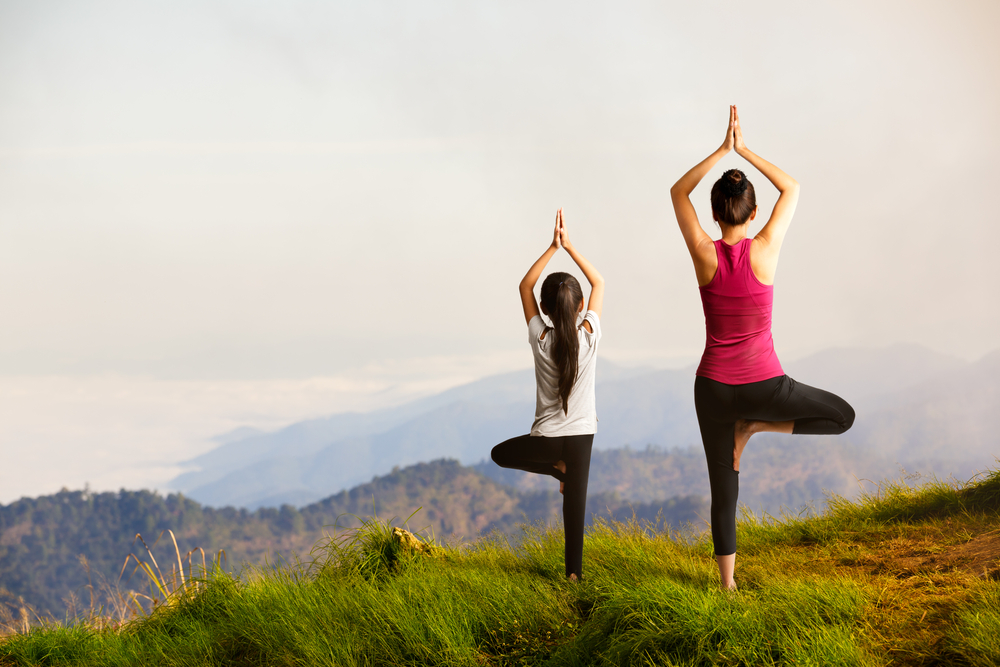
Tree pose (Vrikshasana) is a balancing pose that will help strengthen the legs and abdominals, open the hips, while stretching the inner thighs and groin area. While this posture is a hip opener, the stability of the foot against the floor will help strengthen the foot. As you practice, bring your attention to the foot as well as the stabilization of the supporting leg.
To practice:
- Start in mountain pose with the hands on the hips.
- Gradually externally rotate the right foot so both the knee and the toes point to the right.(If you notice the hips come out of alignment, reduce the rotation of the leg.)
- Ensure your left foot is fully making contact with the floor while lifting through the right leg.
- Find a focal point to keep your gaze on to assist with balance.
- Place the right foot on the inside of the right leg, avoiding placing pressure on the knees.
- Hands can stay on the hips, prayer, or extend up towards the sky.
Hold the posture for five to ten breaths before repeating on the left-hand side.
Malasana – Yoga Squat
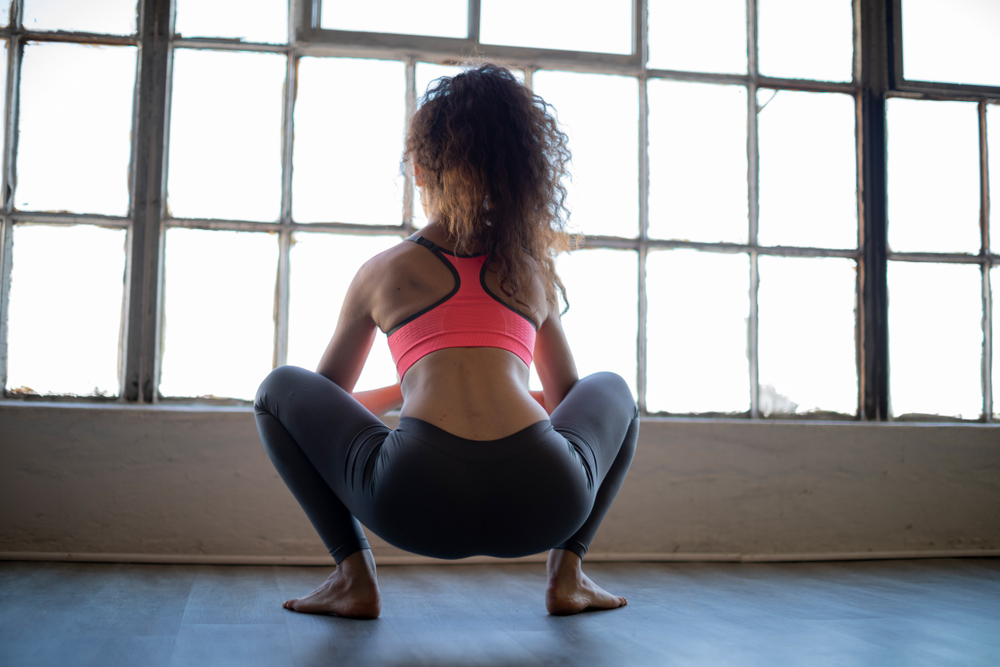
In addition to strengthening the feet, this posture will also help stretch the ankles. One thing to be mindful of is to keep your heels pressed to the ground. If this is not possible use a yoga wedge, or a rolled-up yoga meet underneath the heels
To practice:
- From Tadasana, separate the feet slightly wider than hip-distance apart.
- The toes can either face forward or towards the corners of the mat.
- Bend the knees, the knees should be facing the same direction as the toes.
- Lower the glutes downwards a few inches above the floor. If this is challenging you can place blocks underneath you and sit on top of the blocks.
- Let the tailbone tuck while keeping the spine neutral.
- All four corners of the feet should remain pressed into the floor.
- Bring the hands and prayer.
Hold for ten to 15 breaths.
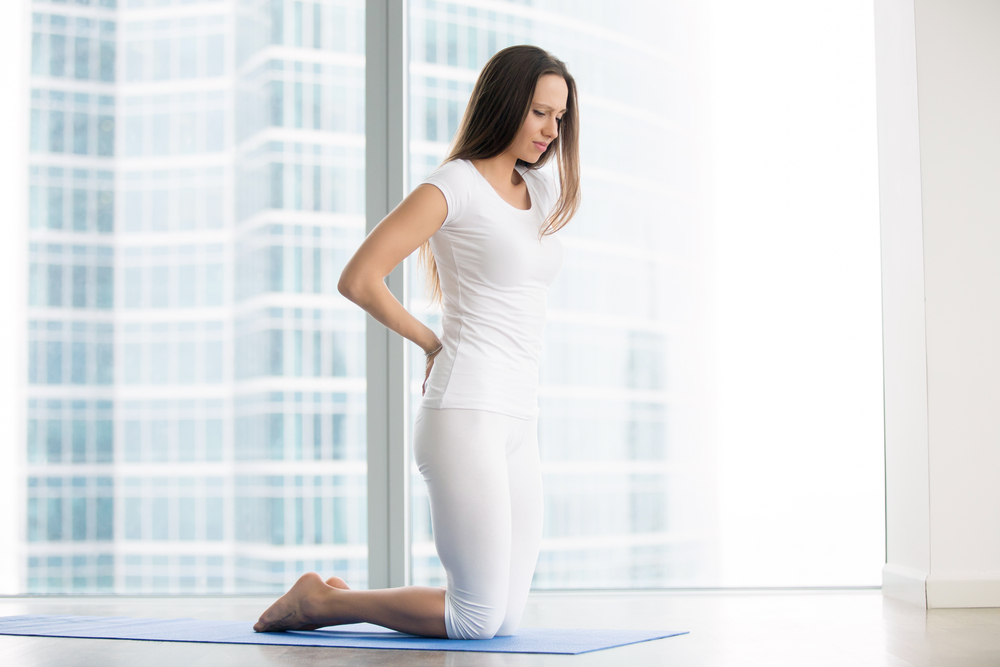
Toe Squat
This mega stretch helps open the toes and feet while stretching the ankles. You may likely find this is incredibly challenging at first but you can build up your strength over time.
To practice:
- Start in a kneeling position with the knees together or a few inches apart.
- Curl the toes so just the toes are touching the ground (not the feet). The toenails should be facing the sky.
- Lean back and sit on your heels.
- Keep the spine long and stack the shoulders above the hips.
Practice as long as you are able to.
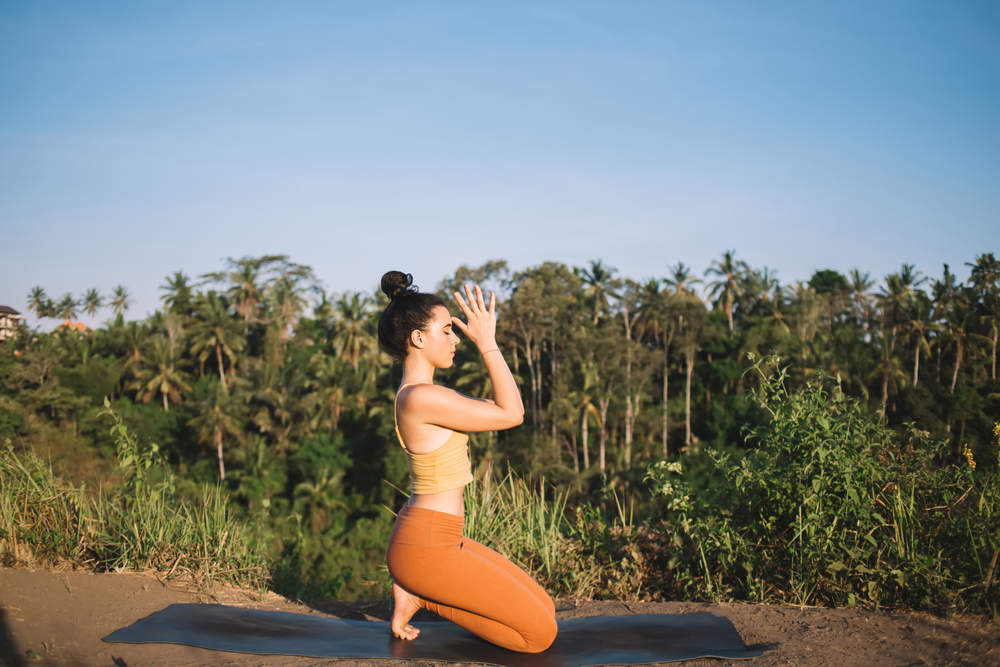
Virasana — Hero Pose
Hero’s Pose helps stretch the thighs, knees, and ankles while strengthening the arches in the feet.
To practice:
- Start by kneeling on the floor with the knees together. If this does not feel good on the knees, place a blanket underneath them for support.
- Bring the knees a little wider than hip-distance apart so there is enough space for your body to sit
- Sit down between the feet. If this hurts or the glutes cannot reach the floor, place a yoga block or bolster between the calves to sit on.
- Stretch the spine so the tailbone is lowering towards the ground while the crown of the head is lifting up.
Hold Virasana for eight to ten breaths.
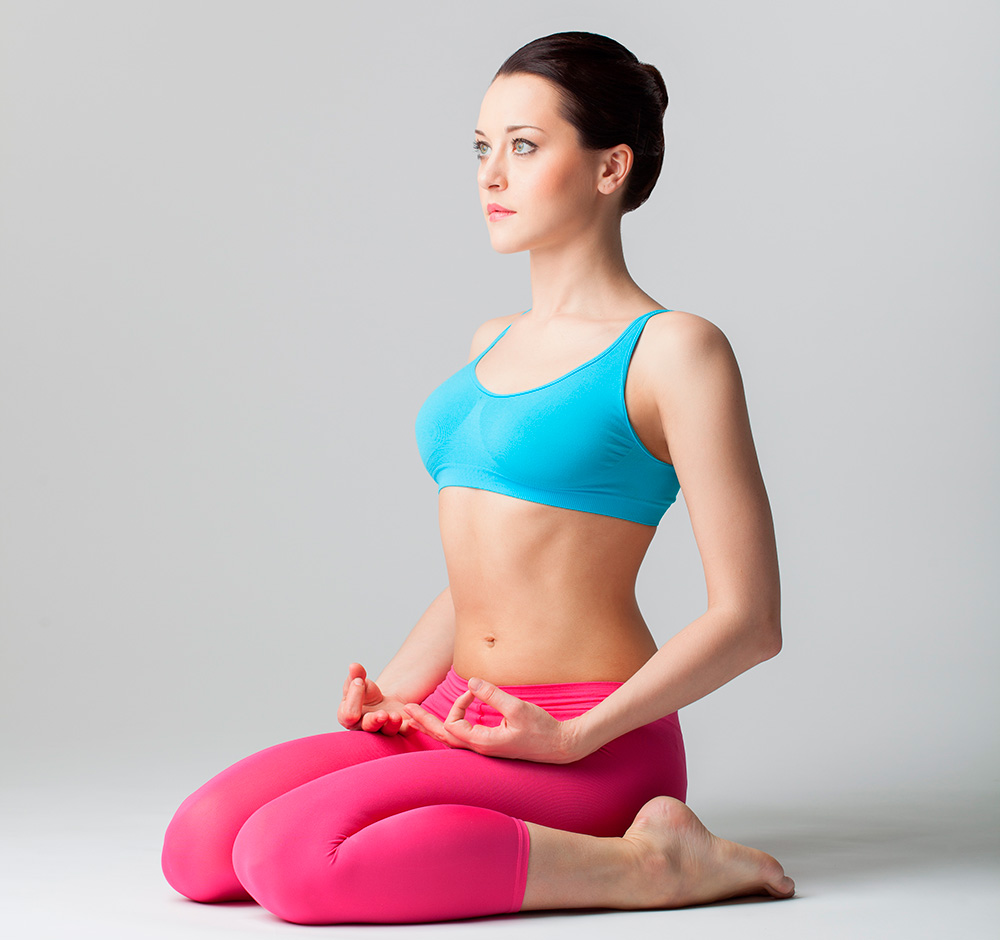
Bound Angle
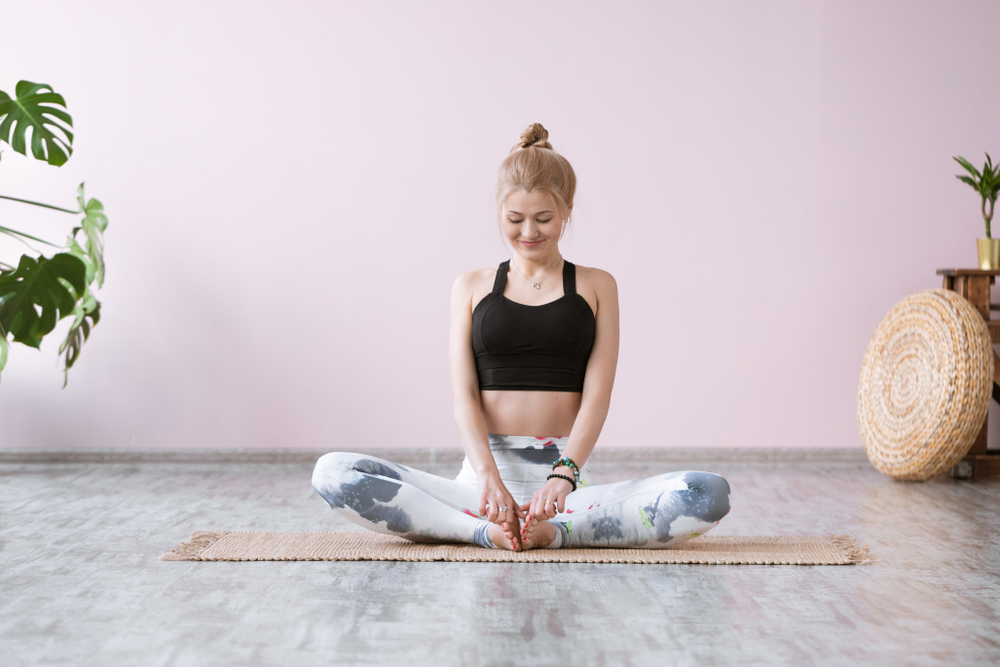
While this posture primarily opens up the hip and groin area, it is an excellent opportunity to actively engage in self-care and massage the feet.
To practice:
- Starting in Easy Seated Pose (Sukhasana) bring the soles of the feet together and bring the heels towards the groin area.
- Externally rotate the legs so the outside of the right knee is releasing downward towards the right-hand side of the floor and the left knee to the left side.
- Ensure the pelvis again so it’s neutral.
- Press down into the sits bones while lifting the crown of the head upward.
- Massage the feet gently while maintaining the alignment of the posture.
Practice this posture for ten to 15 breaths.
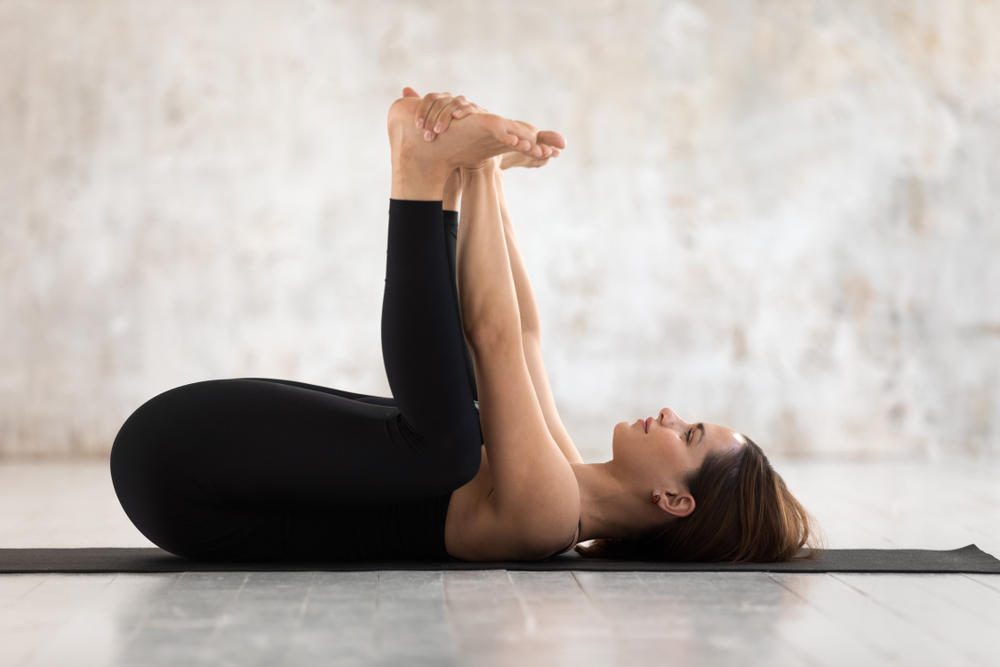
Supta Padangusthasana – Reclined Hand to Big Toe Pose
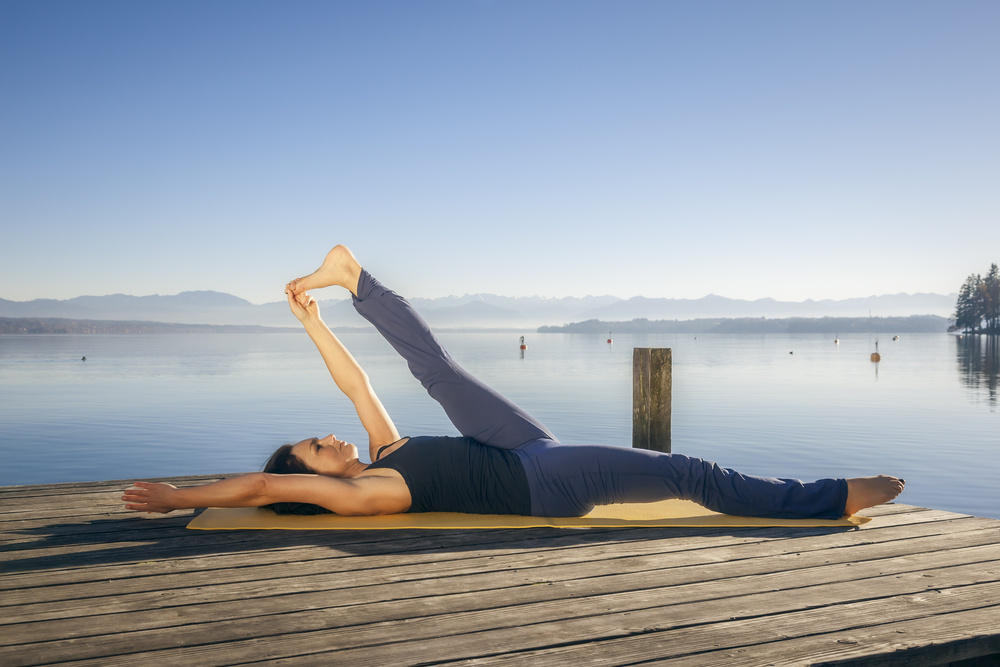
Reclined Hand to Big Toe Pose is therapeutic for flat feet. It also stretches many areas of the legs commonly associated with feet pain while decreasing swelling in the feet.
To practice:
- Lie on your back and extend the right leg towards the sky.
- Loop a strap around the arch of the foot.
- Keep the leg extended while trying to bring the thigh closer to your chest.
- Keep the entire back side of your bred pressed against the floor besides the right leg.
Hold for ten breaths before repeating on the opposite side.
Viparita Karani – Legs Up the Wall
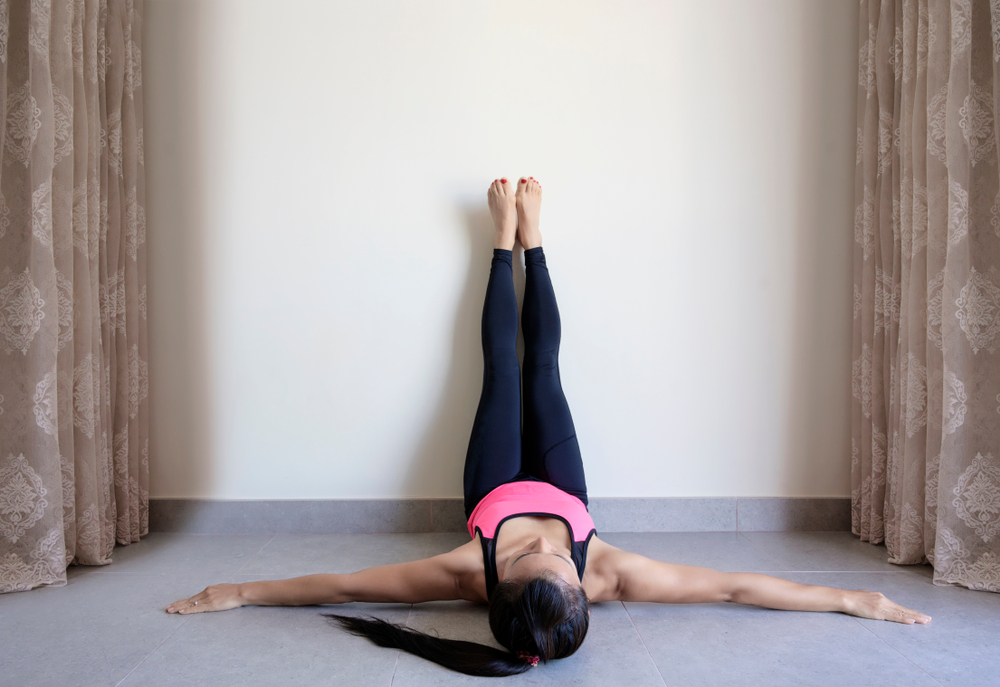
Legs Up the Wall helps reduce swelling in the feet, reduce leg and foot cramps, and improves circulation while gently stretching the hamstrings
To practice:
- Start near a wall and sit on the floor so your side body is against the wall.
- Bring your legs up the wall as you shift your back towards the floor.
- Let the feet gently flex.
- Keep the back of the legs and glutes against the wall. If this is not possible, get as close as you can.
- Allow the arms to rest wherever they are comfortable.
Focus on the breath and hold for 15 breaths or longer.
Savasana – Corpse Pose
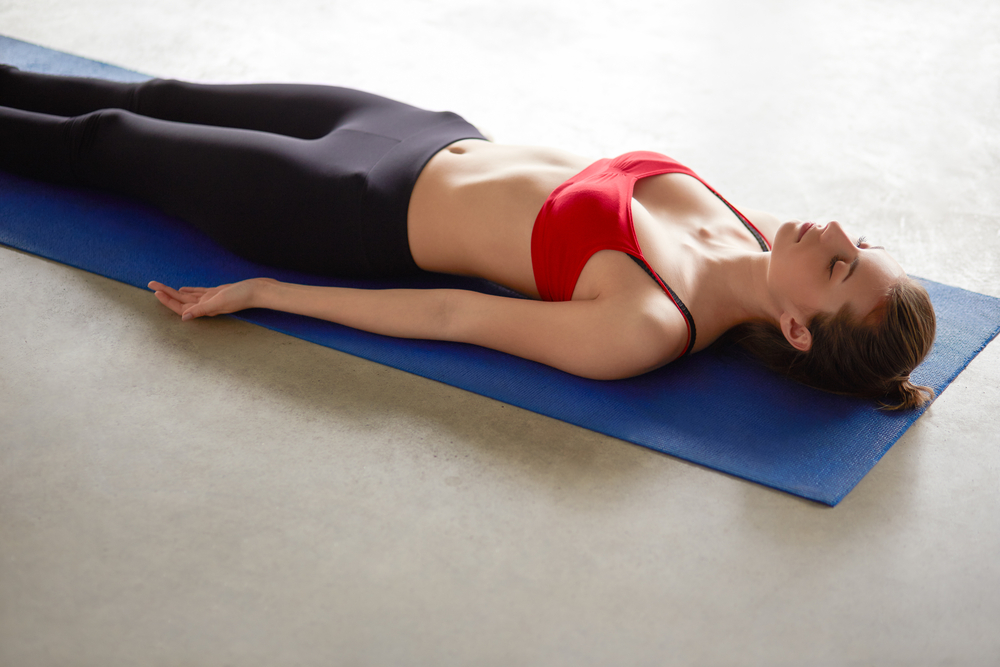
One way of handling chronic pain is practicing being with the pain versus letting the pain control the mind, body, and thoughts.
To practice:
- Lie down on your back.
- Extend your legs and let the feet release outward.
- Release the arms to the side of the body with the palms facing up.
For additional support, you can place a pillow or bolster underneath the knees or cover up with a blanket if you are cold. Take any modifications necessary so you feel comfortable and at ease.
By incorporating this simple practice or even just some of the postures into your daily routine, you can help manage pain while stretching and strengthening the feet and related areas that cause pain.