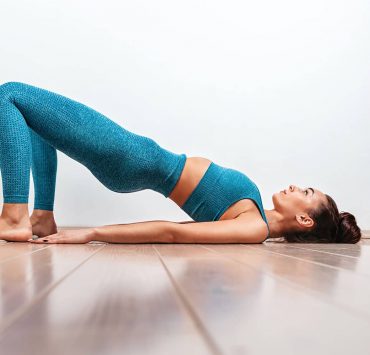
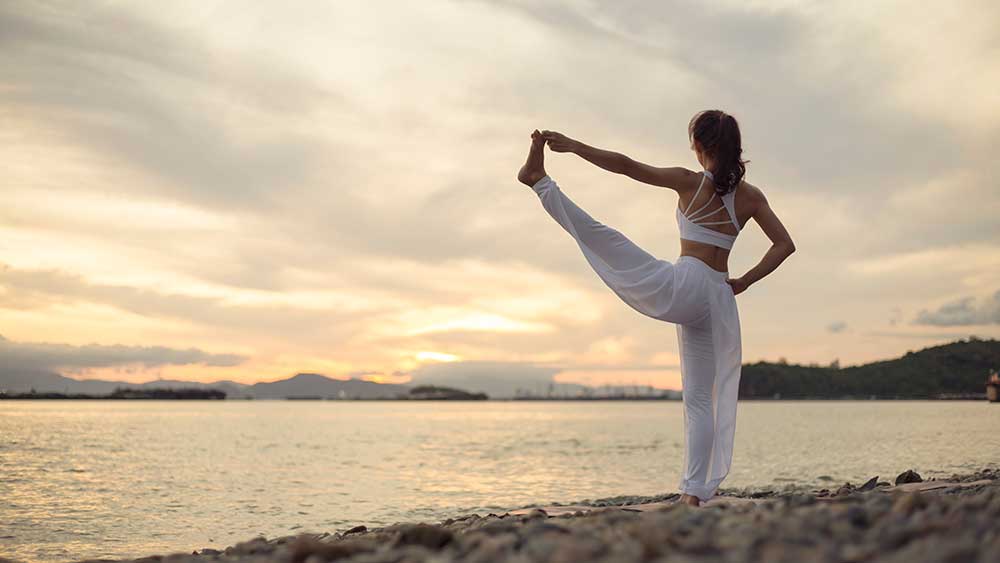
Yoga is known to have many benefits: reduced stress, increased flexibility, greater strength, better balance, and a deeper connection between the body, mind, and the world around us. Standing yoga postures can help increase our strength when the muscles are properly activated.
Tadasana — Mountain Pose
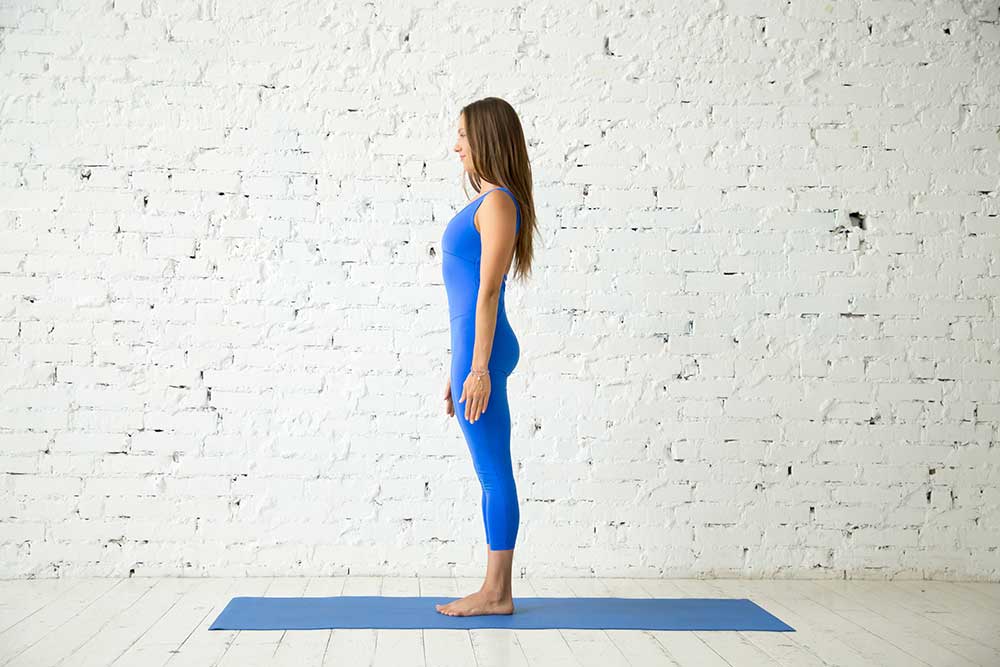
Mountain pose or Tadasana is the foundational posture for all of the standing postures in yoga. Without understanding how to support the body in this posture, it is difficult to master any standing asana. This simple yet effective posture helps improve posture, strengthen the thighs and ankles, support the knee joints while toning the abdomen and the glutes. While it may look like practitioners are just standing up, there is a lot more involved in the posture to build strength and tone the body.
To practice mountain pose, complete the following steps:
- Start with your feet together. Bring your hands to the side of the body while rotating the palms forward.
- Press down evenly into all sides of the feet.
- Engage the legs so there is an upward lift, it may feel like pressure is being lifted off of the knees.
- Allow the tailbone to release downward.
- Bring the navel in towards the spine.
- Imagine getting a few inches taller, lifting the spine upward.
- Release the shoulders away from the ears.
- Keep the chin parallel to the floor.
- Release any tension in the face.
- Lift the crown of the head upwards towards the sky.
Hold mountain pose for five to ten breaths.
While there are not many contraindications for mountain pose, be careful if you have a headache or low blood pressure. There are also a few modifications if you practice the posture and it doesn’t feel right in the body.
Feet Apart: If your balance is challenged or you need more space for your body, step the feet out wider up to hip distance apart. The same principles will apply for the rest of the steps.
Chair Mountain Pose: If energy is low, balance is challenging, or traditional standing postures are not available, Tadasana can also be practiced in a chair. The same movements will apply just make sure to keep your back away from the chair, the glutes evenly pressing down into the chair, and remember to still tuck the tailbone.
Utkatasana – Chair Pose
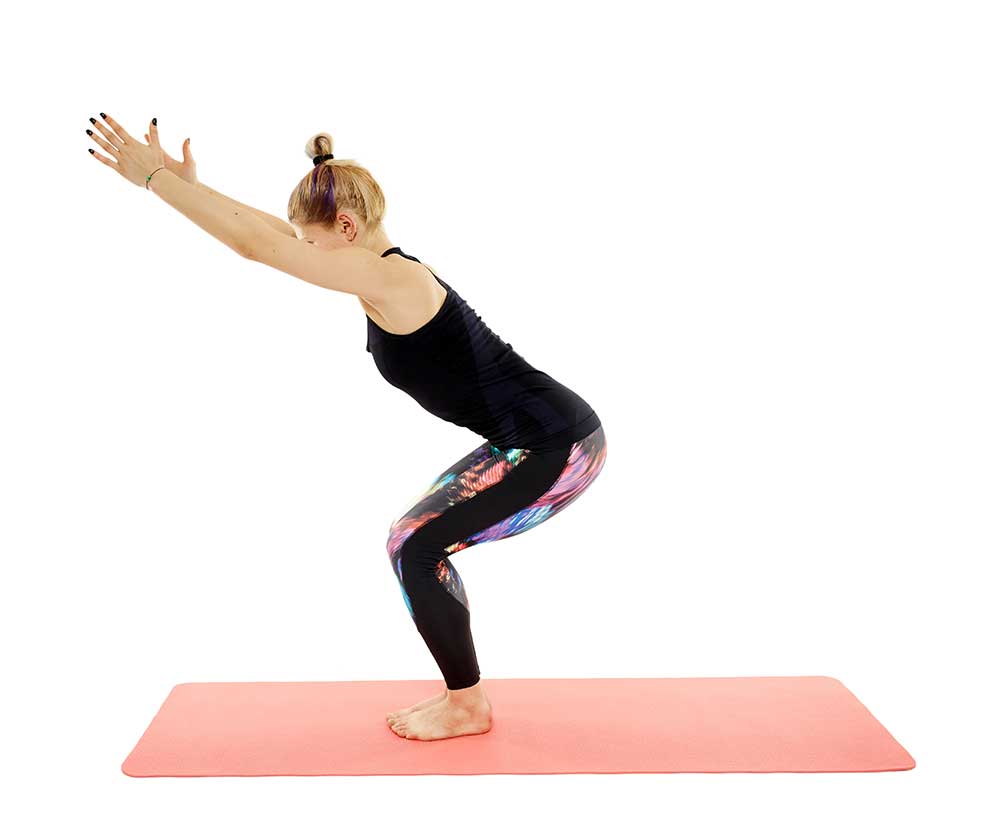
Chair pose or Utkatasana is a challenging pose that can easily be adapted to different abilities based on how long the pose is held or how low it is practiced. Utkatasana helps strengthen the thighs, back, ankles, and arms.
To practice chair pose, complete the following steps:
- Start in mountain pose and raise the arms overhead so the palms are facing each other.
- On your exhale bend the knees as you release the hips back.
- Place a little more weight in the heels.
- Engage the legs, even though the knees are bent there should be an upward life through the legs while the feet remain grounded.
Hold for five to ten breaths.
Contraindications include any issues with the knee joints. If you find Ukatasana too challenging or uncomfortable, try the various modifications below.
Practice against a wall: Using the support of a wall behind you can help with balance as well as holding the pose a little longer as you build up strength. To practice, start with your back against the wall with your feet approximately one foot awry from the wall and slide down into the posture. The wall can be used as a support behind the glutes.
Use a block: If you’re having difficulty activating of the leg muscles, place a block in between the things and gently squeeze to activate the legs.
Feet Wider: If balancing in chair pose feels too challenging or you need more space for the body, you can also practice this with the feet out wider.
Virabhadrasana I – Warrior I Pose
The Warrior poses have strength inferred in their names. Warrior I, also known as Virabhadrasana I, helps strengthen the legs, shoulders, and arms while stretching the chest, hips, and shoulders.
To practice Virabhadrasana I:
- Start in Mountain pose but take the feet out hip-distance apart.
- Step the right foot back, angle the foot 45 degrees, and ensure the entire sole of the foot is pressed into the mat. The foot should not line up with the left foot. Imagine there is a line down the center of your mat and your feet are on separate sides of that line.
- Bend the left knee.
- Adjust the length of the stance if needed. Aim for a 90-degree angle with the front leg. It may not be possible but the stance should be long.
- Lift the arms above the head so the palms are parallel while the shoulders are releasing downward.
- Apply the same principles from mountain pose to Warrior I, root down into the feet, lift through the legs while bringing the navel in.
- Adjust the hips so they are in line with each other. The back leg will have a tendency to result in an externally rotated hip. If you notice this, take a shorter stance.
Hold for 10 breaths and repeat on the opposite side.
Contraindications include issues with the knees. This is a strong pose and can also assist with balance. Here are some modifications to consider while practicing.
Make it flow: If holding the posture for more than a few breaths is challenging, bring some movement into the pose. As you inhale to straighten the front leg, as you exhale bend the knee. Try this flow for a few breaths before holding the posture.
Widen the stance: If balancing feels challenging, take the feet out wider towards the long sides of the mat. This will help increase your center of balance and can make it easier to keep the hips in line with one another.
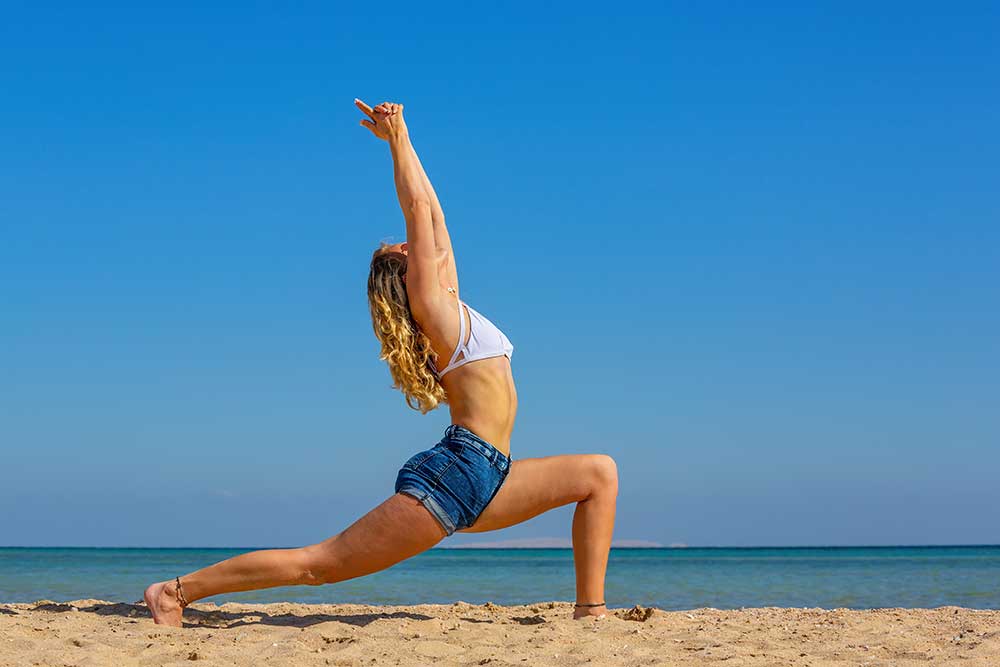
Ashta Chandrasana — Crescent High Lunge Pose
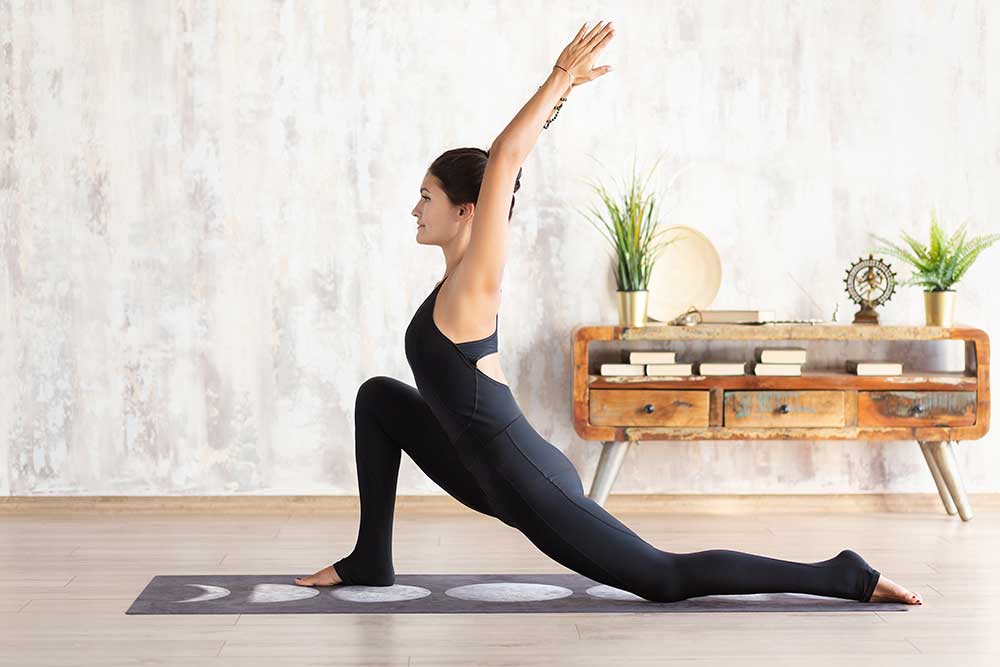
Crescent lunge builds strength in the thighs, hips, and glutes while stretching the legs and hips. Additionally, it opens up the chest and shoulders. While it may not appear to be a balancing posture, holding the posture while keeping the back heel lifted requires a significant degree of steadiness and concentration.
To practice crescent lunge:
- From mountain pose, step the left foot forward.
- Extend the right leg back, press the ball of the foot into the floor with the heel lifted. The toes should be facing forward with no angling of the ankle.
- While pressing down into the feet engage the legs and lift upwards.
- Ensure the hip points are rotated forward, especially on the corresponding hip to the back leg.
- Inhale and bring the hands upwards as if an upward salute.
- Draw the tailbone downwards while extending through the crown of the head.
Hold for five to ten breaths before repeating on the opposite side.
Contraindications include those who experience high blood pressure or heart problems. This is a challenging posture that requires strength and balance. The following modifications can make the posture more accessible while still working on building muscle and focus.
Practice in a chair: There are two ways to practice with a chair, you can either stand behind the chair and place your hands on the back of the chair for support. The second way is to sit in the chair. Rotate the legs so you are facing towards the right side while sitting towards the front of the chair. Extend the left leg as far back as you can, press the toes into the mat while lifting the heel. Proceed with the rest of the steps in posture.
Lower the knee: If It is too challenging to practice standing, you can always lower the back knee onto the floor. If you need extra padding, you can place a blanket underneath the knees.
Heel on the wall: For more balance but serious strength, practice with your back facing the wall. When you lift the heel on the back foot, place the heel against the wall for balance. Proceed with the additional steps in the posture.
Virabhadrasana II – Warrior II Pose
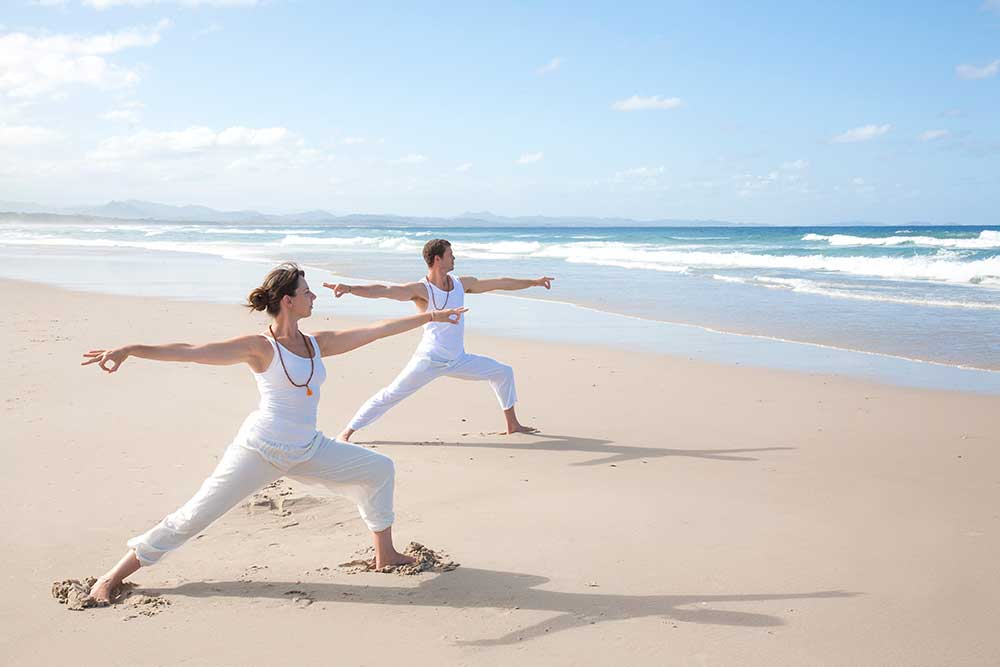
Like its Warrior I counterpart, Virabhadrasana II is a classical standing posture that builds strength in the legs while opening up the hips.
To practice, follow these steps:
- Star in Tadasana facing the long side of your mat. Bring your arms out to the side in a T-shape with the palms facing down.
- Step the feet out as wide as the wrists with the toes facing forward.
- Rotate the right toes towards the short side of the mat and bend the right knee. The left knee remains extended.
- Extend through the fingertips while lifting up through the top of the head.
- Externally rotate the legs so the right knee is over the third big toe.
Hold for ten breaths, rotate back to the long side of the mat, and repeat on the left side.
Contraindications for Warrior 2 include joint issues in the knee, hips, or shoulders, as well as high blood pressure, heart complications, or upset stomach. Modifications for Warrior 2 include:
Take a shorter stance: If holding Warrior 2 is too challenging take bring the feet closer together.
Practice on a chair: Ideal for joint or energy issues, practicing Warrior 2 in a chair can make the practice more accessible. Sit on a chair towards the front and take the feet out as wide as you’re able to. Rotate the right foot towards the right while extending the left leg out with the toes facing forward. Continue with the remaining instructions for Warrior 2.
Utthita-Parsvakonasana — Extended Side Angle Pose
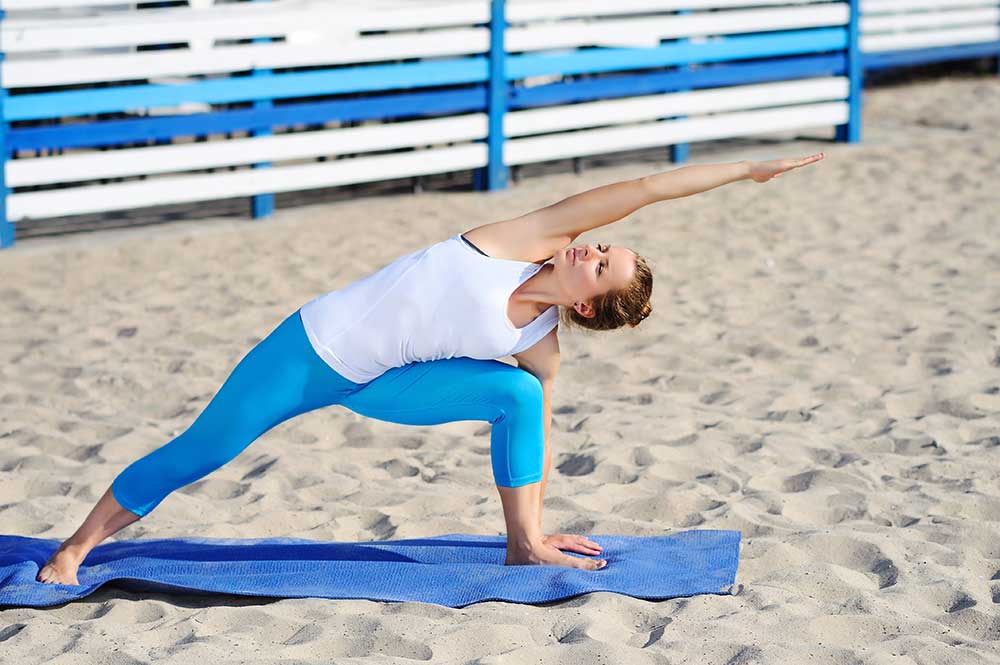
Extended Side Angle or Parsvakonasana builds strength in the legs while opening the chest. It also a grounding yet energizing pose.
To practice:
- Start in Warrior 2 on the right-hand side.
- Band in the side body towards the right, placing your right elbow on the right thigh without collapsing in the side body
- Extend the left arm over the left ear.
- Stay rooted in the feet and avoid rolling in on the inside of the left foot.
- Rotate the chest so it is facing forward.
Hold for five to ten breaths before repeating on the opposite side.
Contraindications include those who have headaches or migraines or high blood pressure. To modify this posture, try the following:
- Hands on the hip: If you have high blood pressure or mobility issues in the shoulders, you can place the top arm on your hip.
- Practice in a chair: This can also be performed in a chair. Simply come into a Warrior 2 on a chair and then adjust the upper body for extended side angle.
Virabhadrasana III – Warrior III Pose
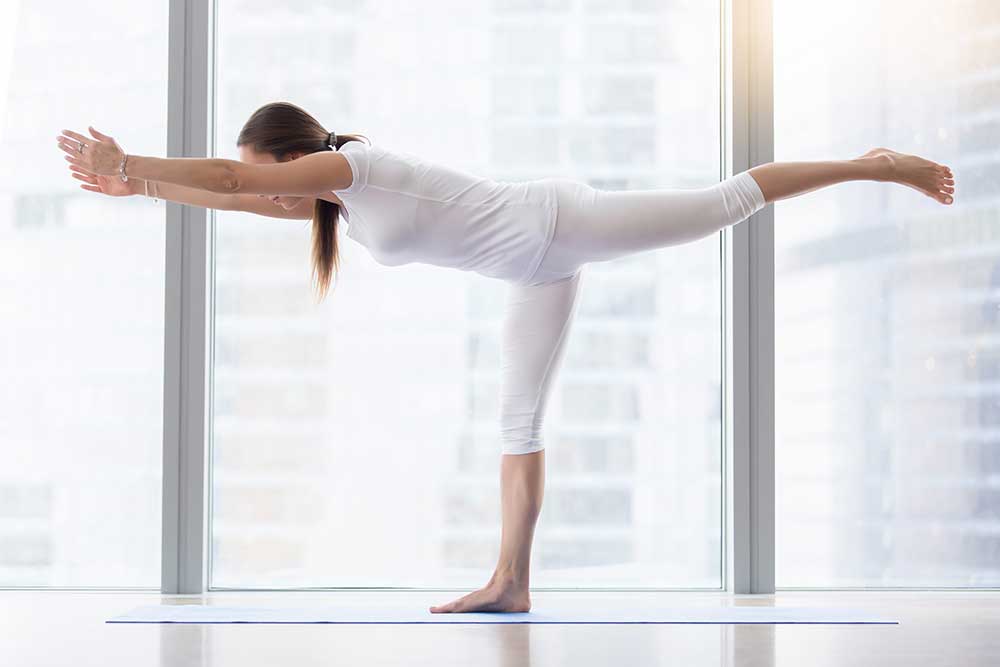
Warrior 3 combines poise and strength for this balancing yet strength-building posture. Also known as Virabhadrasana III, this posture strengthens the legs, glutes, core, and shoulders while stretching the thighs.
To practice:
- Start in Crescent Lunge with the right foot back, a shorter stance may be more helpful.
- Place more weight on the left foot.
- Begin to hinge forward at the waist aiming for a 90-degree angle with the torso.
- As you hinge forward begin to lift the back leg.
- Once the leg is lifted either 90 degrees or as high as you can extend through the fingertips and back heel outward.
Hold Warrior 3 for five breaths before repeating on the opposite side.
Contraindications for Warrior 3 included lower back issues and vertigo. While it is a challenging posture, there is a modification that can help with balance while still building serious strength.
Against a wall: Warrior 3 can be practiced against a wall. Start by facing the wall, approximately one leg’s length away from the wall. Fold forward at the waist 90 degrees and press the hands into the wall. Proceed with Warrior 3 using the steps above. Once the leg is lifted press away from the wall while keeping the hands firmly rooted on the wall.
Utthita Hasta Padangusthanasana — Standing Hand to Big Toe Pose
Hand-to-Big-Toe also known as Utthita Hasta Padangustasana requires balance, strength, flexibility, and concentration. It helps strengthen the legs, back, and ankles while stretching the hamstrings and shoulders.
To practice:
- Start in Mountain Pose and place a little more weight in the left leg.
- Keeping your gaze on a focal point, bring the right need towards the chest.
- Wrap your index and middle finger around the inside of the big toe.
- Extended the leg forward, while maintaining the principles of Tadasana.
Hold for five to ten breaths before repeating on the opposite leg.
Contraindications for Utthita Hasta Padangustasana include issues with the ankles, feet, and lower back. Here are some modifications to make the posture more accessible.
Use a strap: If reaching for your foot is too challenging, utilizing a strap can help focus on the balance and strengthening aspect of the pose. Simply place a strap around the arch of the foot and hold the strap in the same hand as the lifted leg.
Use a chair: If you are working on the flexibility and alignment, practicing in a chair helps focus on other aspects of the pose besides balance. Sit in a chair but follow the same muscle engagement and posturing as indicated above.
Ardha Chandrasana — Half Moon Pose
Half Moon or Ardha Chandrasana is a challenging balancing asana that strengthens the thighs, calves, and ankles while opening the hips and improving balance.
To practice:
- Start in Triangle Pose, the legs do not need to be very wide, with the right toes rotated to the side.
- Take a side bend in the waist and begin to lower the right hand towards the floor. As you reach and move the upper body, the right hand should be able to stack underneath the right shoulder once it is placed.
- Left the left leg with the foot gently flexed, creating a T shape with the body.
- Take the left arm up towards the sky.
- The backside of the body should be inline and try to rotate the crest of the left hip towards the sky.
Practice for five breaths before repeating on the opposite side.
Contraindications for Ardha Chandrasana include low blood pressure and headaches or migraines. If you see spots or feel nauseous, skip out on this practice. Half Moon requires flexibility and balance and the following modifications can be used.
Use a support for the hand: Placing the hand on any sort of prop that will decrease the distance to the floor can be helpful. By placing the hand on a block or chair, the floor is essentially lifted up making balancing a little easier.
Use a wall: By practicing with your backside against a wall, it helps decrease some of the balancing aspects of the posture so you can focus on working on strength and flexibility.
Urdhva Prasarita Eka Padasana — Standing Splits Pose
While Standing Splits or Urdhva Prasarita Eka Padasana may sound and look challenging, it is less about getting the leg high as it is to stretch the legs while working on balance. In addition to stretching, this will work on building strength in the thighs, calves, and ankles while increasing stability in the knees.
To practice:
- Start in Mountain pose. Bring the arms above the head and begin the hinge forward at the waist.
- Allow the hands to come down to the floor or blocks.
- Place more weight on the left leg as you lift the right leg up behind you.
- Keep the hip points inline with each other. The right foot is gently flexed with the toe pointing downward.
Hold for five breaths before repeating on the opposite side.
Contraindications for any posture where the head dips below the hear include high or low blood pressure. Additionally, be careful if you have knee, ankle, or lower back issues. To modify this posture
Use a Wall: Practice near a wall. Instead of letting the lifted foot remain suspended in the air, you can place it on a wall to help with balance and alignment.
Conclusion
Yoga is often known for increasing flexibility and decreasing stress. It can also build up strength in the body by incorporating standing postures and holding them for longer periods of time.