The most common reason for not being able to stick to a regular yoga practice is simply not having enough time to go to a studio and stay in a class for 60 to 90 minutes — and that doesn’t include the time it takes to wait in line to shower and dry off before heading back home or back to work.
This sequence is beginner friendly and can be completed in 20 minutes or even less. You just need a space where you have enough room lay down and close your eyes. And if you can’t find a quiet spot, put on some meditative sounds in your music player and put on your headphones or earphones as you ease into each of the asana.
Sukhasana — Easy Seated (or variation) with Maha Yogi Pranayama

Start off your practice in a comfortable seated position on your mat. Use as many blocks or pillows as needed to prop up your knees if they feel tight. Or feel free to kneel instead if that is more comfortable, or even sit with the spine straight on a chair. The most important is to be comfortable with a gently engaged spine to hold your spine and neck straight with relaxed shoulders.
When you’ve settled in, begin lengthening your inhales and exhales. Try practicing Maha Yogi Pranayama, or Great Yogic Breath, by relaxing your stomach completely as you inhale. When the bottom chamber is full, fill your middle chamber with breath by pushing your ribcage outwards. When that is full, allow your chest to rise as you sip in more air.
Try holding your breath for a few counts at maximum inhale then exhale for twice the amount of time of your inhale, visualising each chamber being emptied of breath. Then at the end of the exhale, hold the breath for a few counts again before repeating the inhale-exhale cycle.
Continue this three-part breathing while seated comfortably for about three minutes before moving to the next asana.
Balasana — Child’s Pose

Transition into a relaxed Balasana, or Child’s Pose, by bringing your big toes together and separating your knees almost as wide as your mat. Keep your sit bones in contact with your heels even as you fold forward. Let your fingertips walk forward and visualize your chest and forehead melting towards the ground. If your sit bones start to lift off your heels, back off and set the proper foundation first. Trust that in time your hips will open up to allow you to go deeper into the pose when you are ready.
If needed, use blocks, blankets, or a bolster to rest your chest or forehead on comfortably while holding the pose for at least one minute.
Marjaryasana — Cat/Cow Pose

The next set of asana will introduce some gentle spinal movement, flowing in a wave with the breath.
Set up in all fours with your palms directly under your shoulders and your knees directly under your hips to create a box shape with your body. Keep your toes either tucked in or untucked depending on which is more comfortable for your body.
As you inhale, start the wave with your tailbone pointing upwards and feeling your spine curve downwards vertebrae by vertebrae. Visualize your heart being pulled towards the front of the room and your shoulder blades roll together. Look slightly upwards at the top of your inhale.
On the exhale, begin the wave with the tailbone again, this time pointing it downwards, and allowing the spine to create an arch. Feel as if your heart is being pulled upwards to the sky and lastly, relax your neck and let your head hang.
Continue these Cat-Cows for two minutes.
Adho Mukha Svanasana — Downward Facing Dog Pose (Vinyasa)

From the previous vinyasa set of Cat-Cows, on your next exhale, keep your palms where they are and lower your hips back down into Child’s pose. On your next inhale, rise back up to all fours with a neutral, straight spine. On your next exhale, push and raise your hips back and up into Downward Facing Dog.
Don’t hesitate to keep your knees bent and heels off the mat if you’re feeling tight. It’s more important to keep your tailbone pointing up to the ceiling with a straight back. Keep your fingers spread wide and pushing away from the mat to strengthen your arms.
When you inhale next, carefully shift your weight forward and lower your knees down to the ground into all fours. On the next exhale, lower back into Child’s pose and repeat the vomibyasa cycle for around 3 minutes.
Balasana (2nd child’s pose) or Virasana — Hero Pose

At this point, either rest in another Child’s pose or change it up with Virasana or Hero Pose. Set it up by kneeling and instead of bringing your big toes together and knees apart, bring your inner knees together and position your feet wider than your hips so you can sit between them. If this is too much for your hips and legs, place a block or folded blanket underneath your sit bones to adjust the height.
Make sure the tops of your feet are flat on the floor and relax your arms, keeping your palms either facing up or down on your thighs. This pose is great as an alternative to Sukhasana or Lotus for meditation and does wonders for tired legs. Close your eyes and breathe in this asana for at least one minute.
Salamba Bhujangasana — Sphinx or Seal Pose

Release the tension in your lower back and abdomen with this gentle backbend from the Yin Yoga school. Ulike a more active Yang practice, it is suggested in Yin yoga to only keep the muscles active that are required to keep the basic shape of the asana. All other muscles may be relaxed.
To get into Sphinx pose, lay on your stomach and prop yourself up on your forearms. Keep your elbows under your shoulders and hands either parallel or with palms together. Relax your buttocks, legs, and neck to let your head hang down. You may even let your shoulders relax.
If you are ready for a deeper backbend, transition to Seal Pose by straightening your arms and bringing your hands forward and wider than your shoulders at a distance comfortable for you. Keep your fingers spread out wide and be mindful of not locking out your elbows. Micro bend them, especially if you have hyperextended elbow joints.
Stay in either Sphinx or Seal Pose for at least three minutes, focusing on mindful and meditative breathing.
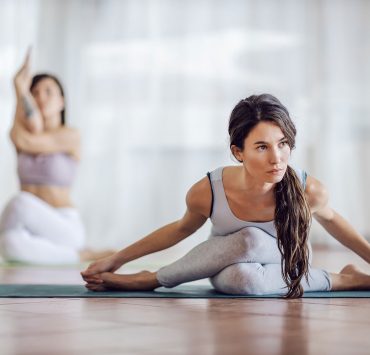
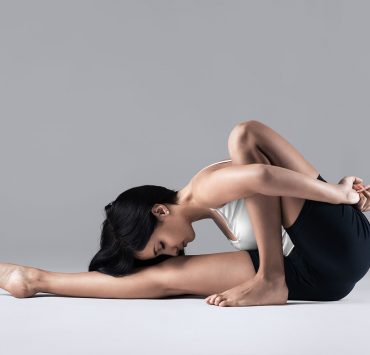
Apanasana — Knees to Chest Pose and Twist

Very carefully transition out of the previous pose and lay on your back. Tuck your tailbone in slightly to prevent too much strain on your sacrum. Bring your left knee towards your chest and hold it there without actively pulling or pushing it. After a few breaths, pull your left knee across your body towards the right and let the bent knee and leg touch the floor completely for a spinal twist. It is ok if your left shoulder lifts off the ground. Either look upwards towards the sky or towards the left if both shoulders are on the mat. Stay here for at least three minutes.
Release the twist by first coming back to laying flat and hugging your left knee towards your chest. Release the leg and switch to holding your right knee towards your chest. Do the same twist towards the left this time for another three minutes.
Savasana — Corpse Pose

Savasana, or Corpse Pose, is the most important asana in the entire library of yogic postures. You are not being a dead body in this pose, but actually, in complete relaxation, you are embodying being an empty vessel of infinite potential that is realized through yoga. It is in the stillness of Savasana that the benefits of all the previous yoga poses start to integrate into your body so allow yourself to lay down with eyes closed and let go of everything except being on your mat with feet slightly apart and palms facing up a few inches away from your body.
Stay here for a minimum of three minutes but ideally, stay even longer to get the true value of this final pose in the series.
Conclusion

Modern life makes finding time for self-care challenging. But if you can set aside just 20 minutes a day, these eight yogasana are enough to reap the benefits of yoga and have a pause in your day to meditate and focus on yourself and spend a few moments with your breath and body and allow all other thoughts to melt away. And no matter where you are, you can always practice yoga by taking a break to lay down, or even sit wherever you are, and close your eyes to focus on your breath. Recenter this way before going back to your daily business and you’ll already be planting seeds for a beautiful, regular yoga practice.