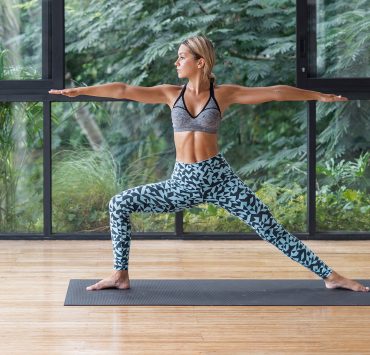
The purpose of yoga does not boil down to the ability to contort oneself into every seemingly impossible human form. With that said, many advanced practitioners of yoga are able to do just that. As one continues to practice, the body continues to stretch, balance, and strengthen; over time, this leads to the seemingly impossible becoming possible. While it is not necessary to focus your intent on these physical achievements, the focus, practice, and patience that bring them into being are worth noting.
Before taking these yoga poses into your own hands, it is important to note that these advanced poses are not to be taken lightly. Each can be developed through a natural build up of ones own practice. These following poses should not be attempted until you have naturally worked your way up to them, and not without guidance or support of a trained yoga professional. Allow these to come when the body and mind feel ready for them. As with any new exercise plan, consult with a trained professional to make sure what you’re undertaking is right for your own bodily composition – especially when it comes to these advanced poses!
Kurmasana — Tortoise Pose

This pose offers a quieting of the mind while opening your shoulders and lengthening the spine. You can sink further and further into it as you practice.
Sit on your mat with your legs stretched out in front of you. Bring your legs outward to either side of the mat with your knees shoulder-distance apart.
Bend your knees and flex your feet, drawing them closer to your body. Bring your chest forward and outstretch the arms to reach between your legs.
Continue to bend the legs, enough so that the shoulders can come inside of the knees. Stretch the arms out to either side beneath their respective knees. Keeping the back straight in order to protect it, stretch forward if possible so that the chest comes further down towards the mat. Gently push the heels forward. Your thighs should stay in touch with your torso.
Take the pose as far as feels natural and comfortable without forcing it. Rest in this pose for a few breaths and then slowly pull yourself back to a neutral seated position.
Salabhasana — Advanced Locust Pose

This pose is the advanced version of locust and offers a deep backbend. Start slowly to work your way up to this level.
Begin in Traditional Locust pose. From here, bend the knees to bring the feet towards the head. The torso will lift further off the ground. Keep the knees parted and take the pose only as far as feels natural to the body.
Stay in this pose for a few long breaths. To release, gently press the arms against the mat as you slowly lower yourself back down with ease and control.
Eka Pada Sirsasana — Foot Behind Head Pose

This is an advanced pose that requires a great deal of practice and warm-up. It stretches the hamstrings, glutes, and hips and tones the core.
Sit on your mat with legs stretched out in from of you.
Bend the right knee then bring the sole of the right foot to the left knee as you lower the right knee to floor.
Pull the right shin towards the chest as you hold the ankle of the right foot with your left hand. The two (knee and ankle) should be aligned with one another.
Make sure that both sit bones are resting on the floor. The hips should also be in line. Gently carry the right knee over to the right side to make room for the shoulder to come beneath. As the right shoulder moves forward, the right leg moves overtop of the shoulder.
Reach the right foot behind the head, ensuring that there is no excess pressure on the neck. You can gently guide the right foot down towards the upper back if possible.
If possible, release the hands and bring them to the heart, palms together.
Hold for a few breaths and then release by coming out the way you came into the pose or by folding forward slightly before releasing.
Karnapidasana — Knee to Ear Pose

Also called ear pressure pose, this inverted pose offers a deep spinal stretch. It requires flexibility of the hamstrings, shoulders, hip, and back. Child’s pose, bridge pose, and plow pose can help prepare you for it.
Begin in plow pose with your hands either entwined behind your back or resting on the floor, palms down.
Bend your knees and rest them on the mat by either side of your head. The shins and tops of your feet can rest on the floor.
Take five calming breaths before very gently rolling back out of the pose.
Tittibhasana — Firefly Pose

Firefly pose requires great core strength and considerable arm balance.
Begin in a squat position with the feet just closer than shoulder-distance apart. Tilt forward to bring your torso between your legs. Stay low while straightening the legs just enough to lift your pelvis to the level of your knees.
Draw the left upper arm and shoulder beneath your left thigh. Place your left palm on the floor, facing forward, against the outer edge of your foot.
Follow the above actions for the right side.
Pressing hands into the mat, gently shift your weight from your feet to your hands. With control, lift yourself off the floor, keeping the inner thighs against the highest part of your arm as is possible.
Continue to breathe as you stretch your legs out either side. Legs should be parallel to the ground and as straight as possible. Press through your feet and pull the toes gently back towards your body.
Keep the arms as straight as possible and the shoulders wide.
Ensure the neck is not tensed as you raise your head to look forward. Hold for fifteen seconds before gently bringing your feet back down to the mat and slowly coming out of the pose.
Eka Pada Rajakapotasana — One-Legged King Pigeon Pose

One-Legged King Pigeon takes an already challenging pose even further. If you have mastered Pigeon, you might consider this variation.
From Pigeon pose with the left leg extended backwards, bend your left knee. With the left hand, reach behind to grab the outside of the left ankle. The left foot remains flexed. If accessible, reach the right arm back as well to hold the inside edge of the left ankle. Open your chest and shoulders.
Hold this pose for a maximum of thirty seconds and slowly release.
Repeat on the opposite side.
Mayurasana — Peacock Pose

This asana strengthens the wrists, forearms, and abdomen as your body effortlessly appears to hover above the ground.
With knees wide, kneel on your mat and then rest on your heals. Leaning forward, bring your palms to the mat with your fingers turned back towards you.
Bend the elbows gently and bring the pinky fingers and forearms to touch those of the opposite arm. Elbows should be bend to create a right angle.
Bring your knees to the outside of your arms and in front of your hands. Lean your torso gently onto the back of your arms and let your elbows nestle into your stomach. Strengthen your core against the elbows.
Bring your forehead down to the mat. Straighten your knees and stretch your legs out behind you. The tops of your feet can be kept on the floor for now.
Strengthening your buttocks and shoulders, lift your head gently to look forward. Shift your weight so that it too moves forward. Gently allow your feet to rise above the mat. Your body should be about parallel to the floor.
Hold for just ten seconds to start and then slowly lower your head, feet, and knees back down.
Bhujapidasana — Shoulder Pressing Pose

An arm balancing pose more suitable for beginners, Shoulder Pressing pose strengthens the arms and the core.
Standing with feet shoulder-distance apart, come into a squat position. Bringing the torso forward, allow the body to come between the thighs. Raise the hips slightly.
Bring your upper left arm and shoulder to the inner part of the left thigh. Hands should be placed on the mat by the outer edge of each respective foot.
Pressing the hands firmly into the floor, shift your weight onto your hands. Feet will gently lift off the floor.
Let the right ankle rest above the left. Gaze forward.
Hold this pose for 20-30 seconds if comfortable. To come out of the asana, bend the elbows and gently bring the feet back to the floor. Come into a comfortable seated position.
Hanumanasana — Monkey Pose

Monkey pose is also known as the splits, a seemingly impossible move for many. It stretches the grown muscle, hips, and the hamstrings.
Begin in a straight kneeling position and then lower your hands so that your fingertips touch the floor in front of your knees.
Reach your right heel to touch the floor in front of you and slowly extend your leg forward, keeping the right foot flexed. The right leg should be kept as straight as possible. The left leg extends as straight as possible behind you. Your left toes can be tucked under or the top of the foot can rest on the mat.
Ensure that the hips stay parallel, facing straight in front of you.
Hold the pose for five breaths and gently come out by bending the right leg and maneuvering onto your left knee. Carry the right leg backward.
Repeat on the opposite side.
Eka Pada Galavasana — Flying Crow Pose

This hip opening pose increases arm and core strength and requires a great deal of balance. Before practicing, pigeon and crow poses may be good places to start, building hip flexibility and balance respectively.
Begin standing in a gentle squat with hands together at the heart.
Placing your weight on your left foot, raise your right foot off the ground. With both knees bent, raise your right foot to place your right ankle over the left thigh. The foot should be just about your left knee.
Begin to bend forward over your right leg. The left leg should be bent enough so that your palms are able to touch the floor.
Wrap your right toes around your upper left arm as if they are hugging your arm firmly.
Come into chaturanga by bending both elbows. Lean forward to rest your right shin on your upper arms. Keeping your knee bent, lift your left foot off the floor gently.
Slowly bring additional weight forward and begin extending the left leg away from you.
Continue hugging your right foot against your arm and flex your foot.
To come out of the pose, lower your body slowly and with control. You may also reverse your movements and come back into a standing pose this way.
Repeat on the opposite side.
Conclusion
These poses are by no means necessary for a good practice, but they are inspiring and mind-bending to observe. They point at how far the body is capable of going and suggest that with patience, practice, and more practice, some of these may, in fact, be within our reach. Each body is different, so what we are capable of will also depend on the natural way our physical composition is put together. Contraindications exist for each individual pose, so it is important to research more thoroughly first and to consult with a professional. Take your own practice at your own pace, but know that even the impossible may one day, in fact, be possible.