


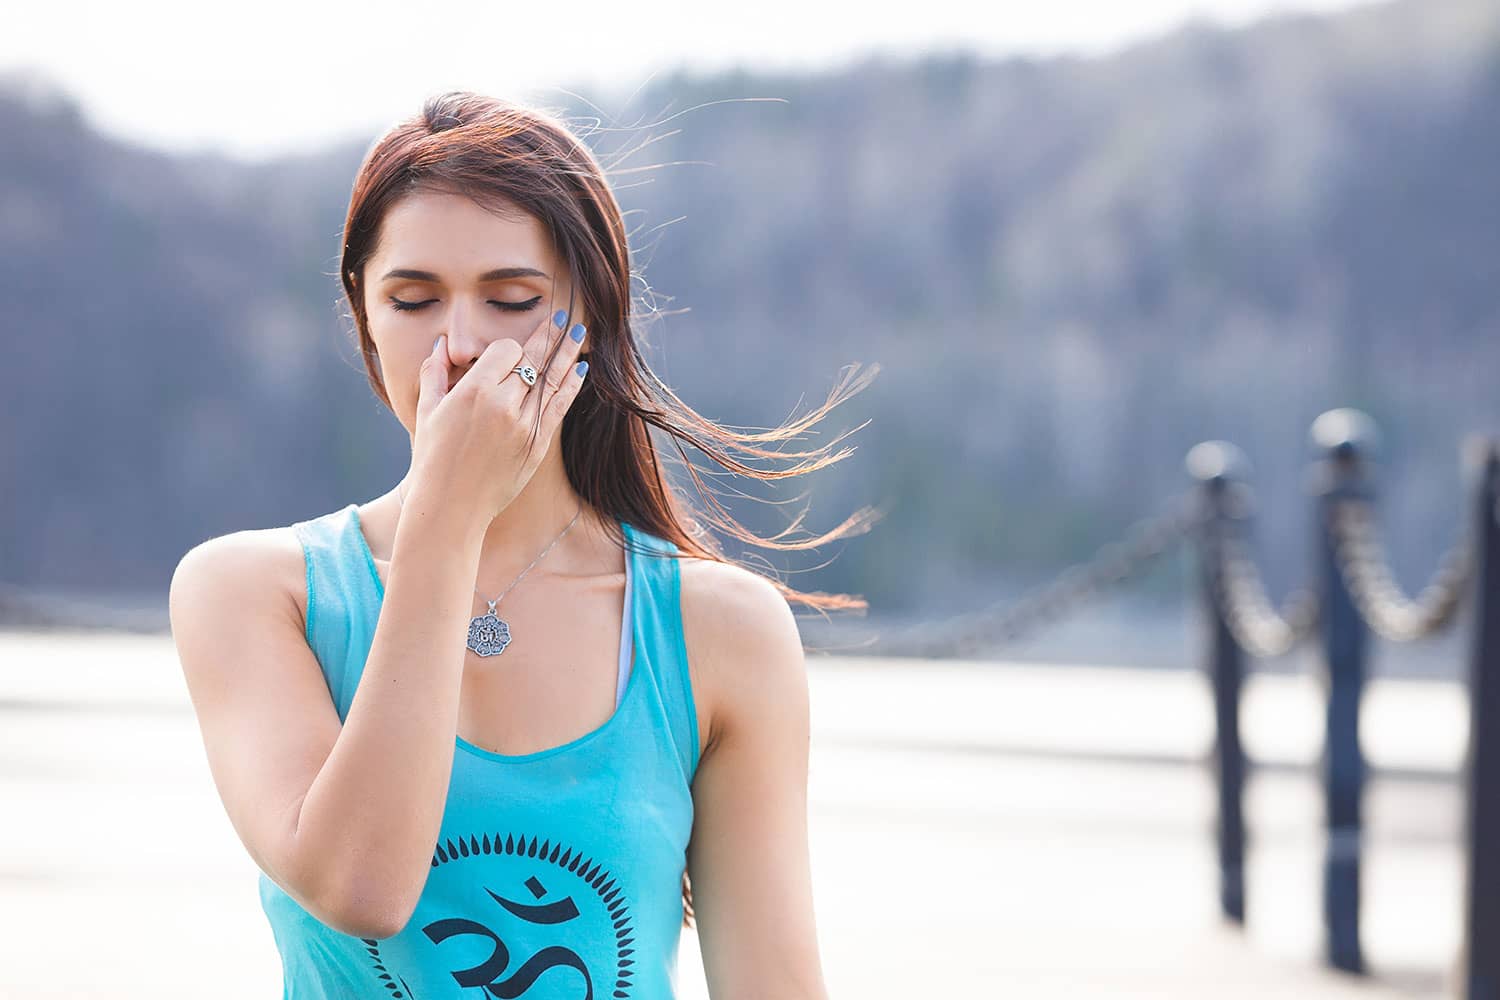
Have you ever been in a yoga class and asked yourself, “Am I breathing right?” The fact that you are still alive means that you’re definitely doing something right!
But when it comes to practicing these techniques in yoga or meditation, the breath is a totally different action. This article outlines 7 types of breathing exercises that any beginner can try, along with detailed instructions to get your prana flowing.
What is Pranayama?

Pranayama is the practice of yogic breathing. Some translate it as “energy regulation”, and other masters refer to it as “breath control”.
In yoga, breath is the core of our existence. The concept of prana is taught in yogic tradition as the “life force”, and pranayama is the first practice that all yogis must master.
Breathing techniques have their own specific blueprint with different physical, emotional and spiritual benefits. Pranayama is often referred to as the primary asana in yoga, and therefore the foundation of all other postures and disciplines.
As a beginner, the key is to feel the breath. You must practice pranayama regularly to direct your energy intentionally.
When prana is strong throughout the body, you are readily able to connect to your intuition and understanding of the Universe.
How Should I Sit?

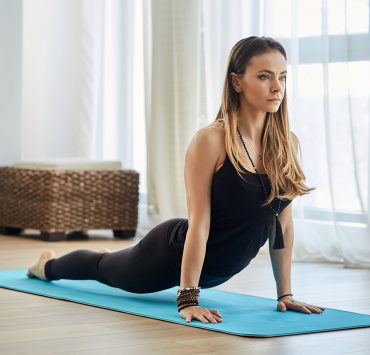
Proper sitting is vital to practicing pranayama. You can either sit on your knees in vajrasana or sit cross legged in lotus position. The goal is to elongate the spine and keep the crown elevated.
How long should I practice breathing for?
The best way is to take baby steps. If you are trying out a new breathing technique, practice for 1 minute and see how you feel. Once you feel comfortable with this amount of time, you can increase slowly.
But really, there is no right or wrong amount of time. It is your own experience!
Here are 7 types of Pranayama for beginners to practice:
1. Natural Breath

The natural breath is, for the most part, effortless. This is the breath you take when you aren’t trying to breathe or change anything. Your natural breath gives you clues into your mental, emotional and physical states of being. For a few moments, close your eyes and mindfully observe the nature of your natural breath, without trying to breath at all.
Are your inhales and exhales shallow or deep?
Roughly how long are your inhales and your exhales?
What other physical sensations do you notice in the body? Give the body a scan here to find any points of tension or holding.
What is present in the mind?
After observing your natural breath for 5 minutes, become aware of your overall state of being. Has anything shifted since you started to pay attention?
Observing the natural breath can be an excellent tool for centering your body and mind before and after a yoga practice. It is also a form of meditation that you can use at any time to help you relax and release stress.
2. Dirgha Pranayama

Dirgha pranayama is the complete yogic breath, also called “three-part breath”. It utilizes the three major parts of the lungs to breathe deeply and fully. When our bodies are infused with oxygen, our cells function more efficiently and we are able to heal faster. Dirgha pranayama stimulates the sacral, solar plexus, heart and throat chakras.
This breath is especially useful for chest breathers who may be limiting their fullest lung capacity. In dirgha, it is important to expand the belly, ribs and chest as you breathe to create more airflow to the lungs. The goal in this breath is to expand on the inhale and contract on the exhale.
Dirgha breath calms the mind, releases tension throughout the whole body, and improves digestion.
Come into a seated position on your mat with your spine tall. Relax your abdomen and place one hand over the belly. Inhale through the nostrils and feel the belly press against the palm. As you exhale, bring the belly back into the spine and expel all the air out through the nose. Repeat several times to expand the lower lungs.
Next, place both hands on the right and left rib cage. As you inhale, expand the entire abdomen from the lower belly to the solar plexus. Fill the both the lower and middle part of the lungs, then exhale out all of the air. Repeat several times.
Finally, place one hand on the chest right below the collar bones. Breathing in, expand the belly, ribs, and chest. Fill up the lungs completely, then gently contract the lungs on the exhale to squeeze all of the air out.
Dirgha breath should be practiced for at least 5 – 10 minutes at a time to achieve relaxation and peace of mind.
3. Ujjayi Pranayama

Directly translated from sanskrit, ujjayi pranayama means “victory breath”. It is performed by slightly constricting the glottis muscle in the back of the throat to create a gentle hissing noise.
Ujjayi creates a peaceful sound, much like what you would hear if you were to put a seashell up to your ear. It’s almost as if you are echoing the ocean through your breath. This sound calms the mind and increases concentration. It is a great tool to use in any type of meditation.
To practice engaging this throat muscle, exhale through the mouth and pretend to fog up a mirror. Repeat this several times on both the inhale and exhale to feel the glottis contract.
When you are ready, come into a seated position on your mat and start with dirgha pranayama for several rounds. Continue to breathe through the nose, and gently contract the back of the throat on both the inhalation and exhalation. As you repeat, explore making the sounds louder and softer. Concentrate on the sound and the sensation in the back of the throat.
Ujjayi breath should be performed slowly for several minutes. Pause after your pranayama practice and notice what has shifted inside you since the beginning. This breath is especially stimulating and cleansing for the throat chakra.
Similarly to dirgha, ujjayi pranayama should be practiced for at least 5-10 minutes during a sitting period.
4. Kapalabhati

KapalabhatiKapalabhati pranayama literally means “skull shining breath”. It is more active and fire inducing than dirgha or ujjayi, and you may feel like you have more energy afterwards.
Kapalabhati is great for toning the abdomen and clearing out the sinuses. It also stimulates the chakras of the face and third eye.
Begin in a seated position. Take a few clearing breaths to center yourself. Place one hand on your solar plexus over the upper abdomen. Deeply inhale through the nostrils and expand the belly into your hand.
Exhale sharply through the nose and squeeze the belly button in towards the spine. Allow the lungs to fill up naturally and quickly on the inhale, then exhale sharply again. Repeat these quick inhales and forceful exhales at a steady pace 20 times.
Make sure that you are taking in enough air on the inhale and squeezing out all the air on the exhale. If you feel light-headed, slow down and return to a normal breath for several minutes.
Otherwise, continue with kapalabhati pranayama for two more rounds.
This is an excellent breath to perform before a more rigorous yoga practice.
It is best to start with 1 minute of kapalabhati. Once you feel comfortable with that, you can slowly increase 1 minute at a time.
5. Alternate Nostril Kapalabhati

Alternate nostril kapalabhati works similarly to kapalabhati, but you only exhale on one side at a time.
Any alternate nostril breathing creates a balance and connection between the right and left sides of the brain. By performing this pranayama quickly, alternate nostril kapalabhati cleanses the nasal passages and clears the lungs.
Begin in a comfortable seated posture on your mat. Take several deep breaths, such as dhirga or ujjayi to center the mind and body.
With your right hand, bring your fingers to vishnu mudra by curling the middle and index fingers towards the palm. Hold your hand up to your face and inhale deeply through both nostrils.
Close your right nostril with your thumb and exhale sharply through the left side, making sure to contract your abdomen at the same time. Release the thumb and passively and quickly inhale through both sides.
Close your left nostril with your ring finger and exhale sharply through the right side. Repeat these sharp exhales through one nostril and passive inhales through both 20 times. This amount will equate to roughly 1 minute of breathwork. Once you feel like you’ve mastered the minute, you can increase by 1 minute increments.
6. Nadi Shodhana

Nadi shodhana pranayama is a type of alternate nostril practice, translated as the “channel-purifying breath”. In yoga, the nadis are subtle energy pathways throughout the body. By breathing through different nostrils, you cleanse and balance the right and left hemispheres of the brain.
Start with a few deep inhales and exhales on your mat. Create vishnu mudra with your right hand and bring it up to your face. On your first inhale, close the right nostril with your thumb and slowly inhale through the left side. At the top of the inhalation, close the left nostril with your ring finger and exhale through the right side. Inhale through the right side, then close your right nostril and exhale through the left.
If you feel confused at first, just remember to switch only before you exhale.
Repeat this breath for 2 minutes to start out with. If you want more, you can practice up to 10 minutes. Enjoy the meditative experience! This breath calms the mind and helps you concentrate on a deeper level.
7. Simha Pranayama

Easily the most animated of all the yogic breaths, simha pranayama is also known as “lion’s breath”. This energetic pranayama improves circulation in the body and also relieves facial tension.
Energetically, lion’s breath activates the throat chakra.
Begin in vajrasana, sitting on your heels. Take a few deep inhales and exhales to cleanse the lungs and sinuses. On your next exhale, open your mouth and stick your tongue out as you make a “haaaa” sound with the back of your throat. Bring your eyes up to your third eye and stretch all the muscles in the face as you exhale.
Inhale deeply again without stretching the face, and exhale while sticking your tongue out and stretching the face again. Perform lion’s breath for 5 rounds then pause and notice how you feel.
5-10 rounds, or 1 minute, of simha pranayama is great for any type of meditation or before asana practice.
Any of these pranayama exercises are suitable for beginners and advanced yoga practitioners alike. It is important to notice how you feel before, during, and after a breathwork session; take inventory of your mind, body, emotions, and spiritual intuition. Connecting to your prana can be a truly eye-opening and intimate experience.
Thanks a bunch for sharing this with all people you actually recognize what you’re speaking about! Bookmarked. Kindly also consult with my website =). We will have a hyperlink alternate arrangement between us!