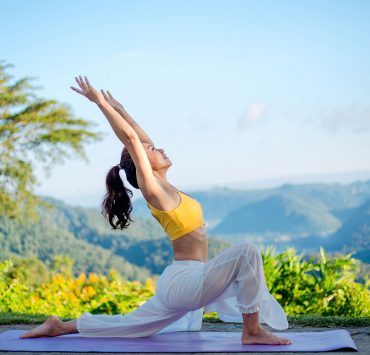
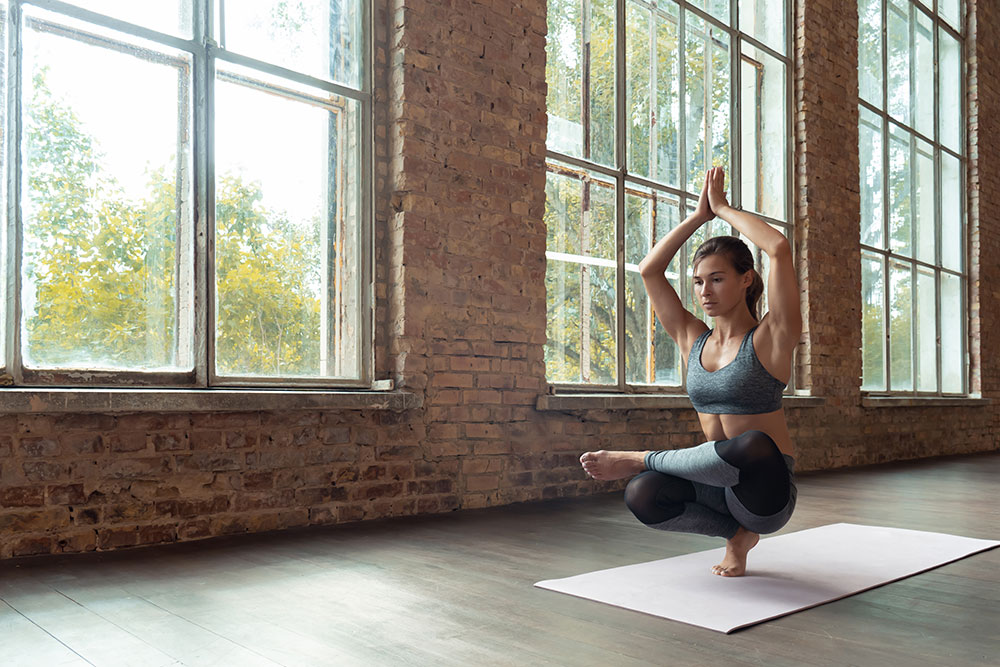
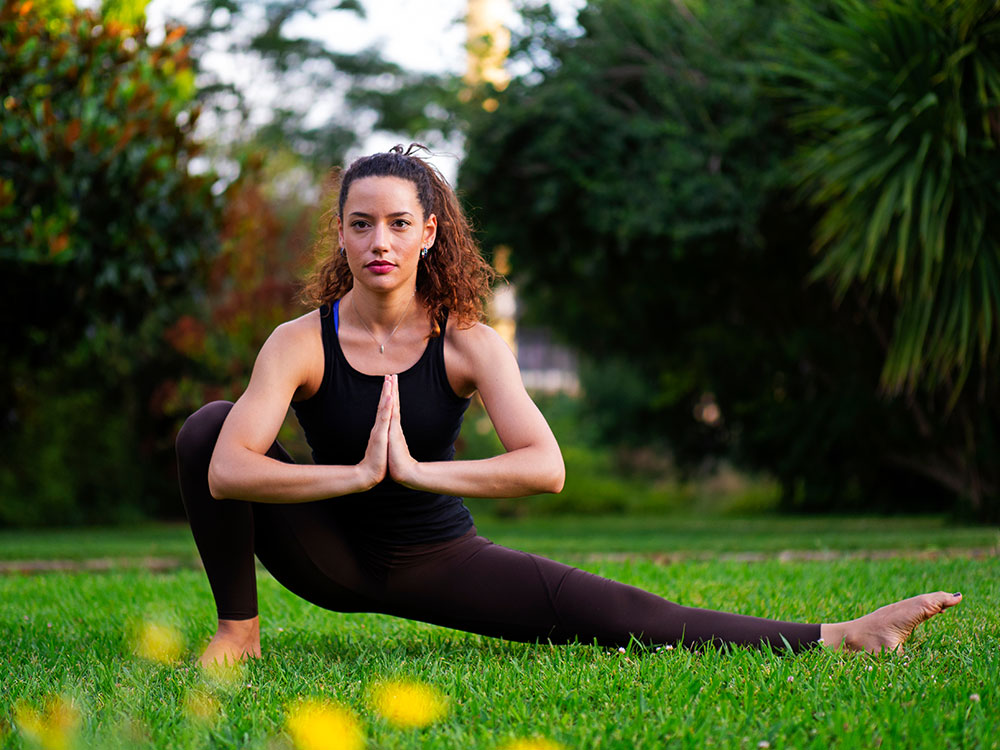
Your pelvis alignment is the foundation of many poses in yoga. But also your everyday life. What does this mean exactly?
It’s important to be familiar with your hips, their planes of movement, and how they work. We will then explore yoga hip openers you can do at home.
Anatomy of Hips
Let’s dive into the anatomy of your hips to understand what it is we are “opening”.
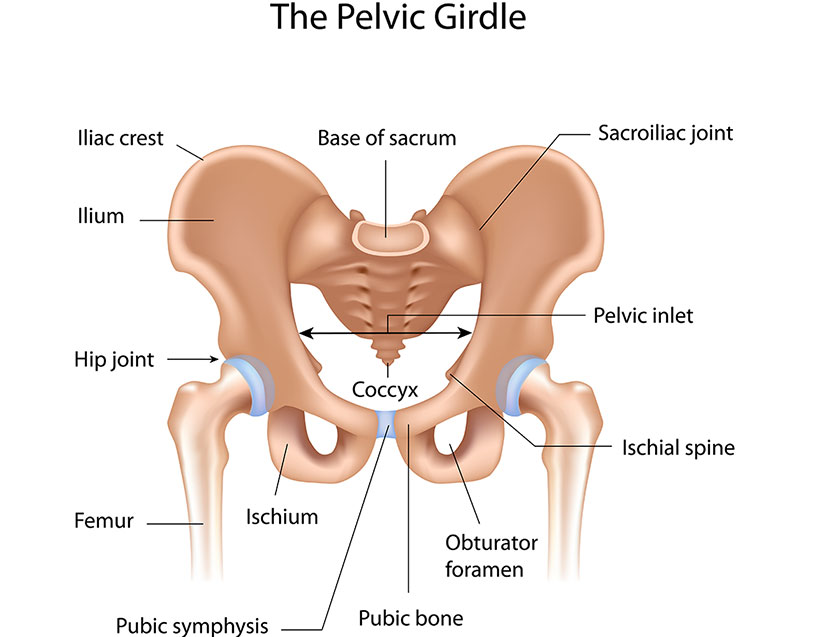
First, your muscles! There are 17 all together. These 17 are further broken into 4 groups. They are gluteal, adductor, iliopsoas, and lateral rotator. All work together to achieve the movement of your hips.
As for bone structure, at the bottom of your pelvis is a ball and socket joint on each side. This is where your femur, also known as your thigh bone, sits into the socket, the acetabulum. Various muscles attach to each of the femurs, pelvis, lumbar spine, and sacrum.
Because it is a ball and socket joint, your hip can move in all directions.
Hip Planes of Movement
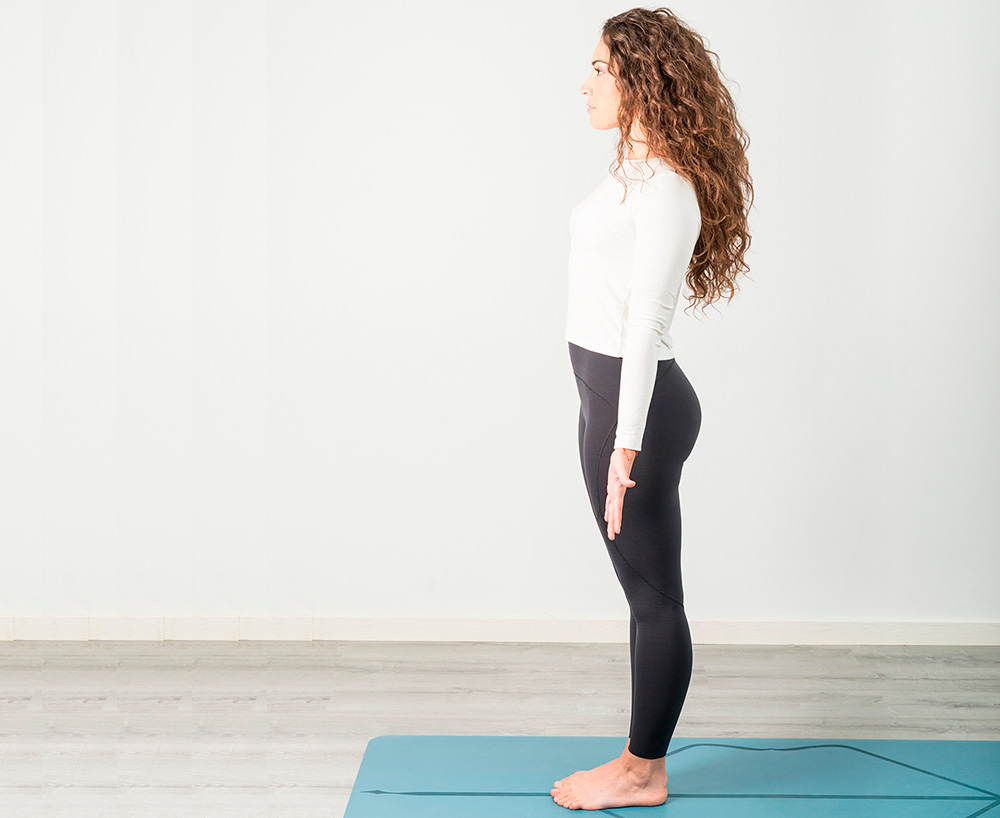
Stand in Tadasana, also called Mountain Pose or anatomical neutral. Shift your weight into your right foot. Lift your left leg away from your right like you’re kicking to the side. This is an abduction movement away from the center of your body.
Back to our hip planes of movement! We’re in our example of abduction, our leg is out to the side. From there, bring your leg back towards neutral. This movement is adduction, the movement towards the center of your body. Remember our adductor muscle group? They’re at work here.
Now, back in Tadasana, pull your heel to your seat in a standing quad stretch. This is flexion, movement decreasing the angle between body parts. The opposite action is an extension, increasing the angle between two body parts.
Trace a circle on the ground with your foot. This movement is circumduction. Turn your toes from pointing forward to the side. This movement is rotational.
All these planes of movement are starting from the hips.
Now that we’re familiar with how the hips can move, what are the benefits of hip openers?
Benefits of Hip Openers
Hip openers stretch your adductors, abductors, and hip flexors. By doing so, you can ease back pain and improve alignment for walking. Opening your hips improve circulation in your legs too.
You can also hold negative emotions (sadness, fear) and stress in your pelvis. By opening up the hips, you’re releasing these feelings that you don’t want hanging out in your body.
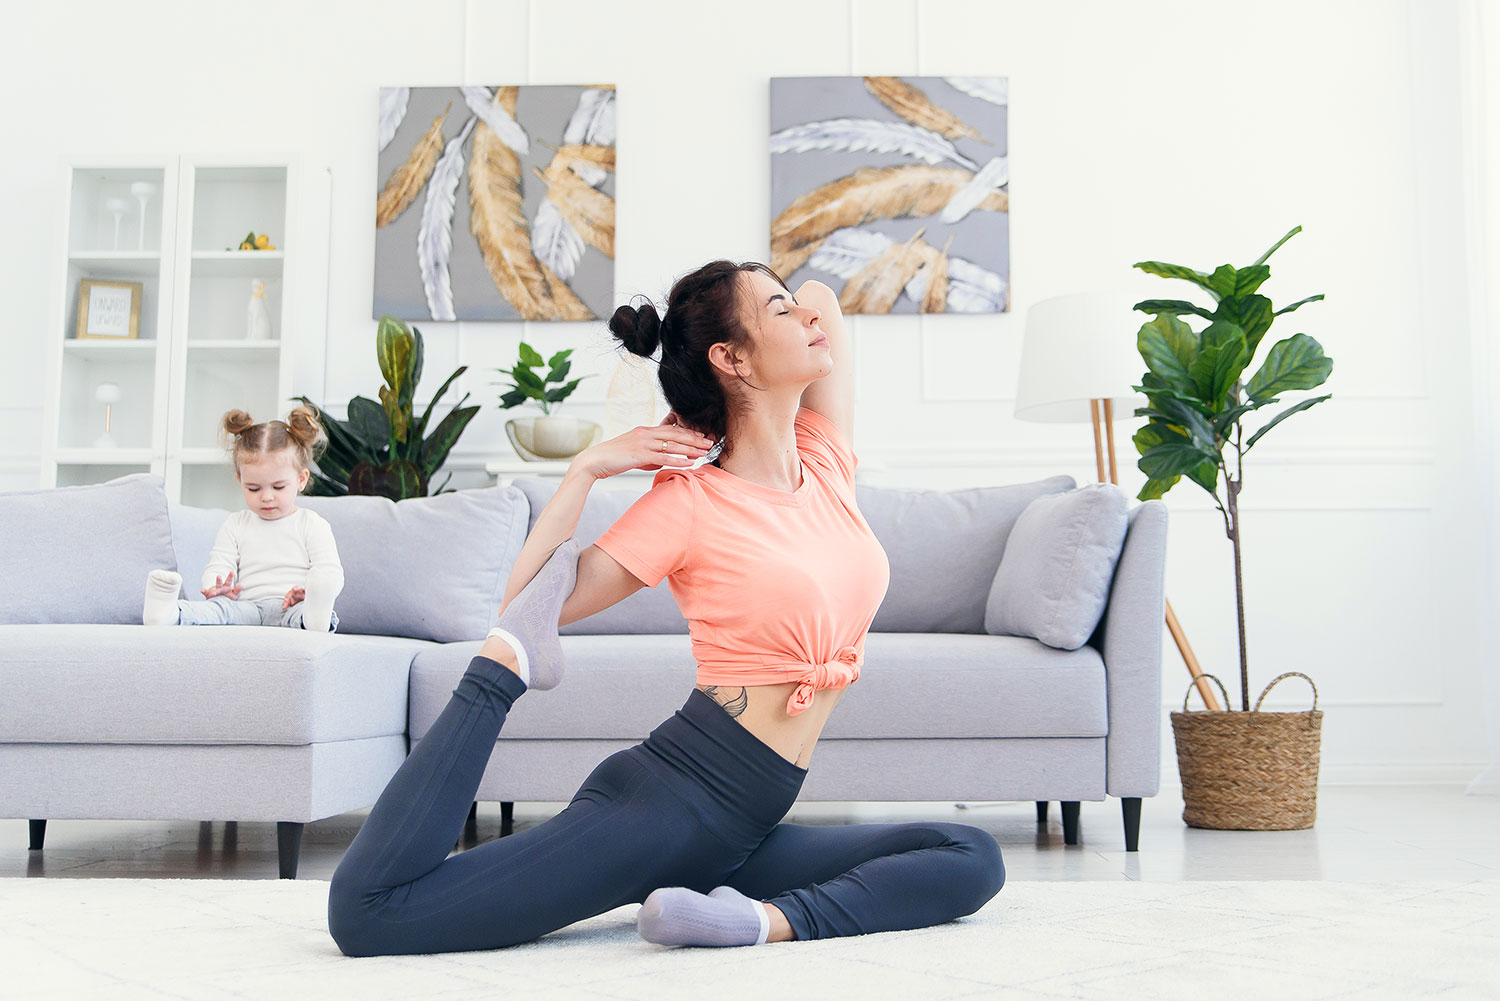
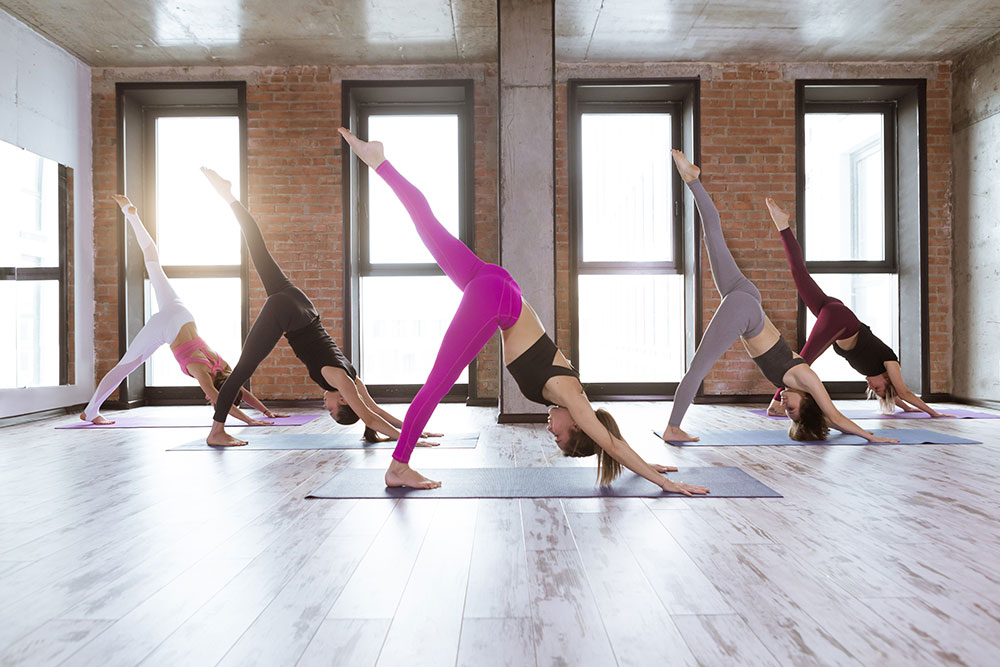
12 Poses for Home Practice
Prasarita Balasana — Wide-Legged Child’s Pose
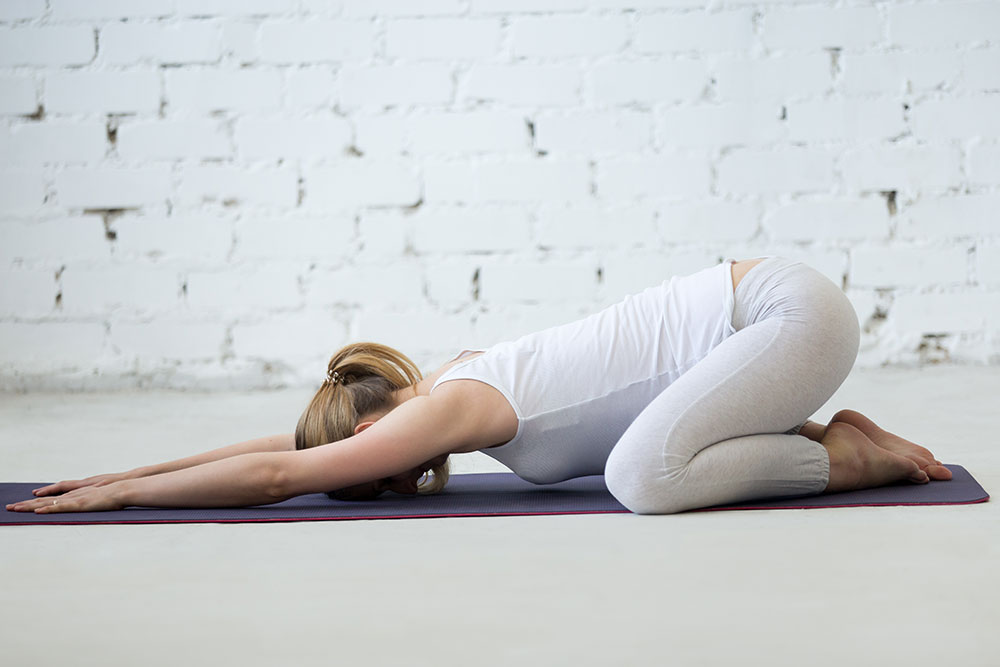
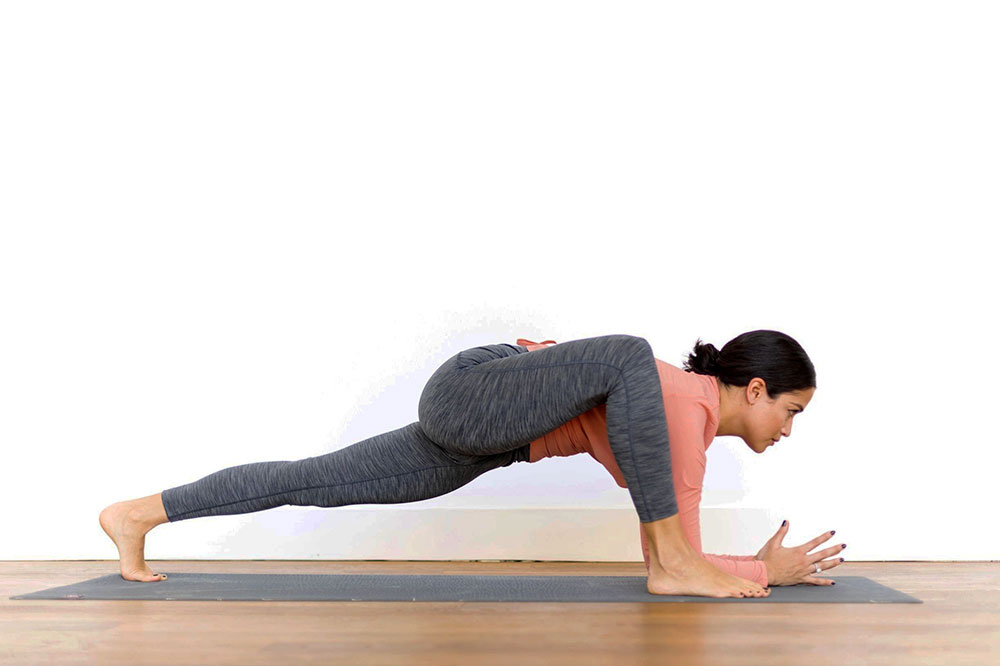
Start in a tabletop position with your wrists directly under your shoulders. Your knees are under your hips. Bring your big toes to touch as you press firmly into the ground. Pick up your knees, spread to the edges of your yoga mat, and set them back down.
Send your hips back and crawl your hands forward. Rest your forehead on a block or the mat.
Hold for 30 seconds or more as your body needs. This is a very calming and passive pose. Sticking around for a while relieves stress and anxiety.
Ardha Apanasana — Half Knees to Chest Pose (Figure 4 Variation Pose)
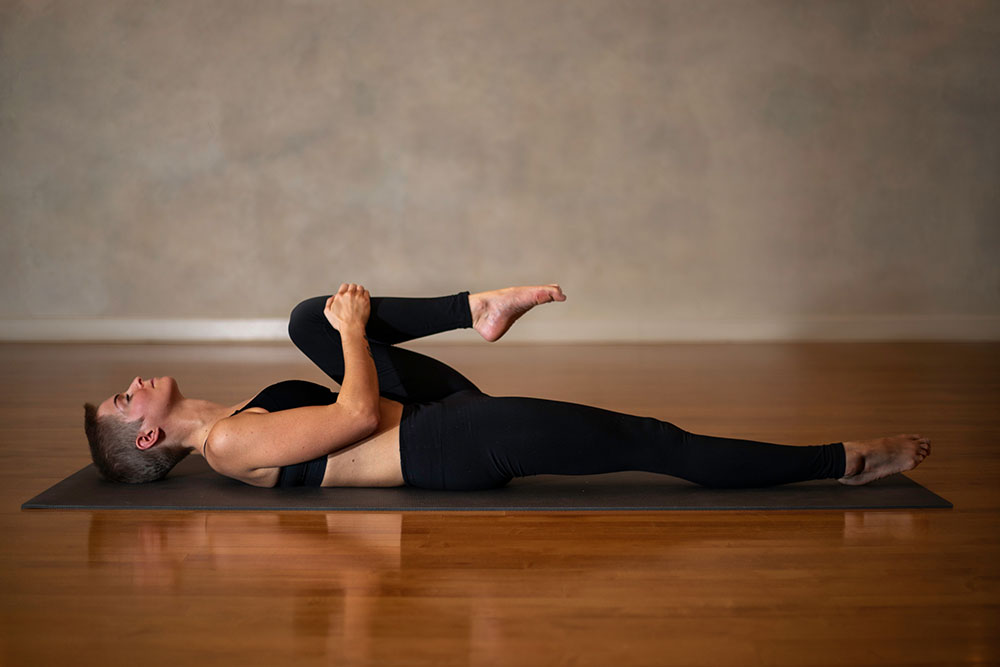
Lie on your back, pulling both knees into your chest. Stack your right ankle over your left knee creating a figure 4 shape with your legs.
Thread your arms around your right thigh. Clasp your fingers behind the knee or hamstring. Gently pull the right leg towards the back of the mat while keeping the right shin parallel with the ground.
Hold for 30 seconds. Reset by pulling both knees into your chest. Gently rock side to side giving yourself a spinal massage. Repeat on the left side.
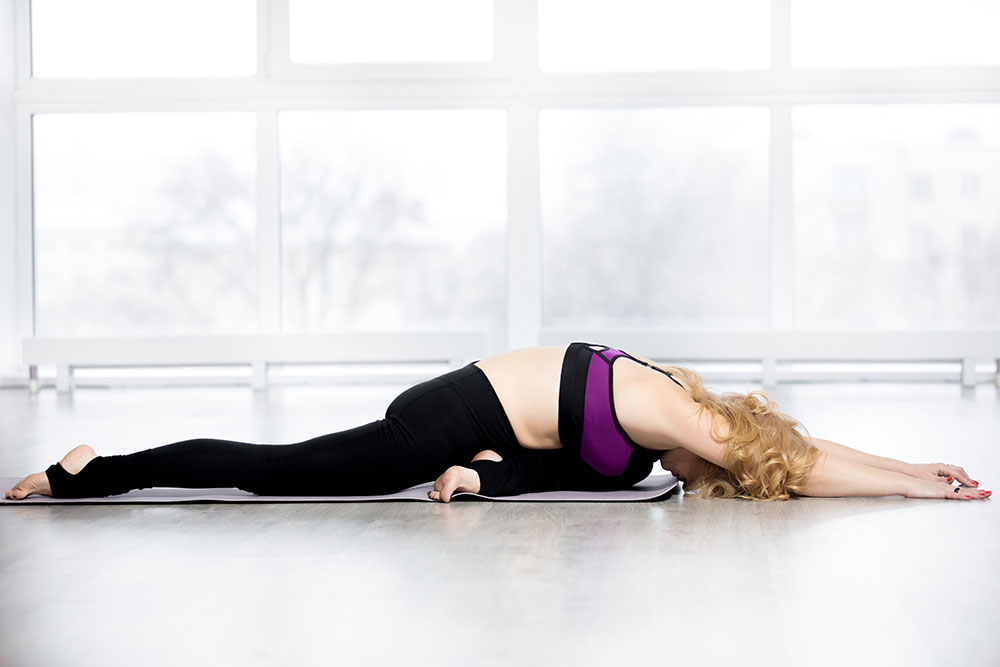
Badha Konasana — Bound Angle Pose
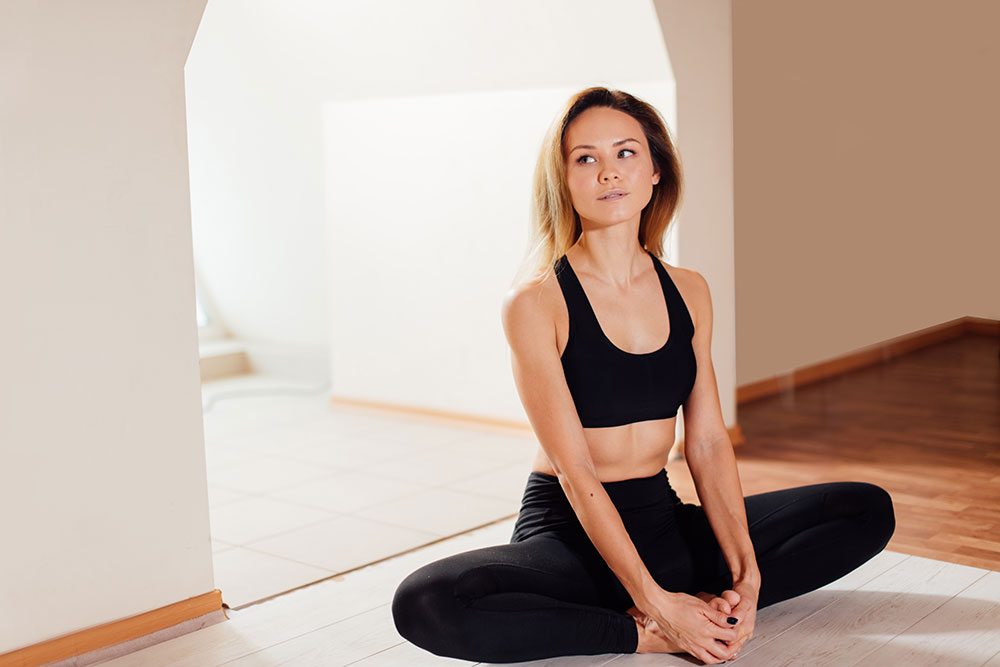
Start in Dandasana or Staff Pose. The spine is long, shoulders stacked over hips, hands reaching for the mat, palms flat. Your legs are out directly in front of you.
Bend your knees and bring the soles of your feet to touch. Grab your feet and guide your heels closer to your pelvis.
Too intense? Place a yoga block under each knee.
Not intense enough? Try a deeper variation.
- Take a hand to the inside of each knee and gently press open.
- Turn this into a forward fold! You have 2 options. You can keep your hands on your feet with your elbows pressing into your knees or crawling your hands forward.
- Lie back into Supta Badha Konasana. Press your hands by your hips as you lift and scoop bringing your hips even closer to your heels. Lean back onto your forearms or lie down. Relax your neck.
Hold for 30 seconds.
Eka Pada Adho Mukha Savasana — Downdog Split Pose
Start in Downward Facing Dog. Press your hands forward into the mat and send your heels into the ground. Have a slight bend in your knees creating a “V” shape with your body. Hips are square and facing toward the mat.
Inhale your right leg up and straighten, reaching for the back of the room. This is a 3-Legged Dog.
Bend your right knee to a 90-degree angle. Stack your hips. By doing so, the right toes will be pointing toward the ground.
Gaze under your left armpit and try to locate your toes.
You have the option to find movement in your right foot. You can wiggle your toes. Rotate your ankle clockwise, then counterclockwise. You can also make circles with your knee.
Hold for 30 seconds.
Reset into Downward Facing Dog. Repeat on the left side.
Ardha Utkatasana — Half Chair Pose
Start in Tadasana or Mountain Pose with your feet hips-width distance apart. Inhale your arms over your head as you send your hips back as if you are sitting in a chair.
Take a peek down. Make sure your knees are tracking over your 2nd and 3rd toes. See if you can sit back a little further while maintaining alignment.
As with any balancing pose, find a spot on the floor to send your gaze. This will help with stability which is important before finding movement.
Shift your weight into your left foot as you peel your right foot off of the mat. With control and an external rotation (away from you) of the shin, place your outer right ankle on top of the left knee.
Tip! The further you sink your hips back, the more of a shelf you’re creating for your ankle.
Hold for 30 seconds. Reset into Tadasana and repeat on the left side.
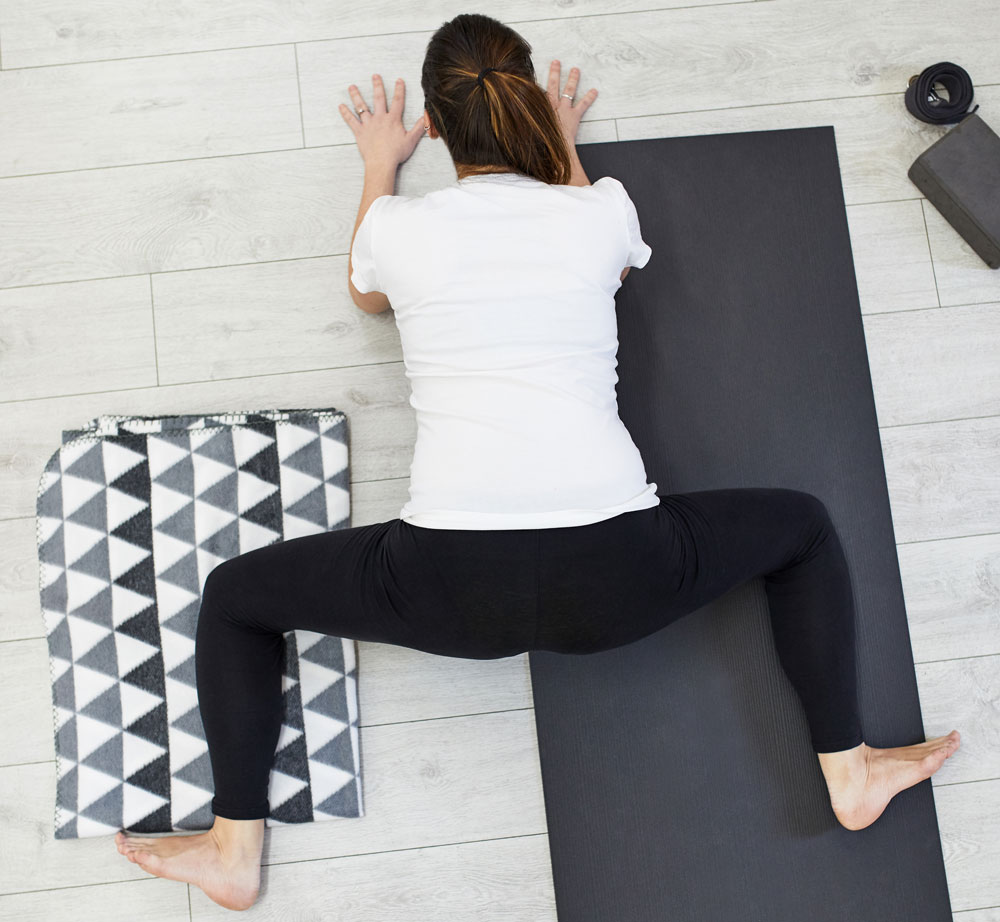
Utthan Pristhasana — Lizard Pose
Start in your Downward Facing Dog. Inhale your right leg up and straighten into a 3-legged Dog. Exhale your right foot to the outside of your right hand. Drop your left knee to the mat, untuck your toes.
You have a few options with your hands from here! Right now, your hands are directly underneath your shoulders. You can bring your forearms to yoga blocks (1 under each) or both forearms to the mat parallel with the sides.
Want to get even deeper into your hips? Place your left hand directly across from the arch of the right foot, under your shoulder. Shift your weight into your left hand and bring your right hand to the inside of the right knee. Gently press open.
Want to make Lizard Pose even more intense? Keep the left leg active by tucking the toes, engaging through the entire leg as you lift the knee off of the mat.
Hold for 30 seconds. Reset to your Downward Facing Dog.
Whichever variation you chose for the right side, be sure to repeat on the left.
Eka Pada Rajakapotasana — Pigeon Pose
Start in Downward Facing Dog. Inhale your right leg into your 3-Legged Dog. Bend your knee and place your shin on the mat at a 45-degree angle.
Double-check to make sure your right knee is to the outside of your right wrist!
Drop your left knee to the mat and untuck your toes. Option to place a yoga block under your hips for a grounded connection.
Walk your hands forward as you lower your forehead to a yoga block or the mat.
Want to make this pose more intense? Pick up your left knee and send it back, away from your hips. Untuck your toes and sink deeper into the pose.
Hold for 30 seconds.
Reset back to Downward Facing Dog and repeat on the left side.
Malasana — Yogi Squat Pose
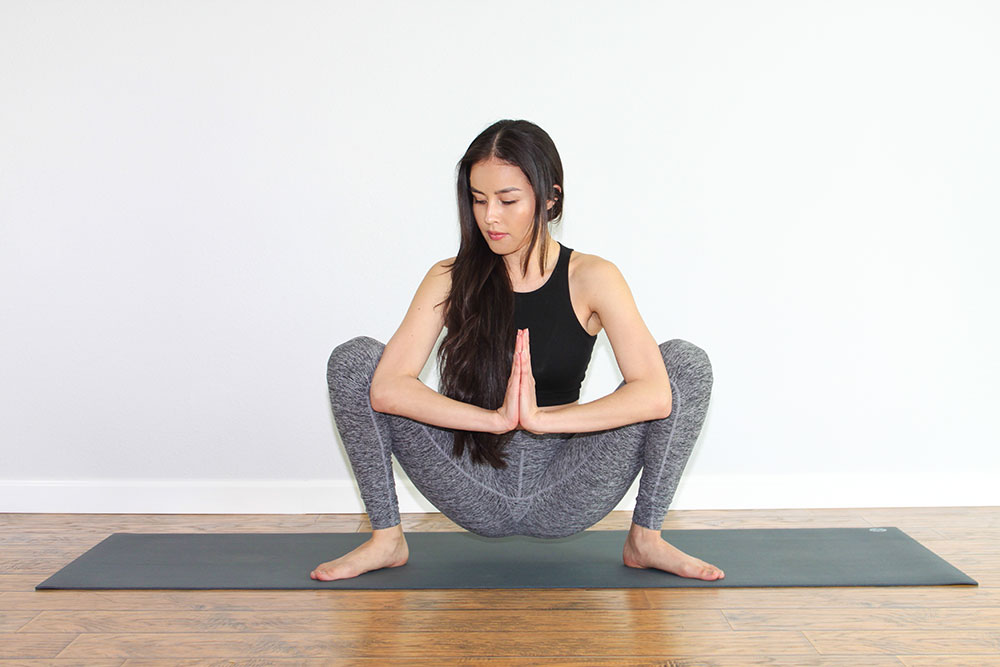
Start in Tadasana, Mountain Pose. Step out to the width of the mat while rotating your feet to 45-degree angles. Bring your hands to prayer at the heart’s center.
With control, start to bend at the knees. Make sure they’re tracking over the feet and sending your hips down towards the mat.
Try to keep your heels on the mat as you lower down. Option to place a blanket underneath to make a connection to the ground.
Want to make it more intense? Press the backs of your arms into your inner thighs to further open the hips.
Hold for 30 seconds.
To get out of this pose, place your hands on the mat in front of you. Shift your weight into your hands as you straighten your legs. Step back to Tadasana.
Skandasana — Side Lunge Pose
Start in a wide-legged forward fold with the outer edges of your feet lined up with the front and back edges of the mat.
Shift your weight into your right foot as you start to bend your knee. Pay attention to your right heel, this should stay on the mat.
Externally rotate your left leg so your toes are facing towards the ceiling.
This one takes some balance! Use a yoga block in each hand to find your stability.
Hold for 30 seconds. Reset to your wide-legged forward fold and repeat on the left side.
Mandukasana — Frog Pose
Start in tabletop position, wrists directly under your shoulders, knees under your hips. Slowly and with control, slide your shins to their respective sides. Keep your feet flexed.
The further your slide your shins, the deeper you’ll get into the pose.
Make it more intense by dropping your forearms to yoga blocks, one under each arm or to the mat.
Hold for 30 seconds.
To get out of this pose, place your hands underneath your shoulders if they’re not already there. Press through your hands to slide your knees back underneath your hips.
Agnistambasana — Firelog Pose
Start in Sukasana or Easy Seat. Line up your right shin with the front of the yoga mat, foot flexed. Guide your left ankle to the top of your right knee. Stack your left knee on top of your right ankle. Your shins should make an “equal sign”.
Please note, this pose can be very intense on your hips. If there is space between either of your knees and ankles, use a yoga block to fill it in.
Hold for 30 seconds. Repeat on the left side.
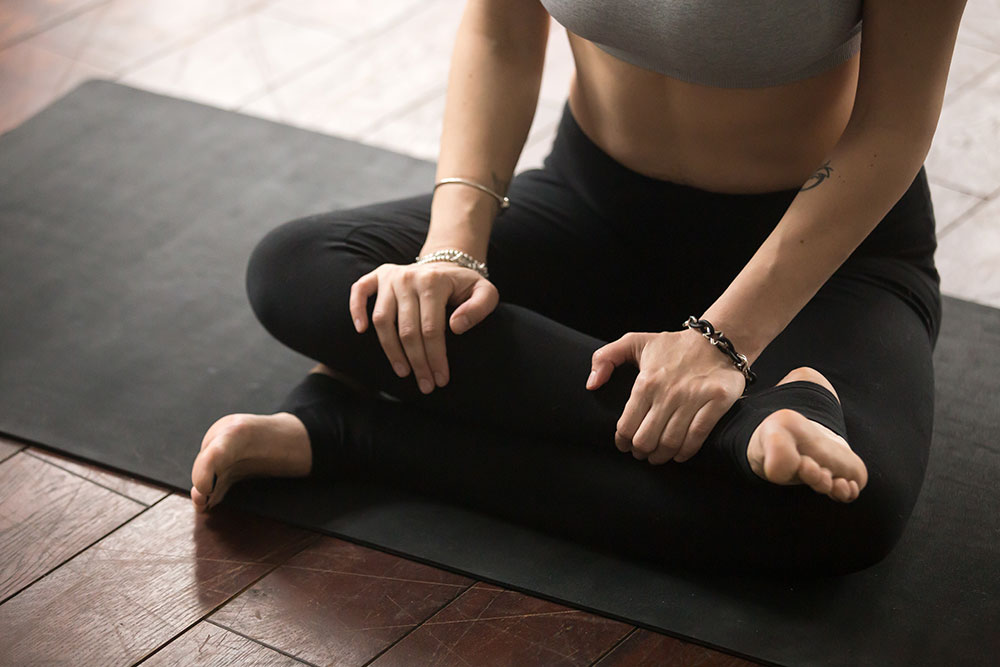
Padmasana — Lotus Pose
Start in Staff Pose/Dandasana. Take a hold of your right foot, bent at the knee into both hands. It’s an external rotation (away from you) of the shin. Place the outer blade of the foot, sole facing toward the ceiling, into your left hip crease. This is your half lotus.
Take a hold of your left foot and repeat, placing the outer blade, sole facing up, into your right hip crease. Your left shin crosses over your right. This is your full lotus.
Too intense? Take half lotus until it feels comfortable in your body to progress.
Hold for 30 seconds. Repeat on the left side.
Are your hips open yet?
Each of these poses builds in optional intensity. As you practice each one, you’ll be able to hold each of these poses longer and could notice differences in your body.
As we’ve covered, your hips have 17 muscles and various planes of movement. Your hips play an integral part not only in your yoga practice but in your everyday life.
Taking time each day to open your hips has many benefits. It can ease your back pain, improve your range of motion, and increase circulation in your legs.
Your hips also trap the negative emotions of the body. By opening your hips, you’re releasing these feelings that don’t serve you.
Go forth, move freely, and without negativity.