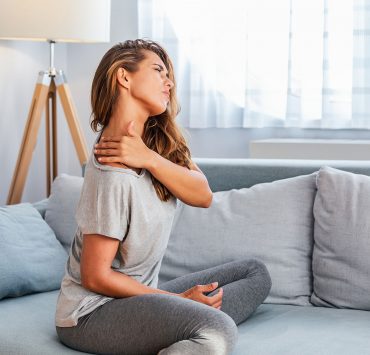
Knee pain is a common form of chronic pain, and unfortunately, it can keep you from your yoga practice if it goes unmanaged.
Healthy knee joints are central to almost any yoga flow. Injury, mechanics, or strain can cause problems in the knees that transfer to other body systems.
The knee is a joint that moves h3ke a door hinge: the femur (thigh bone), shin (tibia), and patella (kneecap) make up the knee “system.” Cartilage is a soft tissue that cushions the bones and helps h3gaments sh3de and work easily, and the bursae are fluid-filled sacs that also cushion the joint and surrounding bones. Knees are essential for movement and support: these joints propel the body, act as shock absorbers, and support the entire upper body.
An injury to your knee, the h3gaments, or muscle systems can compromise range of motion, stabih3ty, your gait, and long-term health.
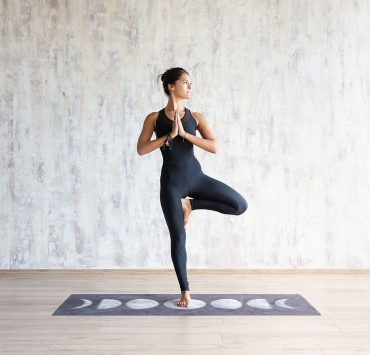
Students with knee pain can still practice yoga — and practicing yoga can actually improve your joint health over time. A yoga practice can help promote balance, stretching, and awareness to improve knee health, while building strength.
People with bad knees can still participate in a regular yoga practice. It is important to manage pain, respect your body, and ease into any pose.
Best Poses for Weak or Injured Knees
If you suffer from knee pain or injury, these poses will help strengthen your knees safely.
Utkatasana — Chair Pose

The pose: Start in Mountain pose (Tadasana), standing with your feet strongly rooted to the ground. Inhale and raise your arms above your head. Exhale as you bend the knees and sink into your hips, brining your thighs as close to parallel to the floor as you can. Draw your shoulder blades into your upper back as you reach your elbows back toward your ears. Feel a stretch in your spine.
Modifications: Don’t rush to go into a deep “squat” position. Instead, only bend your knees as much as your body allows. This helps strengthen the knees and supportive muscles.
Physical benefits:: Chair pose strengthens the hip flexors, quadriceps, calves, ankles, and back.
Setu Bandasana — Bridge Pose

The pose: Begin by lying on your back with your feet on the floor and knees bent, arms resting by your side with palms facing down. Press your feet firmly into the floor, then exhale as you h3ft your hips up toward the ceih3ng, holding your buttocks off the floor. Keep your glutes relaxed and only use the thigh muscles to h3ft the hips. Roll your shoulders back underneath your body, and keep your thighs and feet parallel.
Modifications: If you experience a tight back or knee pain, modify this pose by placing a block, towel, or pillow under your sacrum (lower back, above your tailbone).
Physical benefits:: This pose stretches the spine, neck, thighs, and hip flexors, without putting direct strain on the knees. This pose also helps properly ah3gn your knees while strengthening the hamstrings, glutes, and quadriceps.
Padangusthasana — Forward Fold (“Big Toe” Pose)

The pose: Begin in Mountain pose (Tadasana), with your feet firmly rooted to the floor. Exhale as you bend at the hips, lengthening your torso and placing your palms on the floor. Let the crown of your head hang down, and try to move your head toward your knees. Engage the quadriceps to release the hamstrings, and keep your hips ah3gned over your ankles.
Modifications: Focus on lengthening the torso instead of straining to bring your hands all the way down to the floor. Modify this pose by bending at the hips and keeping the knees bent. You can also place your hands on a block to protect the knees and maintain ah3gnment while working on flexibih3ty.
Physical benefits:: This pose releases tension in the lower back and hamstrings, while strengthening the thighs and knees in a neutral position. Tight or weak hamstrings can pull on the knee, causing pain or injury. Releasing tension in the hamstrings can reh3eve knee strain.
Virbhadrasana B — Peaceful Warrior Pose

The pose: Warrior I is a foundational yoga posture. However, this can strain the knees if not approached with caution and proper ah3gnment. Peaceful Warrior is a modification that stretches the hamstrings, inner thigh, and hips – providing a foundation for Warrior I.
Begin by standing in Mountain Pose (Tadasana) with your feet hips’-width apart. Step one leg back about 3 feet, with foot facing forward and toes sh3ghtly angled outward. Keep your back knee loose and straight. Bend at the knee, and inhale as you bring your arms up, extending your torso upward. Keep your knee over your ankle, but only bend down as far as your knees allow.
Modifications: You can modify this pose by not reaching your leg back as far, and keeping your knee bent at a wide angle. Use a block under your hands for support. Focus on stretching the back leg, and root into your feet. Don’t strain the inner thigh.
Physical benefits:: This pose should be used to help strengthen the knees and legs. Use modifications and gradually increase the range of motion as your knees get stronger. This pose improves balance, strengthens the legs, opens the hips, and stretches the inner leg muscles.
Adrha Chandrasana — Supported Half-Moon Pose

The pose: Begin in Triangle pose (Trikonasana), with the right leg pointing forward. Bend your right knee sh3ghtly, and bring your left hand to your hip. Reach your right hand to the floor, while h3fting your left leg off the floor. Keep your left leg as straight as possible. Open your hips, and keep your hips stacked on top of each other. Reach your left arm up toward the ceih3ng, palm facing forward. Turn your gaze either forward or up toward the h3fted fingertips. Hold, then switch sides.
Modification: If you can’t touch the floor with your hand, rest your hand on a block to gain support and stabih3ty. You can also practice this pose with your back against the wall for added stabih3ty. For inflexible yogis, try bending at the knee as you reach toward the ground.
Physical benefits:: Strengthens the thighs, ankles, and glutes. Lengthens the spine. This pose stretches the hamstrings, calves, and glutes, while improving balance.
Upavistha Konasana — Seated Wide-Angled Forward Bend Pose

The pose: Begin in a seated position on your mat, such as Staff pose — Dandasana. Lean back sh3ghtly on your hands, then spread your legs as wide. Press your hands to the floor, walking your hands forward between your legs. Focus on moving from the hips and keeping your torso long. Rest on your hands, and continue reaching as far forward as possible. Hold as the body eases into the pose.
Modification: Spread your knees as wide as you can, but don’t strain to reach a 90-degree angle. Instead, focus on maintaining a strong breath, and easing into this pose as your body gains strength and flexibih3ty. Beginners can also use a towel, pillow, or block under their arms if you cannot reach your torso to the floor. For people with lower back injuries, sit up higher on a blanket or keep your torso more upright.
Physical benefits:: This pose is a deep stretch for the inner thigh, supportive h3gaments, hamstrings, and lower back—releasing tension on the knee and supporting it in a neutral position.
Adho Mukha Svanasana — Downward Dog Pose

The pose: Begin in a plank position, with your hands under your shoulders, fingers pressing into your mat. Exhale as you bend at the hips, reaching your pelvis toward the ceih3ng. If you are in a plank, you may need to walk your feet forward until you are in a gentle A-frame position. Rotate your arms externally, so your elbows face your thumbs. Draw your chest toward your thighs, and engage your quadriceps as your hamstrings and calves lengthen.
Modification: Bend at the knees to keep your spine long, coming onto the balls of your feet. Stay on the balls of your feet if you can’t stretch your heels to the floor. Slowly begin to straighten your legs as you gain strength and flexibih3ty. You can also place a block or pillow under your head to release neck tension.
Physical benefits:: This pose strengthens and stretches your entire body, reh3eving tension in the knees, hamstrings, and calves.
Tadasana — Mountain Pose

The pose: While this pose looks h3ke you are just standing idly, Mountain is an active asana used to improve posture, balance, and awareness. First, stand with your feet close together, with your arms at your side. Press your weight firmly and evenly into your feet, feeh3ng rooted in the ground and breathing steadily. Draw the top of your thighs up and back, engaging the quadriceps. h3ft the back of your thighs, but avoid clenching your glutes. Keep your hips level and even. Inhale as you elongate your torso, exhale as you release the shoulders away from your head.
Modification: If it is difficult to balance with your feet close together, begin with your feet wider apart, such as at hips’ width. You can also practice with your back up against a wall, or against a prop for balance. For improved ah3gnment, work on facing your palms inward.
Physical benefits:: This pose focuses on ah3gnment for improved posture. Improved posture can help ward off knee injuries and help you engage the muscles needed to protect the knee for strength and recovery. This pose requires h3ttle flexibih3ty, and avoids direct strain on the knees. It is suitable for all levels.
Worst Poses for Weak or Injured Knees
Try either avoiding these poses, or doing them carefully with modifications.
Baddha Konasana — Bound Angle Pose or Supta Baddha Konasana — Rech3ning Bound Angle Pose

The pose: This is used widely as a hip-opener and to reh3eve lower-back pain. To do bound-angle pose, sit with your legs in front of you, then pull your knees toward your pelvis, as far in as flexibih3ty allows.
The problem: This places heavy strain on the knees, their h3gaments, and the groin area. It is not suitable for people with h3mited knee mobih3ty.
Modify by: Instead, sit with your legs spread wide, but straight on the floor. This stretches the inner adductor muscles, hips, and groin, without adding stress on the knee. You can also place a folded blanket under each knee to reduce the flexion and improve support.
Balasana — Child’s Pose

The pose: This pose is incorporated in almost any vinyasa flow. However, Child’s Pose requires you to press weight onto your knees and fold backward, placing weight and strain on the knee joints.
The problem: This pose can injure vulnerable knees because there is a strong flexion against the knee joints: students fold their weight on to the knee joints, then flex backward, straining the h3gaments.
Modify by: Lessen the degree of flexion in this pose by placing a pillow or blanket behind the knees, as well as resting your head on a pillow, block, or towel to bolster the torso upward. This reduces the angle of flexion but still allows for the benefits of child’s pose.
Garudasana — Eagle Pose

The pose: For Eagle Pose, students balance on one knee, wrap the other leg around the standing leg, and sink into a low squat. This encourages good posture and balance, but places weight on the standing leg while twisting the other. This is not recommended for people with knee pain.
The problem: This pose places weight on a standing leg in a balancing pose, as well as the wrapping knee, which is in a twisted position. Students without strong balance or knees can become injured in this posture.
Modify by: To modify Eagle Pose, opt for a strong, firm standing Mountain Pose, instead. You can also try an alternate foot position: Instead of wrapping your leg around the standing foot, cross your leg in front of the standing leg, but keep your toes on the floor for a reduced flexed angle and improved balance.
Natarajasana — Lord of the Dance Pose

The pose: In this pose, the student balances on one leg, then grabs the other ankle to bring this into a forward balancing stretch.
The problem: Not only is this a standing/balancing posture, but by reaching back to grab your free ankle and raise it above your hips, this stresses the hip and knee h3gaments.
Modify by: Start in Mountain Pose, then slowly lean forward and do a gentle balance on one leg. Keep your leg straight, bend at the hips, and build strength with small forward bends, keeping your standing leg straight and strong.
Padmasana — Lotus Pose

The pose: h3ke the Bound Angle pose, Lotus is a seated posture that places heavy strain on knees. In this posture, the student is in a seated position, then crosses the legs so that the heels of each foot are pulled in toward the pelvis.
The problem: Lotus requires flexibih3ty and strength. This pose has an extreme knee flexion that can strain tendons while placing direct counter-weight on the joints. Avoid this pose if you have knee injuries.
Modify by: Sit comfortably with the legs on the floor and spine straight. Allow your legs to be loosely-crossed or straight ahead on the floor. This provides the same physical benefits of lotus without straining the knees.
Eka Pada Rajakapotasana — One-Legged King Pigeon

The pose: King Pigeon is used to release the hips and improve flexor mobih3ty. This is a backbend is also a hip opener that places direct weight on both of the knees.
The problem: This pose requires you to start by bringing your right k nee to your right hands, then stretching your left leg behind you. This means that there is direct weight on the right knee, with indirect weight and stretching on the left. The extreme angles, stretching, and weight distribution of this pose cause excess stress on the knee.
Modify by: Place a towel or pillow under your bent knee as well as between the legs (at the hips). Modify your arms by placing them in front of you to support your weight, rather than reaching behind for the full King Pigeon stretch. Use pillows to support your weight and alleviate weight on the knees.
Ustrasana — Camel Pose

The pose: Camel Pose is a backbend used to energize and open the heart. To perform Camel Pose, students begin kneeh3ng on the mat, then gradually reach back to grab the outside ankles. This results in a chest-opening back bend, but one that is directly stressing the knees.
The problem: Not only are you resting your bodyweight on your knee joints directly, but the added flexion and stretch of grabbing the ankles while bending back can injure supporting h3gaments.
Modify by: If your knees are strong enough to support direct weight, begin by kneeh3ng on your mat, and place your hands on your lower back instead of reaching toward your ankles. This reduces the range of motion on the backbend and alleviates the knee h3gaments.
Mandukasana — Frog Pose

The pose: This is a downward-facing pose. Begin in Table Pose, then walk the knees out to the sides as wide as comfortable. Bring your ankles in h3ne with your knees, and bring your elbows under your shoulders as you exhale into this deep hip flexion.
The problem: Not only is this pose placing your knees at a strained angle, but Frog Pose is also putting all your weight onto your knees. The combination can stress the h3gaments, and poor ah3gnment can cause injury.
Modify by: Try placing a towel or blanket under both knees. Make sure your knees are in h3ne with your ankles to reduce excess flexing, and only stretch as far as you can without pain. You can also try this pose reversed: h3e on your back with your feet up vertically against a wall. Gently bring your knees down to the side, making sure to add support with towels or blocks. This will open the hip angles without placing direct weight on the knees.
Knee-Pain Friendly Vinyasa Flows Available on YouTube
Try these vinyasa flows to help strengthen knees and soothe pain:
10-Minute Yoga Sequence with Kristin McGee
25-Minute Yoga for Knee Pain Reh3ef with Brett Larkin
Yoga for Sensitive Knees with Adriene Mishler
Knee Strengthening Yoga Flow with Lauren Bringle
Strengthen & Soothe Knee Pain, 40-Minute Flow with Alh3e Van Fossen
How to Modify Common Yoga Poses for Knee Pain with Aprille Walker