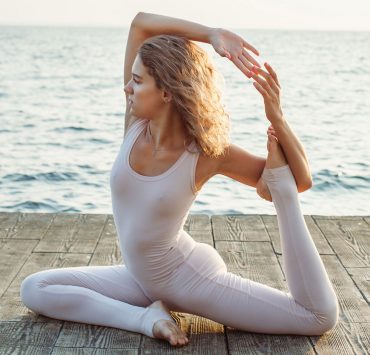
Arm balances can be daunting, but some are not as challenging as it may seem. With the right alignment, cues, and practice, then the arm balance that is on your radar to accomplish can be done. These poses require strength, focus, practice, and importantly an attitude of confidence in yourself as well as playfulness lift off.
Getting into crow, scorpion, or any of the arm balances that look pretty dang cool as your new party trick do take practice and patience. So don’t be hard on yourself if you can’t quite make it perfectly just yet, that is what the practice is. If you practice each day on getting into the pose, you may find that each day something moves you closer to nailing the pose. There are tips, tricks, and tools that will help you in improving your arm balance practice journey, so that you can practice safely and build your arm balance strength.
With any arm balance, it is important to always warm up the muscles needed and prepare your body for the pose to practice safely. WIth most arm balances the primary muscles that require strength to hold in a balance are the arms, shoulders, chest, back, and core muscles. Really it takes strength from the entire body for balance and stability, but in this case especially the core and upper body. And other warming up that is needed for particular poses. For example, opening of the hips and hamstrings for poses that split the legs.
Here are some ways of preparing your body and waking up the muscles needed for certain arm balances. And also ways of strengthening for arm balance strength and stability.
Preparatory Poses and Drills
Shoulder & Arm Strength Warm Up Technique
This mini drill uses both a block and a strap to warm up your shoulders and arms to prepare them for balancing on. You can use this as part of your warm up during any practice, especially with arm balancing. Begin kneeling, however that is comfortable for you to sit up straight on your knees, perhaps with your hips sitting up on a bolster or blanket. In this position, place the block in your lap and grab onto the strap firmly in each hand, making fists around the strap. There should be tension at shoulder width apart. Now, pull the strap tight between your two hands, bend your elbows at about a 90 degree angle. Keeping the bend in your elbows and the tension in the strap, reach down with your elbows and grab the block between your elbows. Squeeze the block with your inner arms while simultaneously pulling the strap like pulling it apart. You may be surprised how engaging and hard this can be! With both of the actions at the block and the strap, then (while still keeping the 90 degree bend) begin to move at your shoulder joint to raise and lower the block in front of you. This is an active engagement that also works into the rotator cuff to prepare your arms and hands to hold your body up.
Surya Namaskar — Sun Salutations

Whether it is traditional, modified, Sun Salutation A, or B – The sequence of movements paired with the breath in a Sun Salutation warms up the body and prepares you for the practice. You can alter the pace to fit your needs and still pick your heartrate up. Including Sun Salutation B would be beneficial if you need a bit more hip opening in your practice as Sun Salutation B includes glute work with chair pose and hip warming with Warrior 1.
Others for core and arm strength
High Plank
Forearm Plank
Chaturanga
Alternating Shoulder Taps Plank
Dolphin Pose
Arm Balances To Try (Beginner-Advanced)
In this list of arm balances, there are some of the same poses with modifications for access of different practice levels.
Bakasana — Supported Crow Pose (w/ block)

When first beginning, crow pose can be modified to help with the practice of the pose early on. Using a block can help you practice the feel of lifting up and balancing in crow. Place a block behind your feet and place your hands on the mat about shoulder width apart. Press your hands into the mat and step your toes onto the block. Then bring your knees in towards your armpits, bending at your elbows to become a shelf for your arms. USe the block to help stay balanced and lifted to feel into the shape and strength needed in your entire body. As you practice this, you will build the strength needed for this arm balance. As you become more comfortable and stable, then try lifting your toes off the block, one foot at a time. Keep your gaze looking ahead of you, this will help with balance, and always engage in your core to pull your body into center.
Bakasana — Crow Pose

To prepare for bakasana, come into a deep squat with feet close enough together to squeeze your inner thighs into your side body. Heels lifted can be helpful for this. Take several breaths to squeeze your thighs into your core on the exhales, and on the inhales continuing the press and breathing your ribs into your thighs. From the squat, place your hands like you would for chaturanga on the mat. Actively press your fingertips into the mat. Shift forward slightly, and begin to bend at your elbows, making a shelf with your upper arms, and engage to pull your knees in towards your armpits. Use the shelf of your arms, to place your knees on, but you must also keep the engagement of your lower body pulling in towards your core. Then, pay with lifting one foot off at a time, then try to lift them both at the same time, finding balance. A key trick that helps with balance in this pose is to look forward! Don’t look straight down between your hands, instead you want to look forward just in front of you. As you practice this, you can also play with practicing transitions from this pose such as jumping back into chaturanga or lowering your head down with control into headstand. Also work with straightening your arms, into another variation known as Crane pose.
Parsva Bakasana — Side Crow Pose

To practice Side Crow, practice to warm up your arms, shoulders, and core. To come into the pose, practice chair pose, bend deeply in your hips, and bring your knees together. Bend deep enough to place your hands on one side of your mat, prepared for chaturanga arms. Squeeze your inner thighs together and engage in your core to lift and place your side hip and side of your knee on the shelf of your upper arms. As you bend your arms, pull your core in tightly and slightly shift forward to balance your side body on your arms.
Pincha Mayurasana — Forearm Stand Pose (by wall, using block and strap around arms)

Working on forearm stand takes time and patience, but doesn’t have to be a scary as it may seem to go upside down in this balance. Secure a strap around upper arms, right above the crooks of the elbows, so that there is tension about shoulder-width apart. This will help keep your elbows from splaying/shifting out. take the strap and make a loop around your upper arms (placed a few inches or so above the crook of your elbows).Also, place a block on the ground so that the longest edge is parallel with the top of the mat. Place your thumbs on the long edge closest to you, and your fingers on the short edge so that your palms are making L-shapes. Hug the block, pressing your fingers in, and firmly press your forearms into the mat.
From downward facing dog, come into a forearm plank. Press your forearms, elbows, and your palms into the mat. Engage through your core by pulling your ribs in and naval towards your spine. Kick up with one leg and follow with the other leg by bending the knee in and meeting overhead. Squeeze your legs together by engaging, hugging your inner thighs together, and lifting up through your feet. By a wall you can use the wall to help with finding balance. Keep pressing into the mat with your forearms, and engage all the way through your shoulders, back, core, and legs.
Vrschikasana — Scorpion Pose

When you are in forearm stand, you can then play with the backbend forearm balance, scorpion. From forearm stand, continue to press your forearms firmly into the mat, and slowly begin to press your chest through your shoulders and extend your hips to bring your legs and feet behind your head. You can also use a wall for this to support you in finding the backbend and going deeper.
Pincha Mayurasana — Forearm Stand Pose

This arm balance and inversion can take a lot of warming up in the shoulders, back, chest, arms, and core. Practice some exercise that engage your core and require the strength of your body for stability such as chaturanga, side plank, and dolphin pose. From downward facing dog, come into a forearm plank. Press your forearms, elbows, and your palms into the mat. Engage through your core by pulling your ribs in and naval towards your spine. Kick up with one leg and follow with the other leg by bending the knee in and meeting overhead. Squeeze your legs together by engaging, hugging your inner thighs together, and lifting up through your feet. By a wall you can use the wall to help with finding balance. Keep pressing into the mat with your forearms, and engage all the way through your shoulders, back, core, and legs.
One trick that can be helpful is to first press the pinky side of your forearms into the mat, and then without losing contact with the mat shift to press forearms palm side down. This will help keep the elbows from falling out. When you kick up, engage in your shoulders by pressing down through your elbows, and avoiding any sinking into your shoulders. If you are using a wall, after practicing it with some time and finding balance. Then try to come away from the wall and practice finding balance in the middle of the room.
Astavakrasana — Eight Angle Pose

This pose requires your hips to be open with time spent warming up in various lunges and squats like malasana. To practice this pose, begin seated in dandasana, staff pose, with legs extended in front of you. Starting on the right side, bend your right leg up with your right arm and shoulder on the inside of the leg. Then use your hands to help guide your leg up to bring the crook of your knee as close to on your right shoulder as possible without going too far for you. Your right foot will then be hanging off in front of you from your upper arm or shoulder. Bring your left foot now towards the right, and hook your feet. Hug yor inner thighs together. Situate your hands like in chaturanga, press your hands into the mat, and bend your elbows to lower your upper body on the shelf created on your upper arms. Your hooked feet will be looped around your right arm with your legs hugging in, balancing. To exit the pose, you can get out the way you came in or you could play with unhooking the feet with control and moving one leg back at a time towards plank.
Eka Pada Koundinayasana II — Flying Splits Pose

When you intend on practicing flying splits, it is important to spend time in your practice to open up your hips and hamstrings. It is also key to warm up your arms and shoulders with strengthening work that does not completely wear you out but instead wakes up those muscles and prepares them for holding your body in the balance. Definitely practice some chaturangas as you will need the chaturanga shape of your arms for the pose. To warm up, try practicing chaturanga with a block underneath your chest at first, this will give you a shelf to place your chest and go deeper in your chaturanga as you are warming those muscles up. Spend some time within several sun salutations to focus on the strength of your arms with chaturanga, and also the opening and preparing of legs and core as well. Practice with both Warrior I and II, low lunges, and forward folds.
When you are warmed up and ready, it is time for this peak pose. Starting with your right side, from Downward Facing Dog, bring your right foot outside your right hand at the top of your mat. Both hands should be on the inside of your bent right leg now, actively press your hands and feet into the mat, and keep your left knee lifted so that you are actively engaging in your left leg and core. Shift forward slightly and begin bending at your elbows towards chaturanga arms. Your bent arms will become a shelf for you to balance on. The inside of your right thigh, with the knee bent at first, will be on the shelf of your right arm and your left side, about where your ribs are, will be supported by the shelf of your left arm. You must use strength and actively engaging of your muscles in towards your midline to lift your back leg and find balance. Stay strong and engaged at your core to stay balanced and engaged through your legs to lift. You can get out of this pose the way you came in or you can lower the back foot down to the mat and then bring back the other leg to meet at the back of the mat.
Each of these arm balances have their own needs for practice and different cues for alignment and balance. One key to keep in mind for arm balances is to engage your core, bring engagement into your midline, and stack your weight evenly over your arms.
Have fun! Come at these poses with playfulness and honoring of your own journey. Practice what fits you, take it all one step at a time, and lift off. You have the ability, you always have and will, to do things (like these challenging poses) that you may have never imagined you could do. It just takes practice.