Handstand, or Adho Mukha Vrksasana, is one of those poses that draws attention and evokes sincere admiration for anyone capable of holding the shape. It demonstrates the tremendous level of strength, control, and discipline needed to push fear aside and take flight. Besides being incredibly demanding physically, the posture also requires flexibility of mind with consistent trial and error. Accepting that you’ll likely not be successful right away and that toppling over is inevitable is an excellent place to start. It’s about acknowledging what makes you fearful and moving past it. Explore some safe ways to exit handstand that don’t make you cringe and warm up to the idea of shifting your perspective upside down. Listed below are ten accessible yoga poses and exercises that will prepare you mentally and physically for handstand.
Warrior III

If you seek to uncover success in Handstand, it’s essential to familiarize yourself with the core stabilizer muscles and become comfortable finding balance. Warrior III, or Virabhadrasana III, is fantastic for cultivating a strong mentality surrounding physical stability and strengthening various muscle groups. Begin standing upright with arms by your sides and take a deep inhale. On the exhale, bring weight into your right foot and raise both arms overhead with hands facing inward. Hinge at the waist and begin to bring the upper body and back leg parallel to the floor. Continue breathing with the gaze softly focused directly below and the inner thighs drawing together. Feel and breathe into the long line of energy extending from fingertips through the back foot. After several rounds of breath, inhale to come back up with a straight spine and exhale the arms down by the sides.
Downward Dog

It’s no secret that handstands require a substantial level of strength and flexibility in the arms and shoulders. Postures like Downward Dog, or Adho Mukha Svanasana, take the arms overhead, stretching the lateral muscles, upper back, and shoulders. Come to a tabletop position and walk the hands forward slightly while tucking the toes. Notice your hands and make sure fingers are spread wide to provide a stable, supportive base. On an inhale, lift the knees to hover and then exhale the hips up and back while working the legs towards straight. Let the head and neck go heavy while continuing to draw the feet isometrically towards the hands. Allow the knees to maintain as much of a bend as necessary while tipping the tailbone up. Continue to breathe here for several cycles of breath while inviting any movements that feel appropriate, perhaps moving the hips side to side or pedaling out the feet.
Mountain Pose

One of the most fundamental elements of mastering a handstand is developing proper alignment. Tadasana, or Mountain Pose, encourages healthy posture and supports and lengthens the spine while increasing body awareness. It may appear to be a simple standing pose, but there’s a great deal of muscle engagement and activity in all parts of the body. This intricate stacking of the body is the same configuration required for handstand and provides a solid foundation for your inversion. Begin standing upright with feet firmly rooted at hips distance and arms by your sides. Engage the legs, draw up from the pelvic floor, and rotate the thigh bones inward to broaden through the sit bones. Follow the natural curve of the spine while stacking the shoulders over the pelvis and decompressing the shoulder blades down. Take five to ten deep breaths while maintaining this elongated and engaged posture.
Dolphin Pose

Dolphin pose stretches and strengthens all the muscles necessary for creating a stable base in a handstand. Starting in downward facing dog, lower the forearms down and walk your toes in as far as possible. Relax the head and neck while engaging the arms and broadening across the shoulders. Props, such as blocks or straps, can prove helpful to keep proper alignment in the arms. Try wrapped a strap tightly above the elbows or holding a block between the hands to keep the arms at shoulders distance. As you begin to feel more stable in dolphin, you can start incorporating exercises to prepare the body for handstand. From your dolphin pose, slowly lift and lower one leg at a time while maintaining the integrity of balance within the hips. Another exercise to explore from dolphin includes drawing each knee in towards the opposite elbow while engaging the core and rounding the spine.
Standing Forward Fold

Standing forward fold, or Uttanasana, presents space in the lower back and hamstrings that make handstands more accessible. Open hamstrings provide ease when kicking up and lowering down from your inversion. From mountain pose, bring feet to hips distance and fold forward with the spine straight on an exhale. Several variations are available for the arms, including grabbing opposite elbows or letting them drop heavy to the floor. Keep a soft bend in the knees to allow more significant release in the lower back and take any movements that feel appropriate. Swaying side to side or front and back can help alleviate any unnecessary tension.
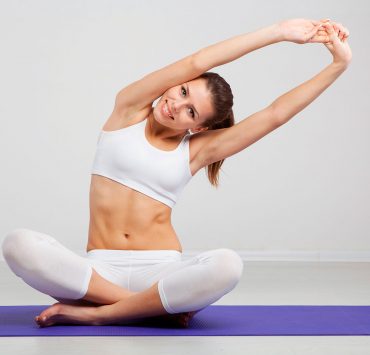
Boat Pose

Boat pose is a highly effective posture for toning core muscles and strengthening the lower back, both necessary elements for handstand. Begin seated with knees bent and feet flat on the floor. Bring your arms straight out with palms facing and start to shift weight back until you reach a balancing point on or behind the sit bones. Stay open in the chest by lengthening the spine as your feet rise off the ground. Several variations can be taken with the legs to make this posture either more accessible or more challenging depending on skill level. The most difficult option is with legs straight out into a full boat, or you may choose to modify with bent knees and shins parallel to the floor. Adding in russian twists or straight-leg lifts offers extra strengthening for the core.
Shoulder Openers
It’s no secret that the shoulders need to be durable to sustain a handstand, but there also needs to be an element of flexibility. Open joints will help prevent injury while producing some ease amidst a challenging pose. There are several efficient ways to strengthen and stretch the shoulders. It’s essential to display patience with your body as you soften into the shoulder muscles. Below are three exercises that bring space through different areas of the shoulders.
Cow Face Arms

Raise your left arm straight up beside your head with the palm facing in. Bend your left arm on an exhale to let the hand rest palm facing down on the back. Extend your right arm straight out to the right with the palm facing back on an inhale. On the exhale bend at the elbow and bring the right hand to your back with palm facing up. Start to work the fingers towards each other, using a strap if necessary, until you’re able to hold on comfortably. Drop your head back into the left arm and continue to breathe into the softening of the left shoulder.
Eagle Arms

Eagle arms bring awareness to the space between shoulder blades and support a greater range of motion across the upper back. Bring your left arm in front with a bend in the elbow, making an L-shape. Cross the right arm under the left, meeting at the elbows, and attempt to find a bind with the hands. If taking the palms together doesn’t feel accessible, let the backs of the hands meet and work from there. With each inhale imagine the shoulder blades drawing apart and creating space in the center of the back. On every exhale feel the shoulders soften down the back and release any trapped tension.
Thread The Needle

Come to a tabletop position with knees stacked under hips and wrists below shoulders. Start to slide your left hand under the right arm with palm facing up until you can drop the left cheek and shoulder down to the mat. There are several ways to deepen the stretch from this position including moving the right fingertips forward or extending the right leg either to the side or straight behind. With each exhale let your weight release into the left shoulder and focus on softening all the surrounding muscles.
Plank Pose

Planks may be dreaded, but they’re highly beneficial for strengthening all the muscles needed to balance on your arms. The wrists are often overlooked when it comes to strengthening, but we place a lot of weight on them during handstand. Plank pose brings awareness to the wrists and prepares them to take on the weight of the body during handstand. Start on your knees with toes tucked under and both hands directly under the shoulders with fingers spread wide. Straighten one leg out at a time while lifting with the back of the knees. Hug the belly in and up while drawing the tailbone towards your heels to activate the core muscles. Press firmly through the hands to broaden the upper back while continuing to engage the legs. Add in some leg lifts or side planks to further heat things up.
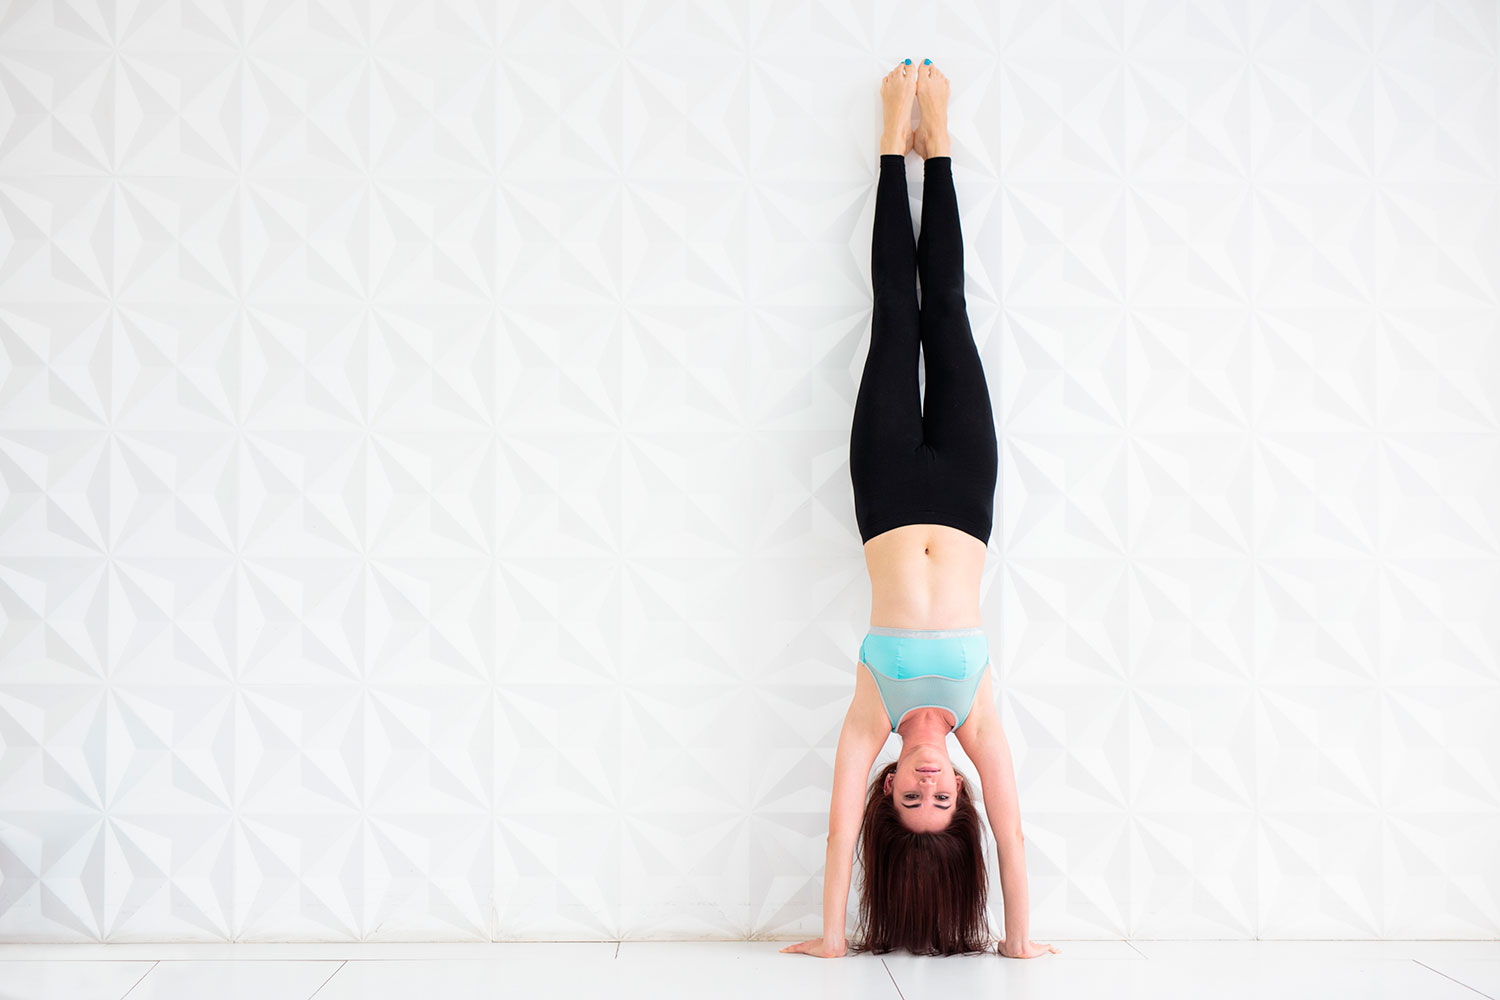
L-Shaped Handstand

As you begin to feel comfortable with bringing weight to the hands, start playing around with letting both feet leave the ground. L-shaped handstands are a great way to test our stability while offering an easy exit if things get wobbly. From a forward fold, firmly plant both palms down and lengthen the spine out. Inhale one leg up and gently hop off the other foot until you find an L-shape with the legs. Flex through both feet to engage the legs and try to keep the balance for as long as you can. This effort will likely take several tries and feel quite awkward at first. The feeling of both feet leaving the ground can be intimidating, but trust your body and have a clear dismount in mind. Maintain patience and understanding that the pose will become accessible when the body’s ready to support it.
Standing Split

Finding comfort during balancing postures is a fundamental part of maintaining handstand. Standing splits are great options for stimulating stability while increasing leg strength and flexibility to prepare for flight. Beginning in a standing forward fold, lift up halfway with fingertips on the ground and exhale weight into your left foot. On the next breath in, extend the right leg up while internally rotating the thigh bone. Exhale and fold over your standing leg while bringing one or both hands to the grounded ankle. Continue to lift through the right heel while focusing on keeping the hips balanced rather than opening them to increase the height of the raised leg. If you’re feeling tight in the legs, try starting with blocks under the hands.