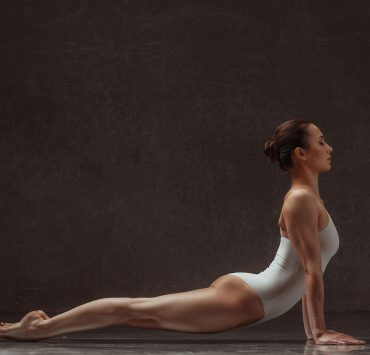
Cow Face Pose, or Gomukhasana, is a wonderful asana that activates the body from the head to the toes. This seated posture works both the upper and lower body, making it perfect for anyone looking to work on their flexibility. While the full expression of this intermediate pose does require flexible shoulders and hips, the pose can be modified to fit your body’s specific needs, so it is available for anyone who wants to practice it and access the full range of benefits.
Benefits of Cow Face Pose

Gomukhasana offers a wide range of benefits not only for the body, but for the mind as well. Since it activates the entire body, it provides wonderful physical benefits, particularly in terms of stretching the muscles. However, the stillness of the pose offers mental benefits as well. These physical and mental benefits include the following:
- It provides a deep stretch in the shoulders, neck, arms, and chest, as well as the hips, ankles, and thighs.
- It strengthens the spine.
- It provides relief for stiff shoulders, and can also help with backaches.
- It can provide relief for those suffering from sciatica.
- It can relieve stress and mental tension, especially when paired with a pranayama
Prep Poses
Cow Face Pose isn’t as easy as it may look, so in order to be as safe as possible, it is important to make sure you are physically prepared for it before trying it out. Since Gomukhasana works the arms, legs, chest, and back, it is smart to practice a few prep poses before diving into the asana. The following poses will help warm up the body and physically prepare you to try out the full expression of Gomukhasana.
Surya Namaskar A — Sun Salutation A Pose

Doing a few rounds of Sun Salutation A, or Surya Namaskar A, is a great way to energize the mind and warm up the body for any physical activity you choose to take part in. It is particularly beneficial for targeting the arms and back, making it an ideal prep pose for Gomukhasana.
Instructions:
Start in Mountain Pose (Tadasana) at the front of your mat. Move to Upward Salute (Urdhva Hastasana), and dive down into Forward Fold (Uttanasana). Lift your torso up into Half Forward Fold (Ardha Uttanasana), and then fold back down and move into Plank Pose. Move through your Vinyasa, and push back to Downward Facing Dog. To finish Sun Salutation A, you will move through Forward Fold, Half Forward Fold, Forward Fold, Upward Salute, and then end in Mountain. Repeat the series of postures two to three times.
Ardha Matsyendrasana — Half Lord of the Fishes Pose

Half Lord of the Fishes Pose, or Ardha Matsyendrasana, really helps target the back to prep for Gomukhasana, as it lengthens, strengthens, and realigns the spine. The twisted element also helps to release any tension, and the legs and hips get a nice stretch as well.
Instructions:
Start in a seated position. Bend your right leg and bring your right foot alongside the outside of your left hip, with your leg fully on the floor. Bring your bent left knee over your right, with the sole of your foot fully on the ground by your upper right thigh.
Elongate your spine, and then twist your torso and shoulders over to the left, placing your left hand on the ground behind your glutes. Bring your right arm up, bend at the elbow, and then place it along the outside of your left thigh, with the lower half of your arm extended up. Bring your gaze over your left shoulder. Stay in this pose for about 30 seconds, lengthening on each inhale and twisting further on each exhale. Release and repeat on the opposite side.
Baddha Konasana — Bound Angle Pose

Bound Angle Pose, or Baddha Konasana, helps prep the lower body for Cow Face Pose. It opens up the hips, while stretching the groin muscles and inner thighs.
Instructions:
Start seated, with your legs out in front of you. On an exhale, bend your knees and bring your feet towards you. Place the soles of your feet together in front of your pelvis, letting the outside edges rest on the mat.
Allow your knees to drop to either side at a comfortable level. Do not force them down so that they are touching the ground—let them hang in space if that is what is accessible. You can add blocks underneath your knees if you would like. Grab hold of your feet, and bring them as close to your pelvis as comfortable, while still keeping them on the ground.
Breathe through this posture, ensuring that your spine remains elongated and shoulders relaxed. Hold for about a minute, and then release back to a comfortable seated position.
Paschim Namaskarasana — Reverse Prayer Pose

Reverse Prayer Pose, or Paschim Namaskarasana, is a heart-opening arm pose that stretches the shoulders, chest, arms, and wrists, making it the perfect upper body stretch to prep for Gomukhasana.
Instructions:
Begin seated, either with your legs crossed or on your knees. You could also stand with your feet hips width distance apart.
Elongate through your spine and roll your shoulders back. Move your arms behind your back, and begin to bend at your elbows so that you can bring your palms together, approximately between the bottom of your shoulder blades. The outside edge of your little fingers will be pressing into your back, allowing your fingertips to point up. Hold the position for approximately 30 seconds, and then slowly release.
Dhanurasana — Bow Pose

Bow Pose, or Dhanurasana, is an intense backbend posture that targets the shoulders, back, and quadriceps, helping to even further prepare for Cow Face Pose.
Instructions:
Start by laying on your stomach. Bend your knees and bring your heels towards your glutes. Reach back for your outer ankles, with your palms facing in. Actively drive your ankles up and towards your head, while simultaneously lifting your head and heart towards the ceiling and back towards your toes.
Hold this pose for about 30 seconds, while focusing on keeping your feet and ankles touching, and shoulders away from you ears. Gently let go of your ankles and slowly release back down to your stomach.
Step by Step Instructions for Cow Face Pose

Once you have practiced the above poses and feel adequately warmed-up, you can move into Cow Face Pose. There are a few modifications that will be outlined below, but these steps will walk you through the full expression of Gomukhasana.
Instructions:
Start seated on the floor, with your legs extended out in front of you and your spine elongated. Place your hands on either side of you, and bend the right leg in towards your torso. Cross it over your left leg, so that the heel of your right foot is at the side of your left hip and your right knee is slightly pointing out. From there, bend your left leg and bring the heel of your left foot to the outside of your right hips. The outside of your left leg should rest on the ground. Work to align your knees so that they are stacked over each other.
Once your legs are in place, reach your right arm up towards the sky and bend it behind your back, so that your hand is between your shoulder blades. Bring your left arm to the side and bend your elbow so that your hand is behind your back, below your right hand.
Try to hook your hands together behind your back. If you are unable to do this, you can use a strap to make up that extra length. Hold the pose for about 30 seconds to a minute, being mindful that you are keeping your spine straight and breathing deeply. When you are done, release and repeat on the other side, switching the legs as well. Both sides can be different, so you may find that you only need the strap on one side.
Modifications
If you have some difficulties with the above version of Gomukhasana, try the below modifications to make it more accessible for your body.
- Strap:As mentioned above, you may need to use a strap to make up some length if your hands can’t reach behind your back. Place your strap in the hand that reaches up towards the sky, so that the excess length extends down for your opposite hand to grab once the top arm is bent. You may find that one side needs a strap, and that you can reach without it on the other.
- Block:If you are experiencing knee pain, a block can help you take off some of the tension on your knees. Simply place a block underneath your sitting bones, leaving it on the lowest height. Sit on the block with your legs in the full expression as outlined above, and move into the pose.
- Mat or Blanket:If your ankles are uncomfortable, use an extra mat or blanket to add some cushioning. Simply add the prop on top of your mat, and move into the pose as usual, with any of the above props if needed.
Try out Gomukhasana if you are looking to stretch the entire body while accessing some stillness in the physical body and mind. It is great to practice as part of your yoga routine or on its own, but ensure that you are properly warmed up before moving into the asana.