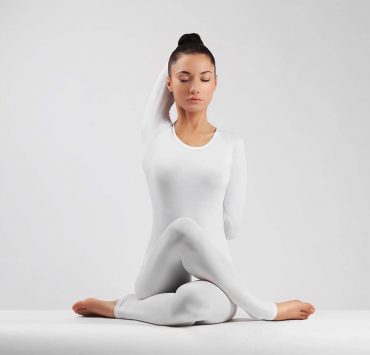
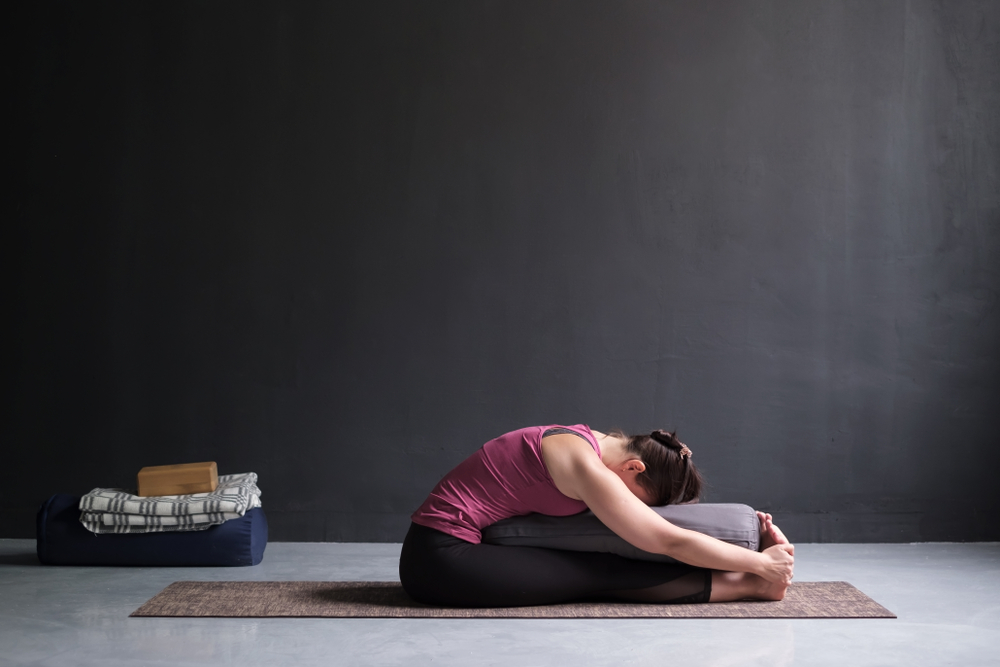
Yoga can be a relaxing activity. Especially when you practice yoga asana variations with a yoga pillow or bolster. This yoga prop can help bring you deeper into a pose by allowing you to relax completely and let gravity do most of the work for you.
And with other creative uses of a yoga bolster, it can also help pump up your heart rate and make you get a more active workout when practicing yoga too. It’s all in how you use the prop for your personal practice.
The Invention of The Yoga Pillow or Yoga Bolster
Yoga props were made popular by BKS Iyengar, who was a student of the father of modern yoga, Krishnamacharya. Iyengar became known for his therapeutic approach to yoga asana and emphasis on proper alignment. He encouraged the use of various props to help yoga practitioners of all body types and movement capabilities to find support in any pose and ways to go deeper into different asana.
In Iyengar’s day, yoga props were improvised. Instead of the mass-produced rubber yoga blocks that may be found today, he would use wooden blocks or even a telephone book. He used cotton ropes instead of yoga straps, and would even find uses for stairs and chairs to help his students in different yoga poses, depending on their needs.
Although Iyengar did not personally invent the yoga pillow, his contributions to modern postural yoga and the use of props helped find ways to standardize the use of this versatile prop in different yoga classes.
Varieties Of Yoga Pillows
There are a few products marketed as yoga pillows today. Here are some you may come across and what they are used for.
Rectangular and Round Yoga Pillows – These yoga pillows are big enough to sit on and are normally used for meditation. They are firm but still comfortable for your seat to stay still for extended periods of time.
Yoga Bolsters – These are long pillows which can be used in a variety of ways in different styles of yoga classes. They may be rectangular in shape or sausage-like. You can lie down on them, stand on them, or even lay them on top of you. They usually have a cloth handle on one or both ends to move around easily.
If you don’t have a bolster available, you can creatively use any pillow you have at home or folded blankets and towels instead.
Using Yoga Bolsters
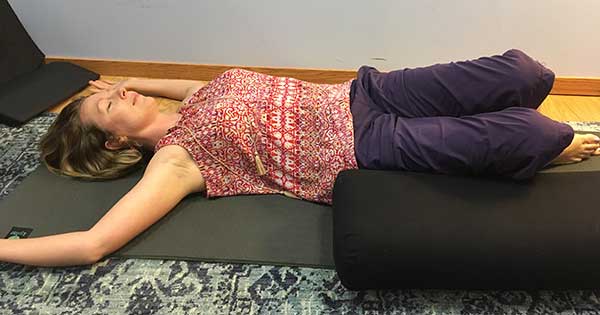
Iyengar Yoga classes usually start with lying over blocks or bolsters while waiting for the teacher to enter the room and begin the session.
The placement of the blocks or pillows are usually on your upper back and behind your head as you lay down. This allows your chest to expand and your whole body to relax as you wait for class to begin.
But a yoga pillow is not only used for relaxation. Here are other ways you can use this prop in a yoga class, from activating, dynamic poses, to relaxing and restorative yoga practices.
10 Ways To Use A Yoga Pillow
Activating Poses
Using a bolster in these poses will challenge your balance and push you to engage your core muscles more. You will need focus and coordination to practice the variations of these yoga asana with a yoga pillow.
-
- Vyaghrasana – Tiger Pose variation
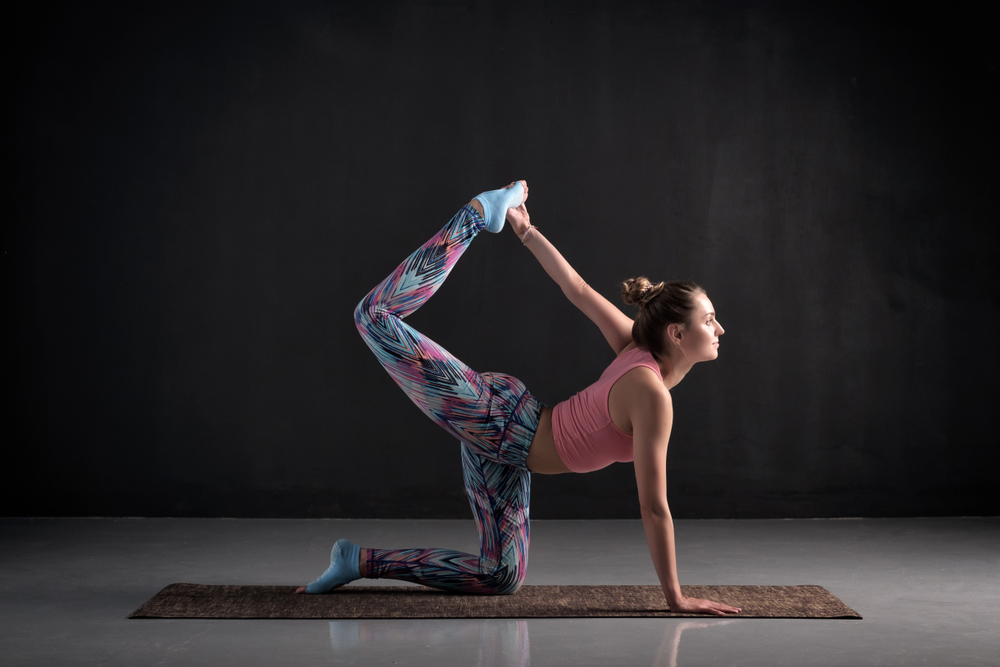
- Practice a few rounds of Cat-Cows on your mat to warm up your spine.
- Place the bolster in the center of your mat parallel to the long edges.
- Go onto all fours with your left hand on the upper left edge of the bolster and your right knee on the lower right edge.
- Maintain your balance as you lift your left leg and keep it on the same line as your torso. Point your toes.
- Further challenge your balance by lifting your right arm, also in the same line as your torso.
- Keep your neck relaxed and gaze towards the top of your mat or a few inches above it for concentration.
- Hold the pose in this line or challenge yourself further by reaching back to grasp your ankle or foot from behind as you create a gentle backbend in your spine.
- Rest in Balasana, or Child’s Pose, beside the bolster before repeating the pose with the opposite leg and arm.
-
- Natarajasana – Lord of the Dance variation
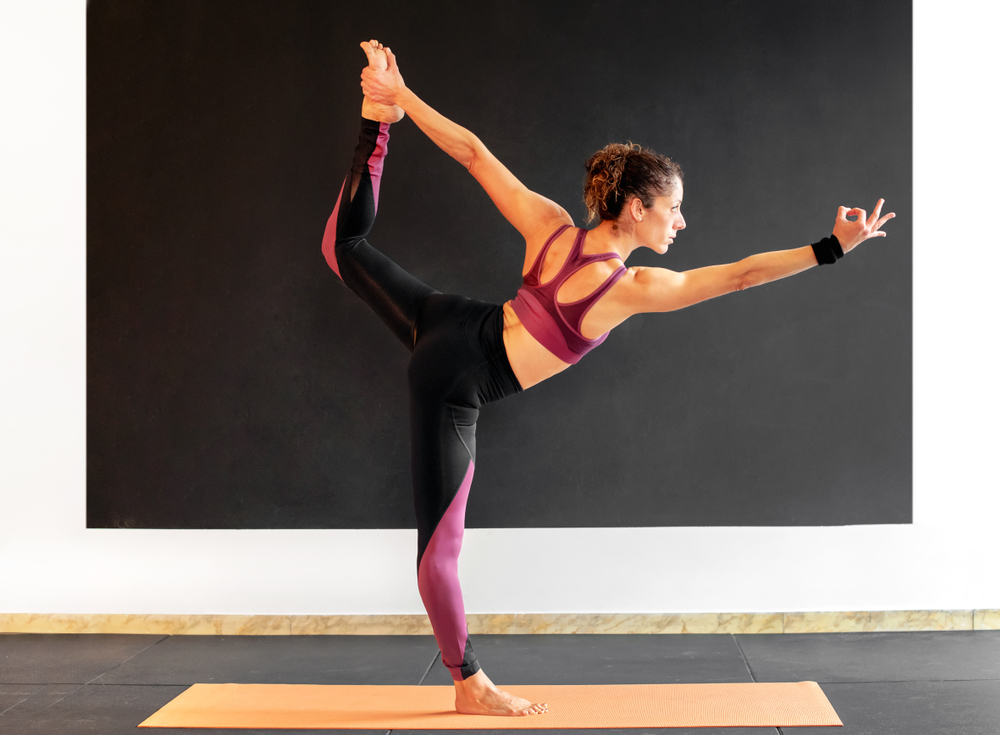
- Stand in the center of your bolster.
- Find a spot directly in front of you and softly fix your gaze there.
- Carefully bend your right knee and bring your heel towards your buttocks.
- Reach for your right ankle with your right hand from behind.
- Raise your left arm with your fingers pointed up towards the sky.
- Very carefully and slowly kick your right leg back and up.
- Keep your balance by engaging your core and activating your thighs with a micro-bend in your knee.
- Reach your left hand towards the front while your right leg reaches up to create a backbend.
- Slowly release the pose, maintaining balance and equilibrium.
- Stand in Tadasana (Mountain Pose) to the side of your bolster before repeating the pose with the opposite hand and foot.
-
- Virabhadrasana III – Warrior 3 variation

- Stand in the middle of your mat with the bolster in your hands.
- Use the handle of the bolster to carefully swing it over your head and onto your back.
- Tilt your body forward to give the bolster a bit of a shelf on your back and run your arms alongside it to keep it in place.
- Keep your gaze a few feet in front of your mat and square your hips.
- Ground yourself on your left foot with a micro-bend in your left knee. Engage your left this and core muscles.
- Lift your right leg as you tilt your torso even more. Create a flat shelf for the bolster — in other words, make a “T” shape with your body.
- Lengthen your arms reaching behind you to help maintain balance.
- The bolster on your back will help you to keep your hips square in this balancing posture.
- Release the pose by bringing your arms to hold both sides of the bolster again as you come back to standing.
- Remove the bolster from your back and stand in Tadasana to reset.
- Repeat the pose with the opposite leg.
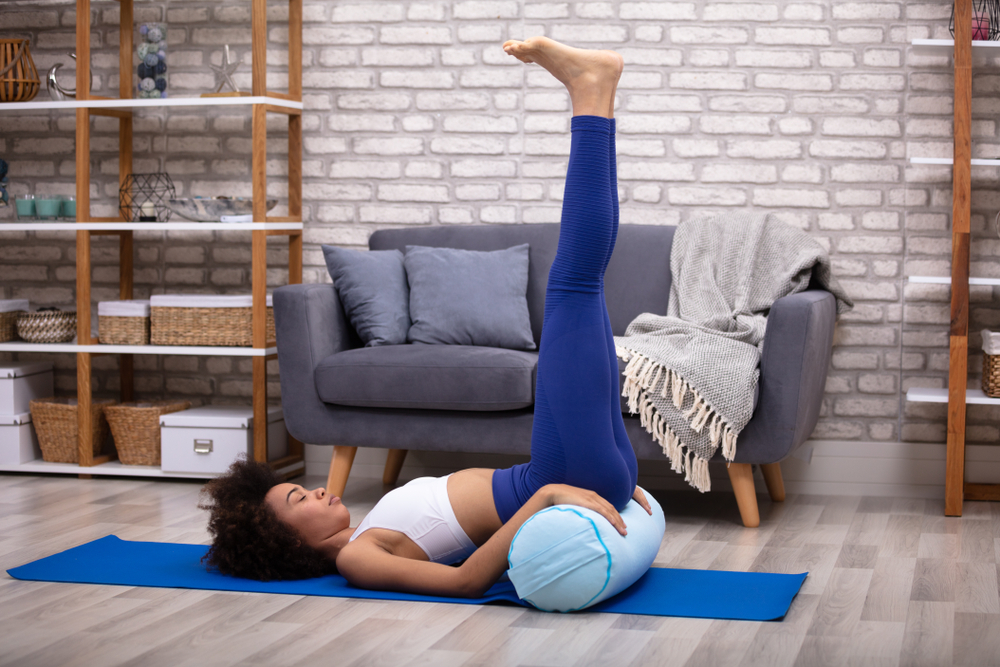
- Place your bolster on your mat with a block at the top. Lie down on the yoga pillow lengthwise and ensure that your entire spine is supported. Rest the back of your head on the block.
- Engage your core muscles to keep your balance.
- Raise both your arms above you with your fingers pointing towards the ceiling.
- Bend your legs so that your knees are above your hips and your ankles are in the same line as your knees (rather than towards the ground). Take a long, deep inhale in this position.
- As you exhale, extend your left leg forward — keeping it at a 45-degree angle off the ground. At the same time, extend your right hand over your head, beside your ear. (Keep the left hand reaching for the sky.)
- On your next inhale, bring your left leg and right arm back to the first position.
- Exhale and repeat the leg and arm extension on the opposite side.
- Do this for a few rounds and then roll off the bolster to rest in Savasana or Balasana on your mat.
Yin Yoga Poses
Yin Yoga style encourages you to use as many props as necessary to support your body in certain poses so that you can remain in them for 3 minutes or longer. Not all poses in Yin Yoga are practiced in complete relaxation, although the practice is never heat-activating and focuses more on the soft tissues of your body such as the ligaments, joints, and fascia.
-
- Salamba Setu Bandhasana – Supported Bridge Pose

- Place your yoga bolster crosswise in the middle of your mat.
- Lay on your mat with the bolster positioned under the small of your back. (Towards your buttocks rather than on the spine of your lower back.)
- Either bend your knees to rest the soles of your feet on the ground, or extend your legs out.
- If you do the extended leg version, you may place a second bolster under your legs.
-
- Reclining Heart Opener – Supported Bridge Pose variation
- Place your bolster lengthwise in the center of your mat.
- Lie on the bolster with your buttocks on the ground and your torso and head supported by the bolster. You may need to place a smaller pillow or rolled up towels underneath your head for a more comfortable position.
- Extend your legs or bring the soles of your feet together and allow your knees to open up to the sides in a Baddha Konasana or Butterfly position.
- Relax your arms by your sides.
-
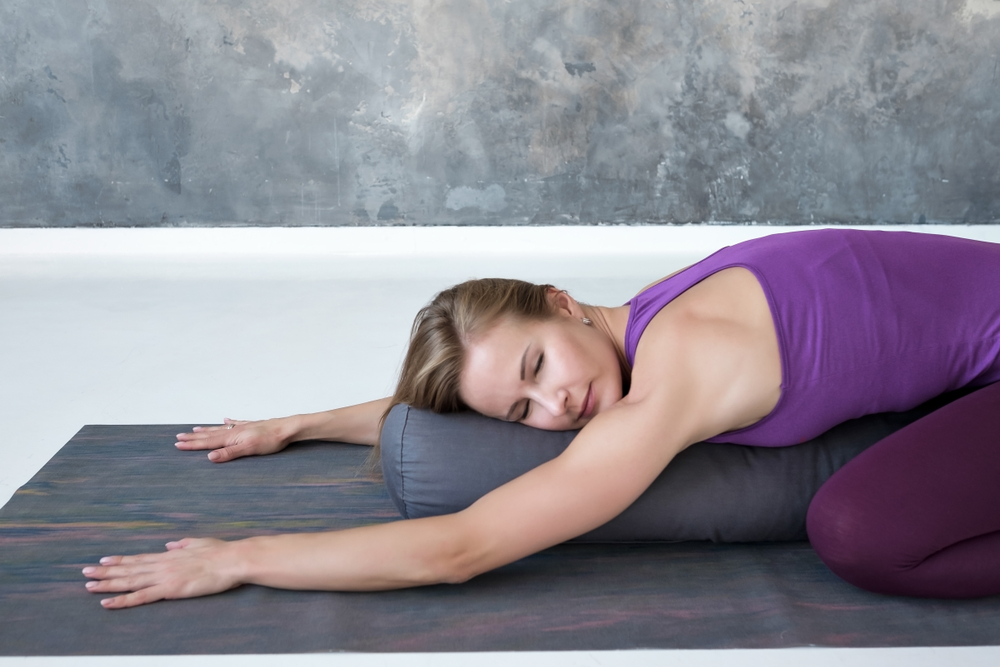
- Kneeling Meditation
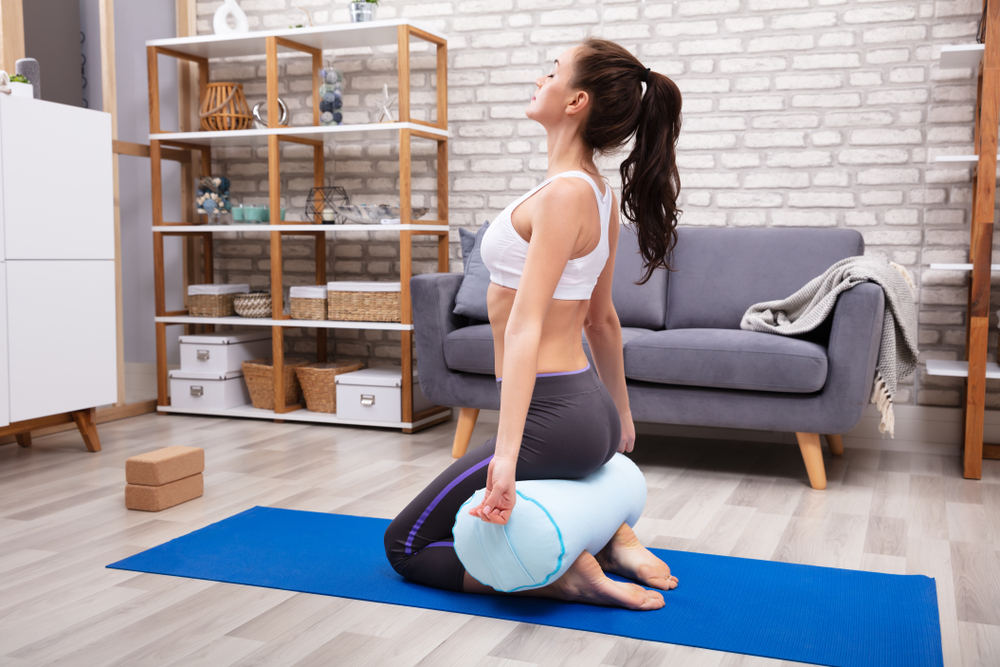
- Kneel on your mat with the bolster under your seat and your legs on either side of the yoga pillow.
- You may want to stack more bolsters on top or some folded blankets to adjust the height as needed.
- Check that your weight is distributed comfortably between your seat and your lower legs — not too much weight on your knees.
- Rest your hands on the bolster between your thighs.
- Close your eyes and meditate.
Restorative Yoga Poses
Restorative Yoga classes are designed to be deeply relaxing. Placing a yoga bolster beneath you helps to cushion your body and provide support so you can be comfortable. You may also place a big towel or blanket over your mat for more warmth and soft areas to lay down on while practicing this style of yoga.
-
- Reclined Twist with a Bolster
- Lie down on your mat and hug your right knee towards your chest.
- Release your right arm to stretch outwards to the right and pull your right knee across your body with your left hand.
- Place a bolster or yoga pillow underneath your leg to support it as you twist.
- If your right shoulder remains on the ground, look over towards your right fingertips. If your shoulder is off the mat, keep your neck neutral by gazing up towards the sky.
- Release and reset your body in Savasana and repeat the reclines twist on the opposite site.
-
- Viparita Karani – Legs up the Wall Pose
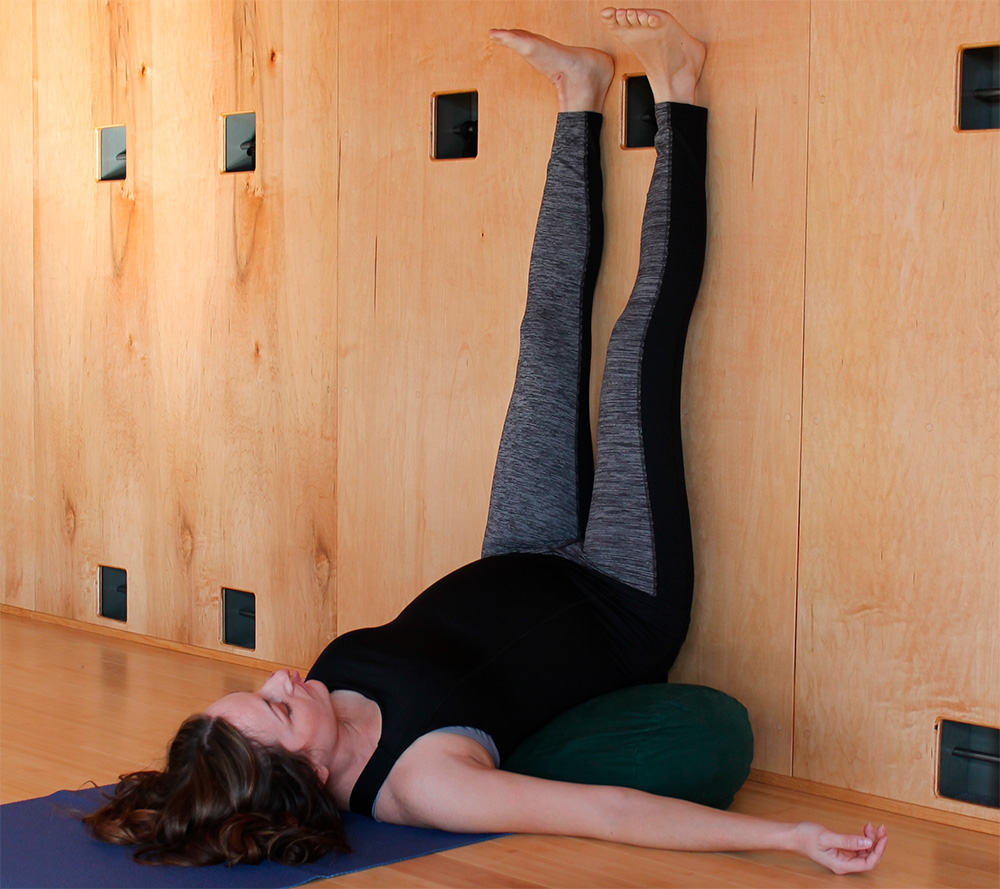
- Position a bolster by a wall lengthwise. Ensure there’s enough leg and arm room on both sides of the bolster for ease of getting into and out of the pose.
- Lay on your side with your buttocks on the bolster while touching the wall.
- Slide your legs like windshield wipers up the wall so your body forms a 90-degree angle.
- Adjust the pillow as needed.
- Outstretch your arms towards your sides and relax.
- You may loop a yoga strap around your legs to prevent them from falling open as you keep them up on the wall.
-
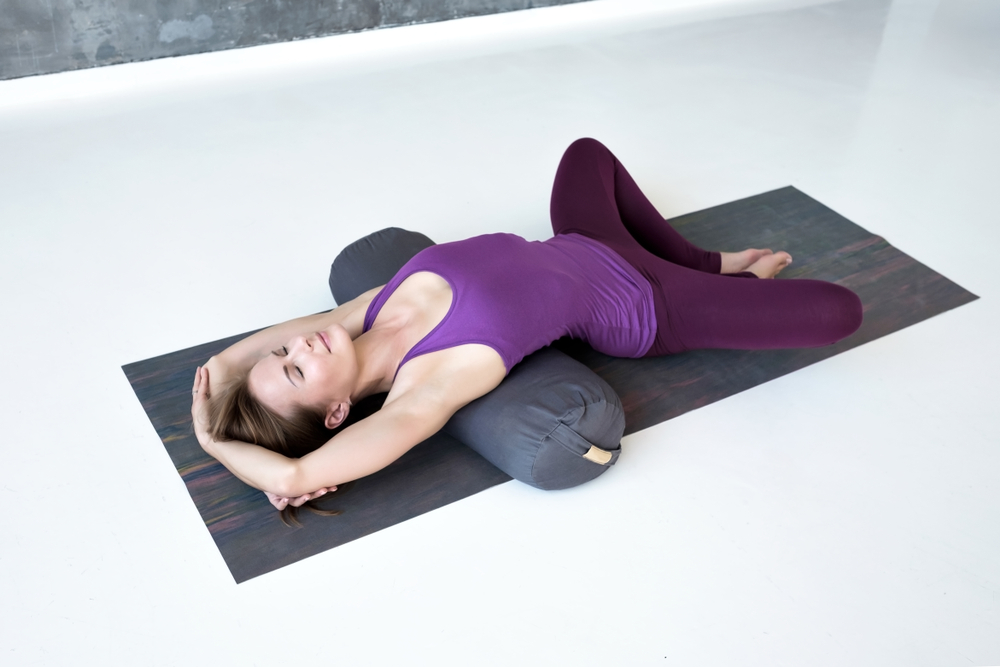
- Savasana – Corpse Pose or Final Resting Pose
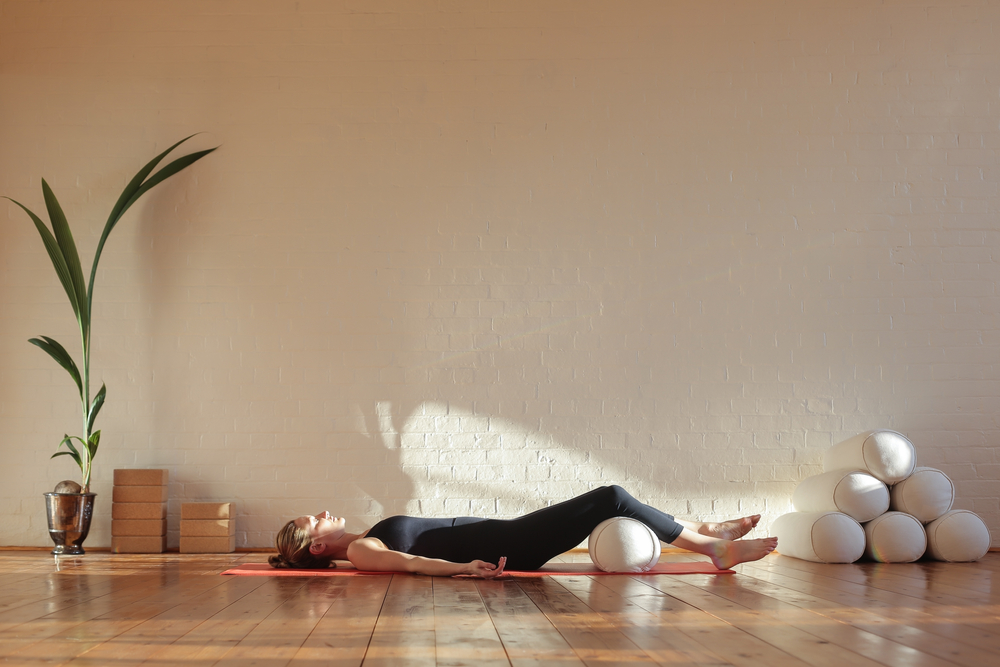
- Lie down on your mat. Place a bolster underneath your knees.
- Keep your feet a few inches apart and allow your toes to fall open.
- Relax your arms a few inches away from your body with your palms facing upwards and fingers curled in slightly as you keep them relaxed.
- You may also place a smaller bolster or weighted bag over your hips and an eye mask to help keep your eyes closed.
- You may also request someone to help place a blanket over you as you remain in Savasana because your body temperature will drop while in this pose.
Conclusion
Yoga Pillows are excellent tools to support your yoga practice. Although they are not strictly part of Classical Yoga texts, they are valuable in modern postural yoga to help you go deeper into some poses.
Creative use of your yoga bolster can spark a new dynamic in your yoga practice to make balancing postures more activating and challenging. Bolsters can also help you relax in Yin and Restorative Yoga postures which encourage you to release and let go of tension in your body.