Yoga is a beneficial way to keep your joints healthy. Keeping your muscles flexible and strong protects your joints from becoming arthritic. Use this guide to learn more about joints and to ensure that your yoga practice is beneficial for your joint health.
What Is a Joint?
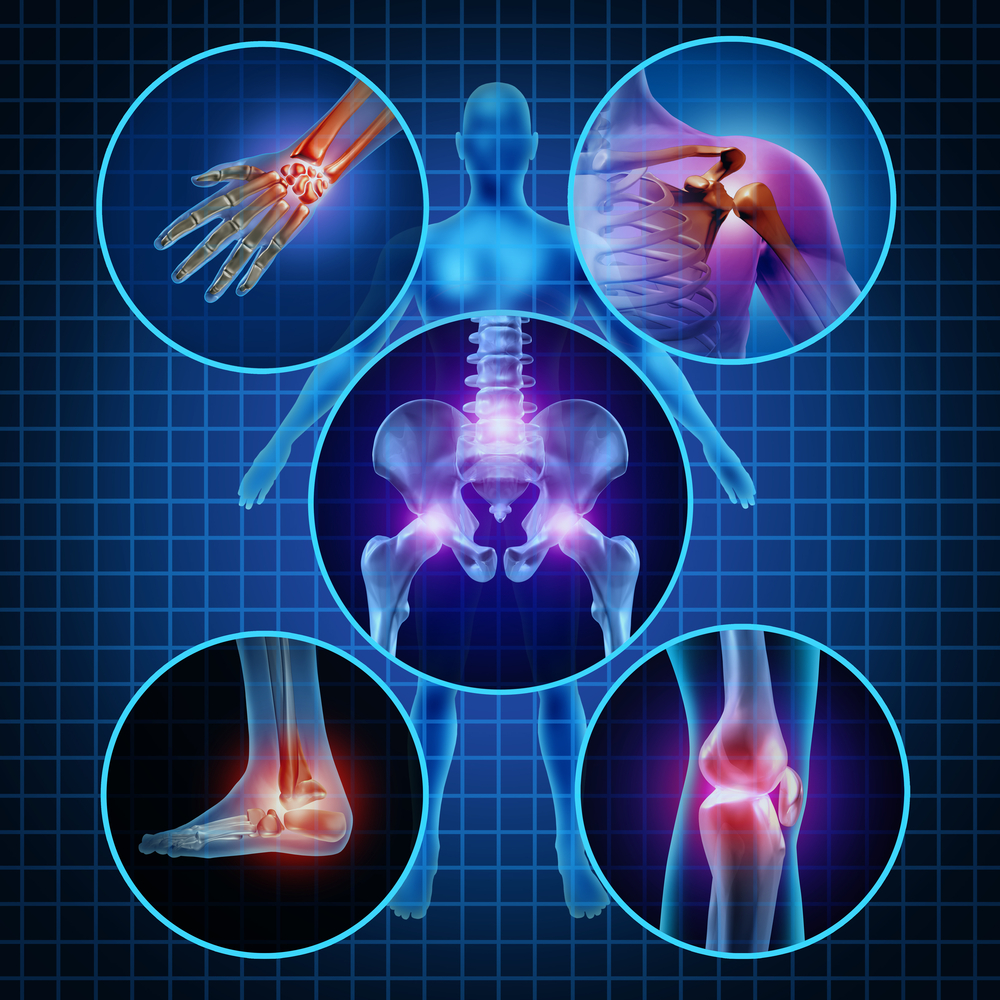
A joint is an anatomical structure located where two bones meet. Joints are where movement occurs.
Look down at your knee and bend and straighten it. Look at your hands and open and close your palms. Your joints are underneath your skin where movement is coming from. Muscles control the movement at your joints.
You may have noticed how various parts of your body move differently. How a body region moves depends on the type of joint present. Your shoulders and hips have a mobile ball and socket joint, vs your sacroiliac joint is a more rigid type of joint.
How Do Joints Get Injured?
Regardless of the type, joints are normally strong and sturdy. They are reinforced by a joint capsule, ligaments, and sometimes additional cartilage structures inside the joint. Joints become injured when your muscles aren’t adequately engaged and these stabilizing structures take on too much stress.
How Can I Keep My Joints Safe?
You can keep your joints safe by learning where your joints are located. With this knowledge, you can ensure that you stretch and strengthen the surrounding musculature instead of stressing your joints.
Try the following postures to learn more about where your joints are located and how to keep them safe:
Example Postures
Spine
To protect your spinal joints, it’s important to keep your abdomen strong. A strong abdomen will give your spine the support it needs to prevent degenerative joint and disc disease.
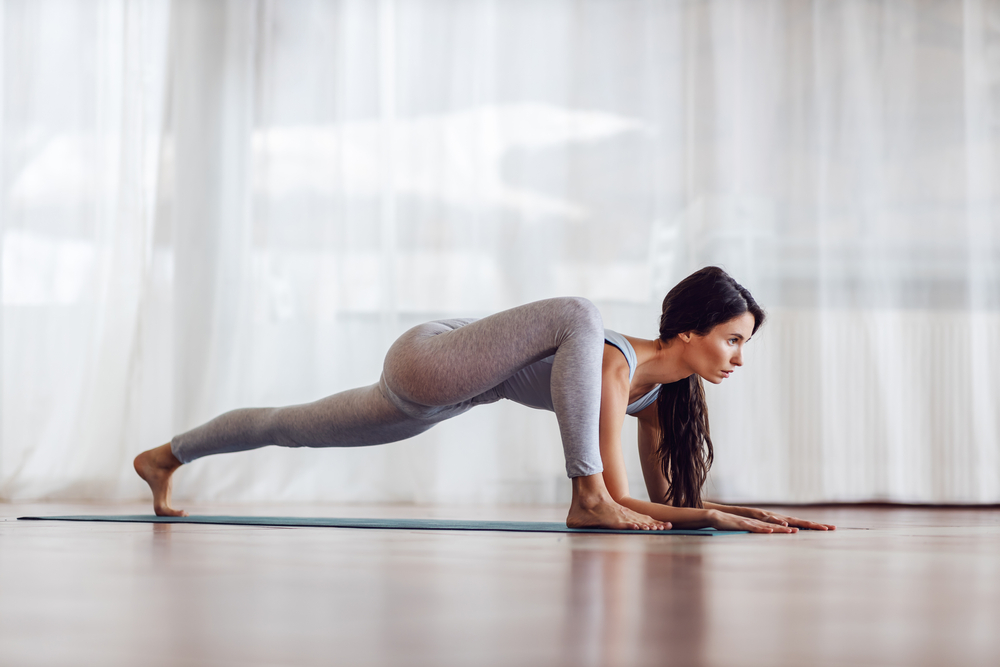
Kumbhakasana — Plank Pose
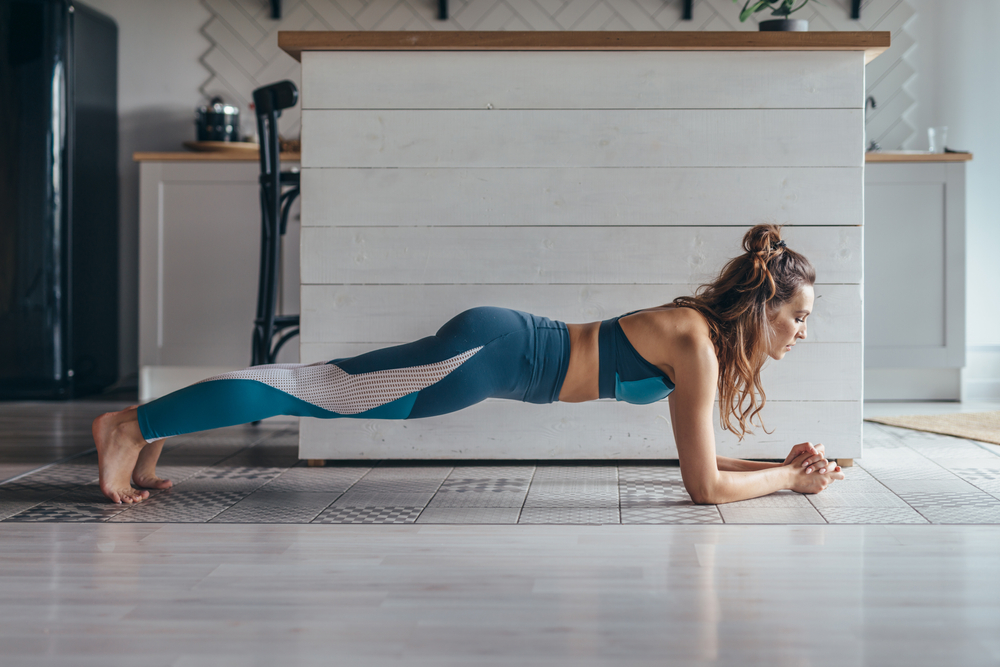
Plank pose is an effective way to build core strength and endurance.
Begin on your hands and knees. Place your shoulders in line with your wrists. Firmly seal your palms into the mat Face your elbow creases forward.
Tighten your abdomen by drawing your navel to your spine. Walk your feet back so your knees lift off the ground and your legs straighten. Align your feet hip-width apart.
Energetically hug your upper arms and inner thighs together. You should feel the backs of your arms, tops of your thighs, and your abdomen strengthening. Start with holding plank pose for 5 breaths and gradually build your way up to 15.
If you feel your lower back, this is a sign that your spinal joints are not getting enough support. Try tightening up your abdomen more. If this doesn’t resolve the sensation, place your knees on the ground. Build strength with your knees down for a few weeks before lifting your knees off the ground again.
Bhujangasana — Cobra Pose
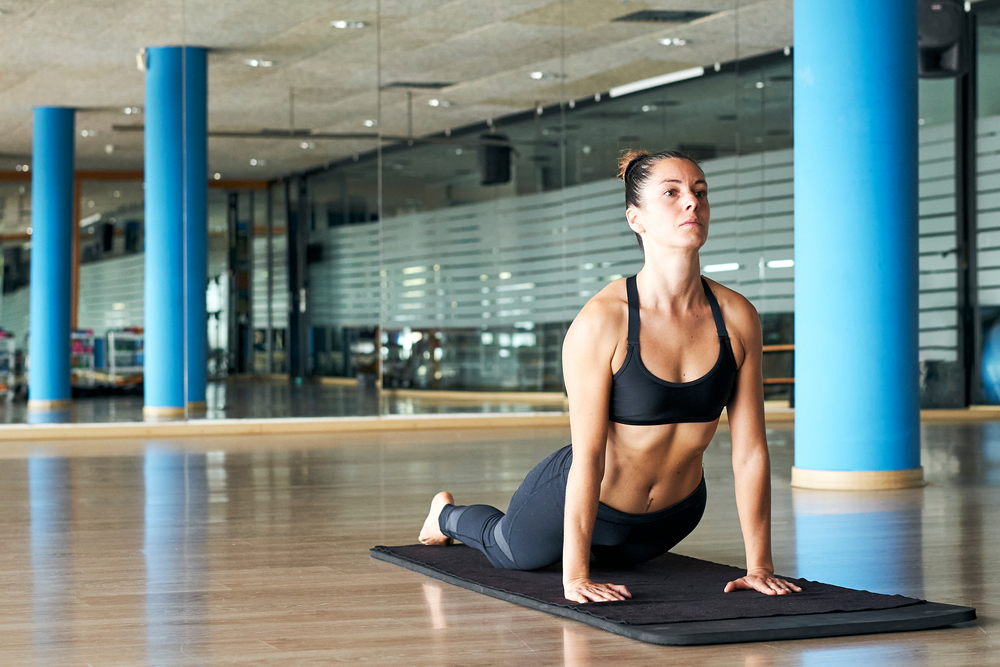
Cobra pose is a great way to keep joints mobile and build strength in your upper back and arms. If done incorrectly it can also irritate spinal joints, so be sure to pay close attention to what you are feeling in your body!
Begin lying on your stomach. Align your feet hip-width apart and place your hands by your lower rib cage.
Hug your inner thighs together and squeeze your elbows by your sides. Press the tops of your feet into the mat. Engage your belly as you begin to lift your chest off the ground.
Once lifted, create an action with your palms as though you are pulling your body forward. Draw your shoulders away from your ears. You should feel the backs of your arms and the muscles between your shoulder blades engaged.
If you feel your lower back, this indicates that you are compressing your spinal joints. Try engaging your abdomen further. If this doesn’t resolve the sensation, reduce the degree that you lift your body off of the ground. Hold for 5 breaths.
Shoulders
Your shoulders are one of the most mobile joints in your body. Because of this mobility, your shoulder joint is prone to injury so you must be sure to engage the surrounding muscles.
Adho Mukha Svanasana — Downward Facing Dog Pose
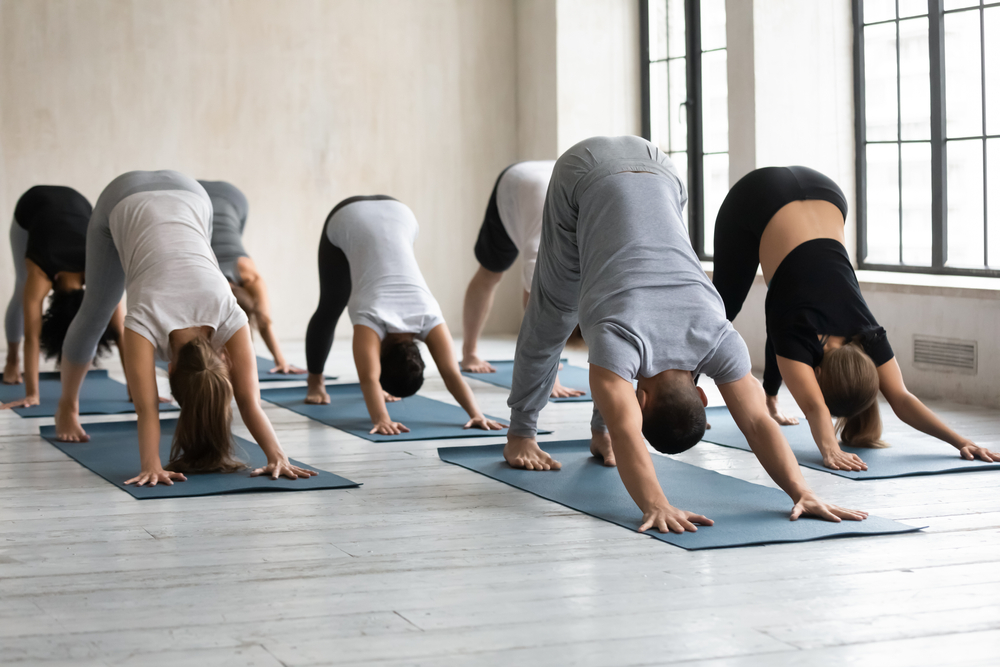
Downward facing dog is a great way to build strength and bone density in your upper body. In this position, your arms are overhead and your shoulder is vulnerable to injury. Engaging the correct muscle groups will keep your shoulders safe in this common pose.
Begin in a plank position. Ensure that your elbow creases are facing forward and that your hands are placed shoulder-width apart.
Energetically hug your upper arms together as though there were magnets tugging them together. Pull your shoulders away from your ears. Keeping this action, pike your hips up to the sky.
Once in an inverted V shape, you should feel the backs of your arms, the muscles between your shoulder blades, and your abdomen engaged. Hold for 5 breaths.
If you feel the tops of your shoulders, this indicates that your joint is taking too much of the workload in this pose. Check-in with the alignment cues above and if you cannot resolve which muscles are working, practice with your knees down.
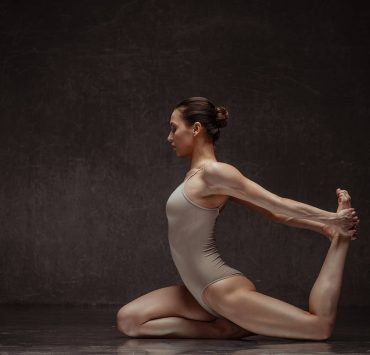
Uttanasana — Standing Forward Fold With Arm Bind Pose
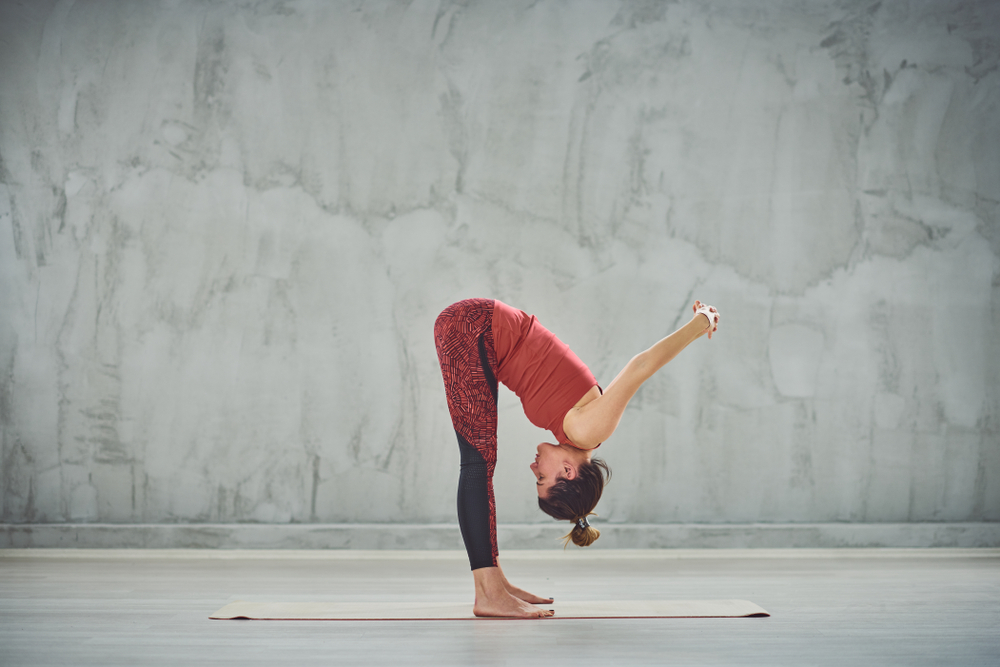
Binds are a fun way to stretch your shoulders. Read on to make sure that your binds are stretching muscle and not stressing your joints.
Stand at the top of your mat. Place your feet hip-width apart. Interlace your fingers behind your back.
Engage your abdomen and press your palms back behind you. Feel an opening across the front of your chest. Begin folding forward from your hips. Your palms will raise up towards the ceiling.
As you inhale, squeeze your shoulder blades together and feel a stretch across the front of your chest. As you exhale, let your palms fall further over your head. Hold for 5 breaths.
If you feel pinching or stress at the front or top of your shoulder, this is a sign that your joint may be overstressed. Try starting over and follow the cues to try to redistribute the sensation to the correct muscle groups. You can also try grabbing onto opposite elbows or use a strap instead of binding your hands together.
Hip
Your hip joint needs gluteal and abdominal strength to be safe and stable in your yoga practice.
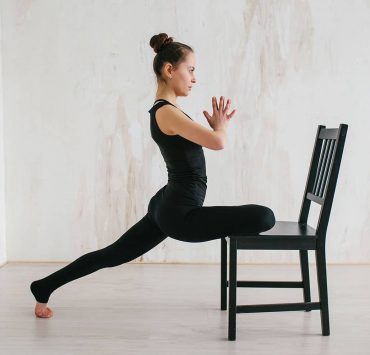
Utthan Pristhasana — Lizard Pose
This pose is an efficient hip opener. It stretches the glute and hamstring at the front leg, and the hip flexor on the back leg.
Begin kneeling. Step your right foot forward into a lunge. Place your hands onto the inside of your right foot. You can use blocks under your palms to make this position more accessible.
Slide your left knee back further until you feel a stretch at the front of your left hip. Once here, choose to stay up on your palms or lower your elbows down to the ground to deepen into your stretch. Hold for 5 breaths and then switch sides.
You should feel a stretch along the front of the left hip and the back of the right hip. If you feel your right groin region, this is a sign that you are compressing your hip joint.
Try moving your right foot over to the right edge of your mat a few inches. If this doesn’t resolve the sensation, roll to the edge of your right foot and open up the right knee as you would in a butterfly pose.
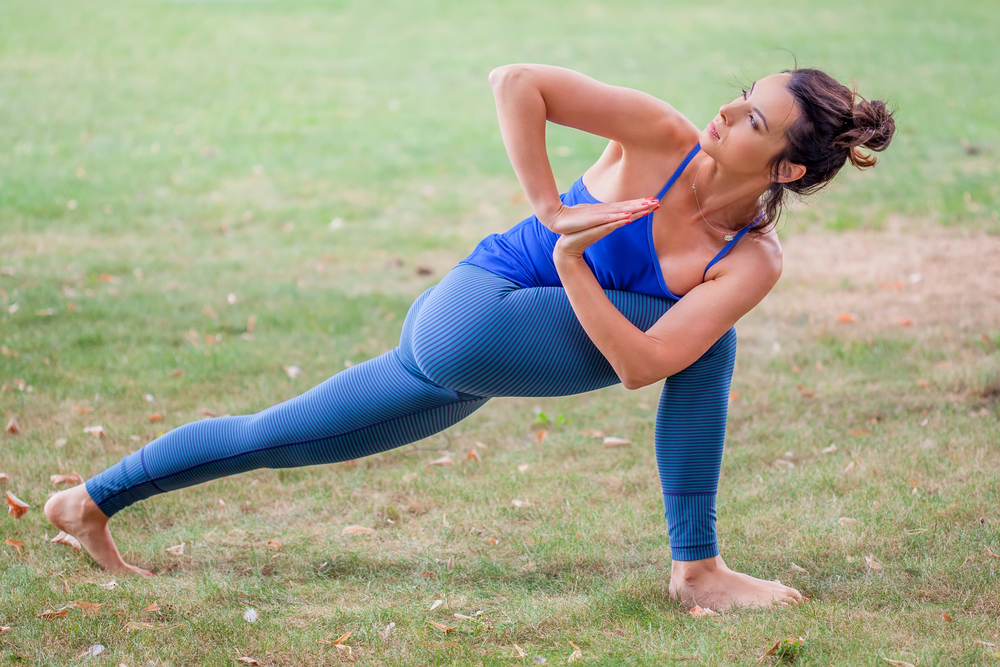
Skandasana — Side Lunge Pose
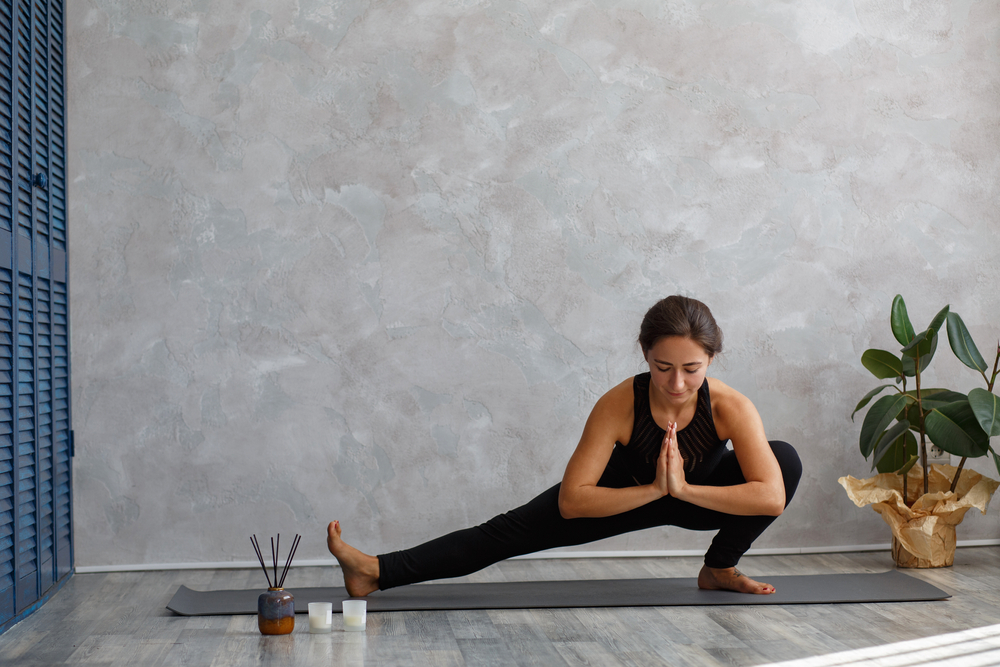
Skandasana builds hip stability on one side while opening up your inner thighs on the other!
Begin standing facing the long edge of your mat. Widen your stance so your feet are about 4 feet apart. Place your hands on your hips and keep your left leg straight as you bend into your right knee.
Press into your right heel so you feel your right hamstring and glute engage. You should also feel a stretch along your left inner thigh. Keep your hands on your hips, or for a deeper option, you can place them on the ground. Hold for 5 breaths and then repeat on your other side.
Pinching in the right groin is a sign that you are stressing your hip joint. Try engaging your right glute more or reducing the range of motion of your posture. If this doesn’t resolve the sensation, you can hold a wall or chair to provide more support while you increase your strength.
Knees
To have healthy knee joints you need strong quadriceps, hamstrings, and glutes.
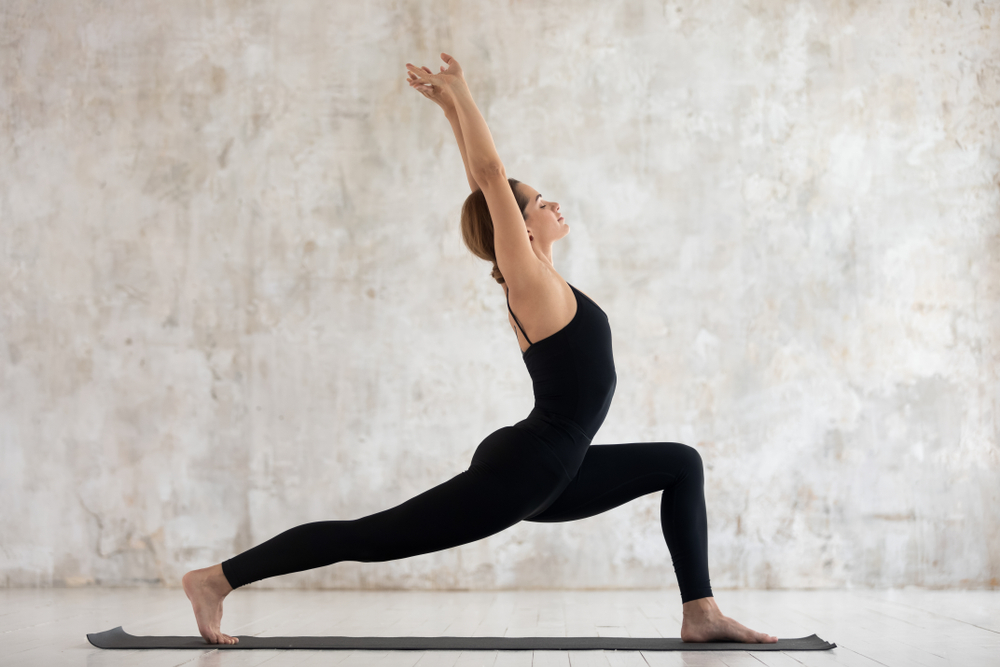
Anjaneyasana — Crescent Lunge Pose
Crescent lunge will help build strength in your lower body to protect your knees. This pose is also very functional, meaning that working on your lunge in yoga will help you have better strength and form during your daily walking and stepping based activities!
Stand at the top of your mat. Step your left foot back about three feet. Balance on your left tiptoe so your left heel aligns on top of the ball mound of your foot. Bend into your right knee, aligning it on top of your right ankle.
Engage your abdomen to create a neutral lumbar spine. This should create a stretch across the front of your left hip. Now press into your right heel and push your right hip back so you feel your right glute engage. Reach your hands to the sky and hold for 5 breaths. Repeat on your other side.
If you feel sensation along the front of your front knee, this is a sign that your knee joint is bearing too much load in your lunge. Try leaning your body forward as you press into your right heel to engage your glute more, then hold the action as you rise back up. You can also lower the back knee down and practice in this modification while you build strength.
Balasana — Child’s Pose
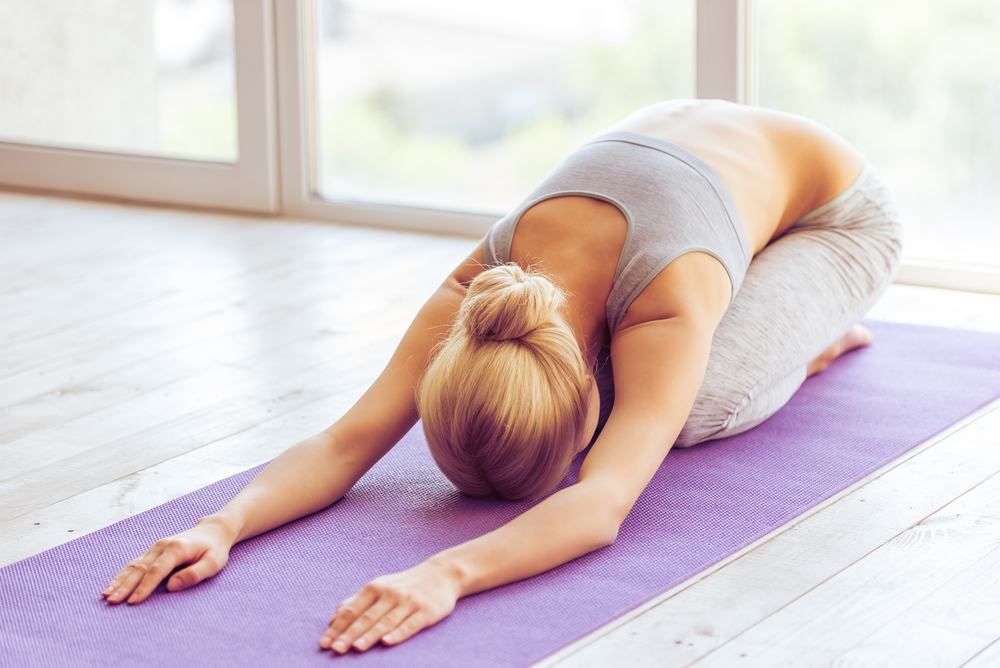
Child’s pose is a restorative and relaxing pose. Read on to learn how to keep your knees safe in this much-loved pose!
Begin on your hands and knees on your mat. Bring your big toes to touch and widen out your knees. Sink your hips to your heels and lie your torso onto the mat. Reach your hands towards the top of your mat. Hold for 5 breaths.
You should feel a stretch at the backs of your legs and hips, along with the inner thighs. If you feel stress at the front of your knees this is a sign of joint stress. Try widening your knees more. If this doesn’t resolve the sensation, place a towel or pillow between your hips and your heels.
Wrists
Bearing weight through your palms can stress your wrist joints. It is important to properly engage the musculature in your upper back and arms to protect your joints.
Bitilasana- Marjaryasana — Cat- Cow Pose
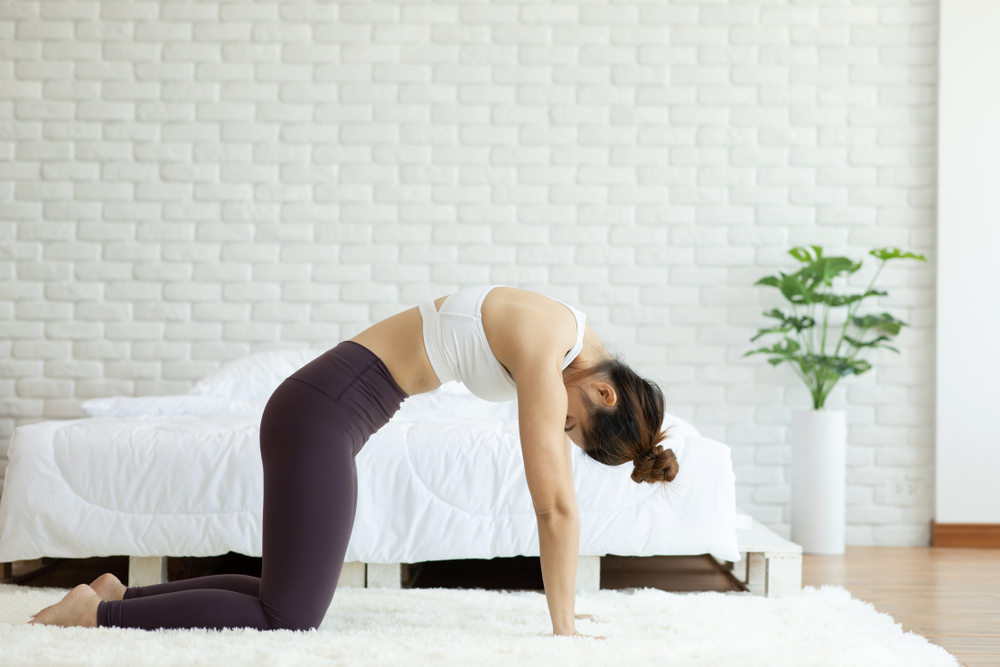
Begin on your hands and knees. Align your hips on top of your knees and your shoulders with your wrists. Face your elbow forward and ensure that your palms are pressing firmly into the ground.
Inhale and drop your belly towards the ground as you reach your chest forward. Exhale and reverse the curve of your spine, arching it up towards the sky. Continue for 5 rounds of breath.
If you feel stress in your wrists, try pressing your fingertips into the mat to engage your forearm muscles further. You can also make fists instead of having your palms flat on the ground or lower down to your forearms.
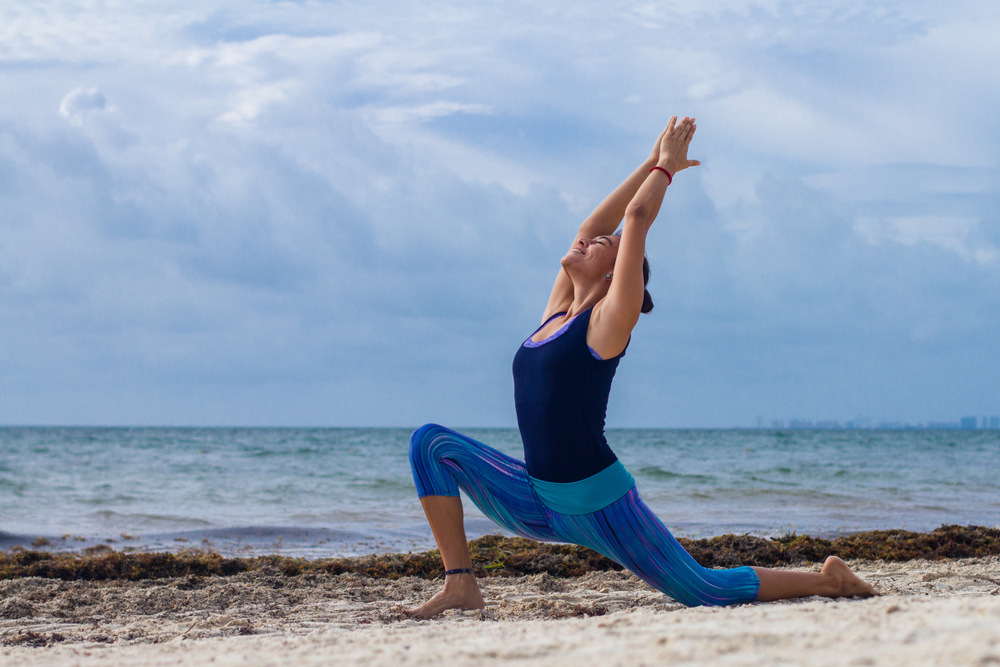
Parivrta Anjaneyasana — High Lunge With a Twist Pose
Stand at the top of your mat. Step your left foot back so you have a long stance and your left heel aligns on top of the ball mound of your left foot. Your right knee should be bent into a lunge. Place your hands on either side of your right foot.
Reach your right hand towards the sky. Press firmly into your left palm. Face your left elbow crease forward and pull your left shoulder blade towards your spine so your mid-back engages. Hold for 5 breaths then repeat on your other side.
If you feel pain or stress in your left wrist, try tightening your triceps and the muscles between your shoulder blade. If this doesn’t reduce the sensation, you can rise up to your left fingertips or make a fist with your left palm.
Ankle
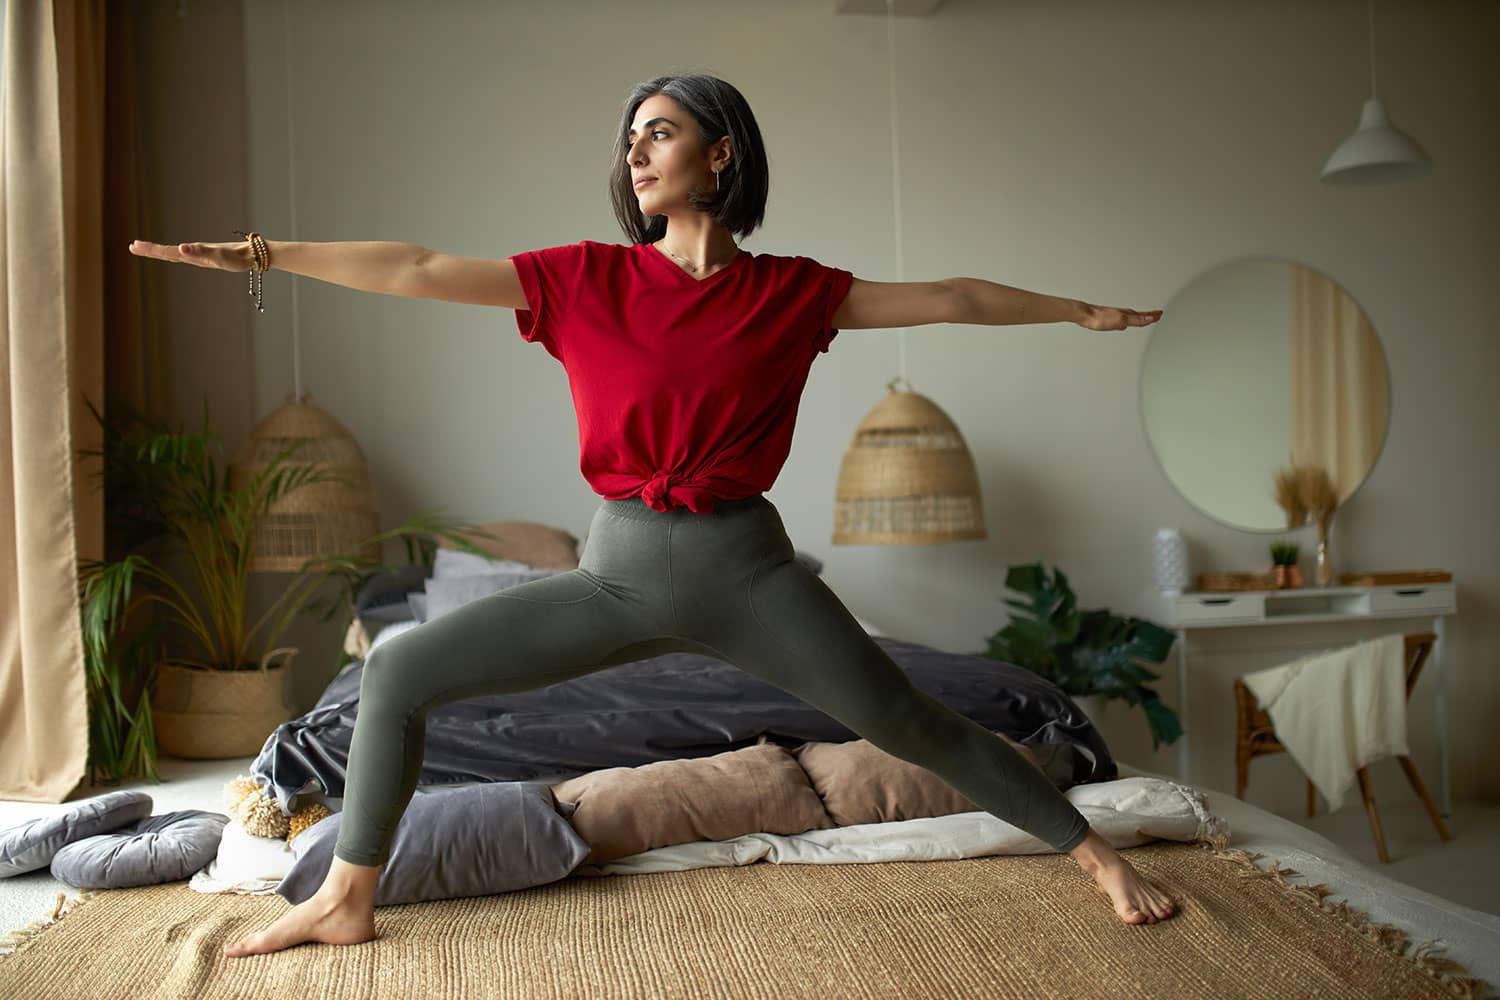
Virabhadrasana I — Warrior I Pose
Warrior 1 strengthens your front leg and stretches your hips and ankles on your back leg.
Begin standing at the top of your mat. Step your left foot back and angle your left foot out to the left 45 degrees. Your feet are hip-width apart.
Engage your abdomen and bend into your front knee. Reach your hands to the sky. Feel your right glute and hamstring strengthening, and a stretch along your left hip flexor and calf. Hold for 5 breaths and then repeat on your other side.
If you feel the front of your left ankle, this is a sign that your ankle joint is being compressed. Try shortening your stride length and pressing down more into the pinky side edge of your foot. If this doesn’t resolve the symptoms, perform this pose with your back heel on top of the ball mound of your foot like a crescent lunge,
Malasana — Yogi Squat Pose
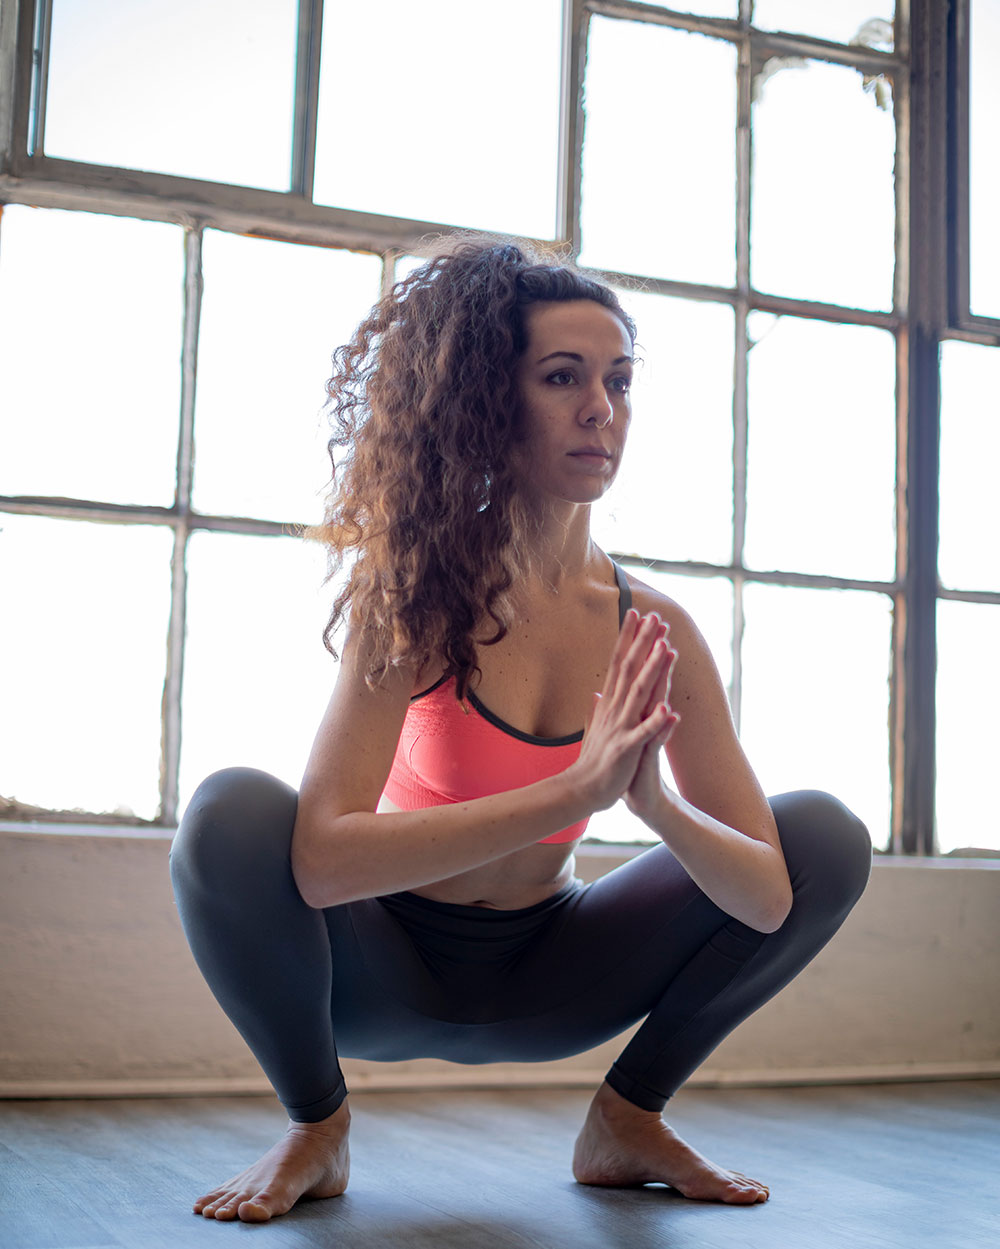
Malasana is a great way to open up your hips, lower back, knees, and ankles. With a few tips, this pose can be easily modified to keep your ankles safe!
Stand at the top of your mat with your feet mat width apart. Angle your toes pointed out slightly.
Begin to sink into a squat. Draw your palms together in a prayer position at your chest. Hold for 5 breaths.
If you feel stress at the front of your ankles, this is a sign that you aren’t stretching your ankles and instead your joints may be compressed. Try placing a towel under your heels or sitting on a block to relieve this sensation.
Keep practicing the above poses several days per week to learn how to keep your joints safe in your yoga practice. This improved body awareness will maximize the benefits of your yoga practice and preserve the longevity of your joints.