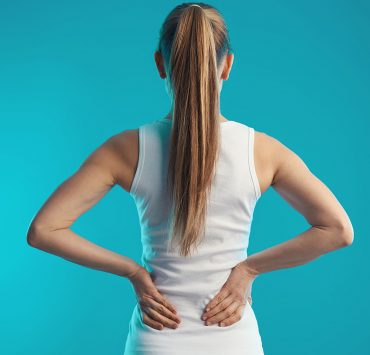
When our daily schedule is tight, it can be hard to find the time to fit in a 60- or 75-minute yoga practice; however, for yoga to be effective, it is not mandatory that we practice for such a defined length of time. In even 20 minutes, it is possible to activate and awaken the body through engaging in a gentle but powerful session of movement and stretching. Yoga is the perfect at-home practice that can help us to make movement a more common occurrence in our daily lives. In fact, it is routine exercise that holds the most power in transforming our minds and bodies, no matter the length. By creating a daily ritual of even just 20 minutes dedicated to movement and stretch, we set the stage for long-term benefits to appear.
The following yoga practice can be done at anytime of day. Consider it a way to start the day or a way to end it. Alternatively, it might be used as a mid-day reset, or as a post-work release. Depending on your own unique schedule, carve out 20 minutes at some point within your day, as often as possible, to engage in this (or some form) of movement. As with any practice, it is of highest importance to trust your body. The more that you practice, the more you are able to intuitively understand what type of movement the body calls for – and for how long. The hold times for each pose for will vary in accordance with your personal body composition and grow alongside your continued practice.
20-Minute Yoga Routine
Some poses contain contraindications. Consult with a healthcare practitioner before beginning any exercise routine. Maintain breath awareness as you practice and always listen to the subtle calls from your body.
Marjaryasana — Cat/Cow Pose

- To begin warming up the body, come onto all fours on your mat. Hands are beneath the shoulders and knees are beneath the hips. You may tuck your toes if this is most comfortable.
- Take a deep breath in and on the next exhalation, begin to round the back as if the belly button is pushing up towards the ceiling. Allow your head to drop naturally. Keep the core engaged and hold here with an arched back in “cat” pose for the duration of the exhalation.
- On the next inhalation, reverse the motion by allowing the belly to drop towards the floor. Open the chest and allow the head to gaze upwards without force, keeping the neck in line with the spine. Keep the core engaged as you hold for the duration of the inhalation.
- Repeat this rotation between poses slowly and gently for one minute before coming into a neutral tabletop position.
Adho Mukha Svanasana — Downward Facing Dog Pose

- From tabletop, curl your toes if they are not already tucked. Press into your hands and the balls of your feet as you extend the legs and draw your pelvis towards the ceiling. You may adjust the distance between your hands and feet as feels comfortable.
- Allow the head to fall naturally towards the floor as you press into your feet. Press your sit bones upwards and engage your leg muscles, feeling into a deep stretch.
- Find stillness here and hold for 20 seconds.
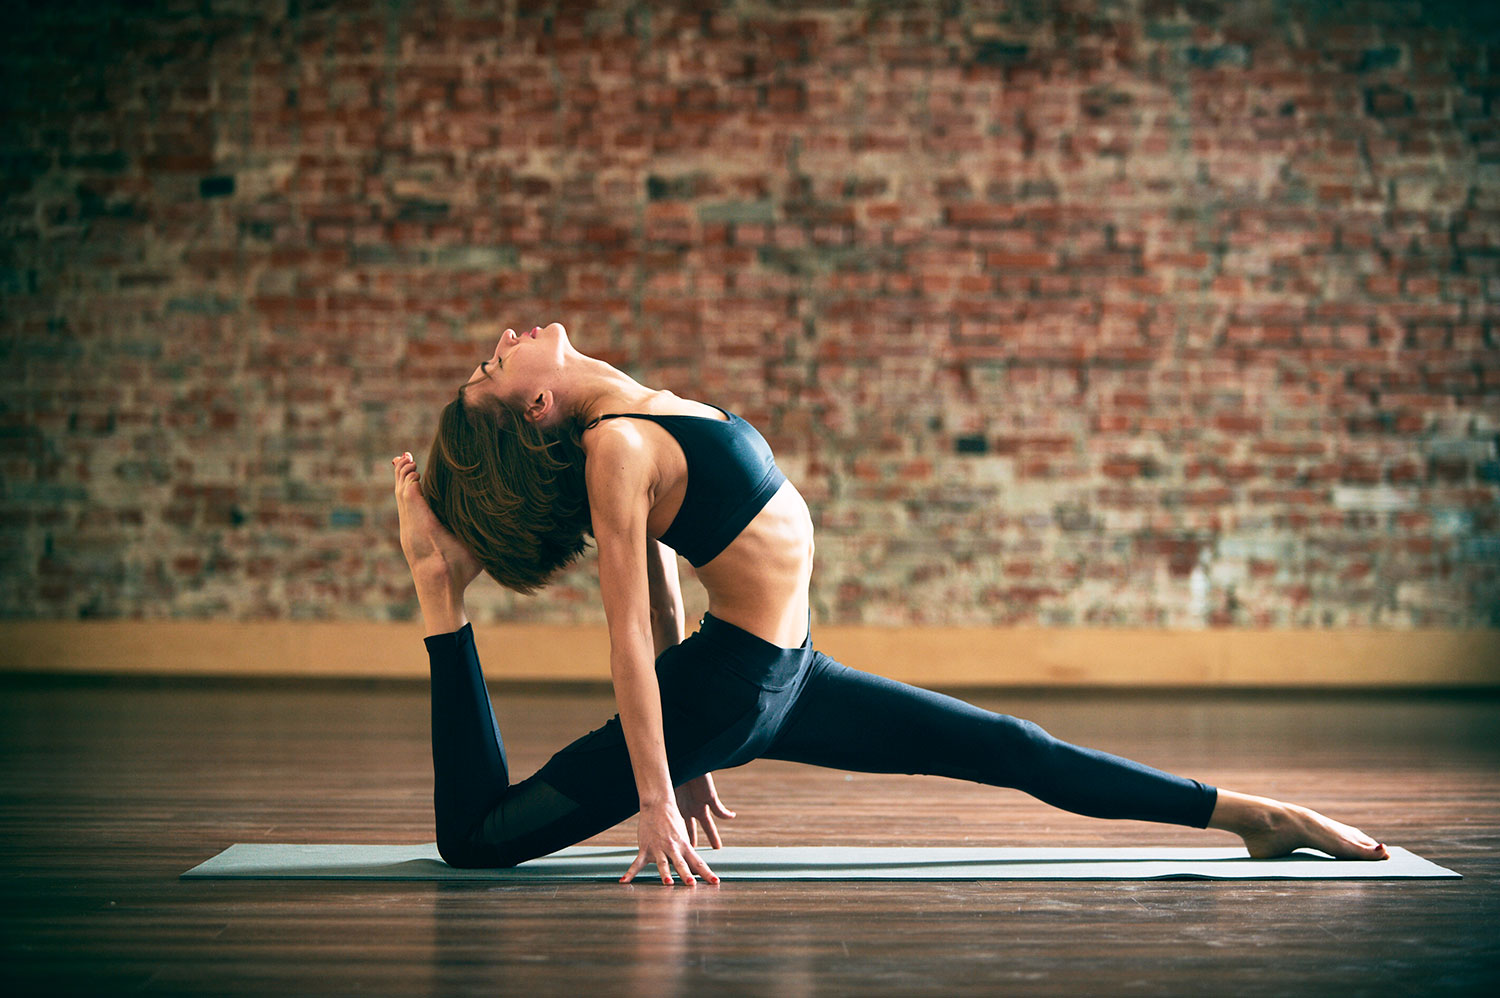
Ashwa Sanchalasana — Low Lunge Pose

- From Downward Dog, raise your left leg backwards towards the sky and then step it forwards and in between your hands. Lower your right knee to the floor.
- Ensure that your left knee is above your left ankle. Your right calf and top of the right foot can rest on the mat. Push your fingertips into the mat as you begin to open the chest. Gaze forward.
- Hold for 20 seconds before stepping back into Downward Dog.
- Come into Child’s Pose for a moment of body awareness by bringing the knees to the mat hip-width apart and sinking the buttocks back to rest on the heels. Stretch the arms out in front of you with your lower arms resting on the mat. Allow the forehead to rest here as well. Hold for one minute.
- Repeat on the opposite side by first coming into tabletop and then pushing once again into Downward Dog. Repeat from step one, ending in Child’s Pose.
Kurmasana — Tortoise Pose

- Shift your positioning by coming to a seated position on your mat with legs stretched out in front of you. Ensure that both sit bones are on the mat and are aligned.
- Bend the knees to bring the soles of the feet to the mat. Walk the feet out towards either side of the mat, creating an opening between the knees.
- Raise your arms above you and then bring them back down, threading them beneath corresponding knees. Allow your hands to rest on the floor, either topside or palm side facing up.
- Bend at the waist, ensuring that the spine is straight. Do not push or create a curve in the back. Ensure that the neck is in line with the spine.
- Hold this pose for 30 seconds before making your way back into Child’s Pose for one minute of body awareness.
Dhanurasana — Bow Pose

- Come to rest on your belly with your arms by your sides. For this pose, you may wish to rest a folded blanket beneath the hips to avoid unnecessary pressure on the hipbones.
- Bend your knees bringing your heels towards your buttocks. Raise your hands to grab hold of each ankle. Keep your knees hip-distance apart or even closer together.
- On the next inhalation, raise your heels and pull your thighs away from the floor. Your chest and head will naturally rise. Draw your shoulder blades together and away from the ears to open the chest.
- Gaze forward and hold the pose for 20 seconds. Gently release and rest on your belly with arms at your side for 30 seconds. Repeat, holding the pose once more for 20 seconds.
- Return once again to Child’s Pose to provide a counter stretch to the back. Hold for 30 to 60 seconds.
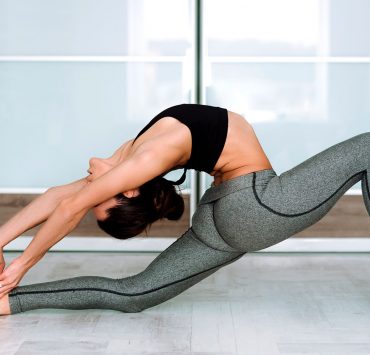
Uttanasana — Standing Forward Fold Pose

- From Child’s Pose, raise the buttocks to come into a tabletop position. Tuck the toes and press into the hands and feet to come back into Downward Dog for a few breaths.
- Gently step both feet forward to come into a standing forward fold. Your hands may naturally come up from the mat depending on your flexibility. Allow them to fall wherever they may while ensuring that the lower back is straight. Bend from the hips, rather than through the back. The legs should be straight and the knees unlocked. Allow the head to fall naturally towards the floor.
- Hold this pose for 30 to 60 seconds. To come out from it, gently begin to unroll the spine to come into a standing position, inch by inch, with the head arriving last. In a neutral standing position, take a few deep breaths to ground and to balance.
Trikonasana — Triangle Pose

- Turn to stand facing lengthwise on your mat. Adjust the feet so that they are about three feet apart, adjusting as necessary throughout the set-up.
- Raise your arms so that they are parallel with the floor, palms facing down.
- Turn your right foot so that toes point towards the top of your mat, keeping the left foot parallel with this narrow end of the mat. Your right heel should be aligned with the arch of your left foot.
- Ensure that the right knee is in line with the right ankle, shifting your foot positioning back in slightly or rotating the thigh outwards as is necessary.
- Keeping the torso facing the long edge of your mat, bend gently at the hip (rather than at the waist) to extend your body over your right leg. Each side o the torso should feel of equal length.
- Allow the right hand to land where it does naturally – on your right shin, ankle, or the ground. Do not push unnaturally to reach further.
- Your left arm will reach upwards. Maintain one straight line between the two arms. Gaze forward or towards the left hand if it is comfortable.
- Hold for 30 to 60 seconds before gently bringing yourself back up. Rest in stable standing position for a few long breaths before repeating on the opposite side.
Viparita Virabhadrasana — Reverse Warrior Pose

- From a neutral standing position, step your feet out to be about three feet apart (adjusting as necessary throughout set-up once again). Turn your right foot to point towards the top of your mat and align the outside of your right foot with the back of your mat.
- Raise your arms to become parallel with the floor, with palms facing down. Bend your right knee so that it is aligned with the heel below.
- Sink your hips gently so that the front thigh is closer to parallel with the floor.
- Breathe in and on the next exhalation, drop your left hand to the back of your left thigh. As you inhale, raise your right arm towards the ceiling, stretching through the right side of the torso.
- Raise your gaze gently towards your right fingertips. Allow the shoulders to relax.
- Hold the pose for 30 seconds before gently releasing. Come into a stable standing position for a few breaths before repeating on the opposite side.
Supta Eka Pada Utkatasana — Reclined Figure 4 Pose

- Make your way onto your back with knees bent, feet resting on the floor.
- With your left foot planted on the ground, raise your right foot to place the outside of your right ankle on your left thigh, just above the knee.
- Wrap your hands around your left thigh and pull it gently towards you feeling a deep stretch in the hip region.
- Hold this pose for thirty seconds, seeing if you can deepen the stretch with each breath. Release by bringing your right foot back to the mat. Repeat on the opposite side.
Savasana — Corpse Pose

- To finish your practice, remain on your back, stretching your legs out and letting your arms rest naturally by your sides with palms facing up. Relax the back by allowing it to make contact with the mat. Close your eyes.
- As you come to find stillness in the body, invite the mind to also come to rest. Focus on your breath here for three to ten minutes as you allow yourself to be completely at ease.
As you become more comfortable with these poses and as you become more highly attuned to the body, you will more naturally follow your own instinct as to how long to hold poses and which way to flow. There is no right or wrong way to engage in this or any other yoga practice; simply use this practice as a tool to bring a gentle stretch and slow movement into the body.
Modify your practice as is needed from day to day. The more we learn to listen to the body, the better we are able to provide it with what it needs in each unfolding moment. Simply by bringing more fluidity to the body, in even just 20 minutes of each day, we come to find that other aspects of our lives begin to flow more naturally as well.