Straddle Splits, Middle Splits, Front Splits, or Upavistha Konasana, as it is named in Sanskrit (the direct translation of this pose is: Wide-Angle Seated Forward Bend), is a yoga pose that that is a great way to start getting your body loosened up and more flexible, and is the foundation for other poses that require hip and leg flexibility. The hardest thing about this asana is actually all the thoughts that may run through your head as you practice — Why are my hamstrings so tight? Why can’t a fold as deep as other people? Why do my knees need to bend? Why can’t my split look as pretty as that one? Etc…
But, as we should already realize, yoga should never be about comparison to others or giving into self-deprecating thoughts our ego might tell us. Once you make your practice more about the journey of experience, then you can find more ease and joy into working your way into a full Straddle Split. A journey has many parts, and these are some yoga poses that can help you along the journey.
Anatomy of a Straddle Split

Before we get into the actual practice of Upavistha Konasana, let’s have a look at the muscles, joints, and other body parts that need to work together into order to flow safely and comfortably into this pose.
This is a seated pose which works on the hip flexors, hamstrings, lower back, and upper back. It is a forward bend and a hip opener which works on balancing our strength, and flexibility. The pose lengthens your hamstrings, strengthens your adductor muscles in your inner thighs, and can help relieve sciatica pain.
Who should not practice Straddle Splits
The most common injuries that could potentially occur when practicing Upavistha Konasana are hamstring or groin tears, and lower back injuries. Avoid forward bends, including the full expression on these Seated Wide-Legged Forward Folds, especially if you have herniated or slipped discs.
Safety Tips

Modify Straddle Splits as your body eases into the pose and take it easy on yourself to avoid any injuries that will prevent you from regular practice or even comfortable movement in regular life.
If your lower back tends to round, sit on a block or use your hands to help internally rotate both thighs. Keep your feet flexed so that your toes look back towards your face. This keeps your knees protected as your hip flexors gently become more open.
Do not “bounce” your limbs in any of these yoga asana. Instead, relax and open up into the pose and visualize your breath going into any areas which feel tight or feel like they are holding your back from going deeper into the pose.
Hold each pose for at least 90 seconds. It takes a minimum of one minute (60 seconds) for the body to get out of Flight, Fright, or Flight mode so it’s best to breathe slowly and deeply for longer than this and reach a stage when the body and relax and create space in itself to let go of any built up tension or resistance.
Before going into any deep stretches or bends in any movement practice, make sure you limber and warm up adequately first. Just a few rounds of Classical Sun Salutations will help get your body more prepared for these poses which will push your flexibility.
Finally, make use of any blocks, straps, padding, bolsters, towels, and other yoga props that will support your and make your yoga practice comfortable and safe.
10 Yoga Poses to Prepare for Straddle Splits
Use the following postures in your yoga asana practice to gently deepen your journey into Upavistha Konasana. Approach all these poses mindfully, moving in and out of them slowly and with the intention to explore the pose rather than getting into any particular “ideal” shape.
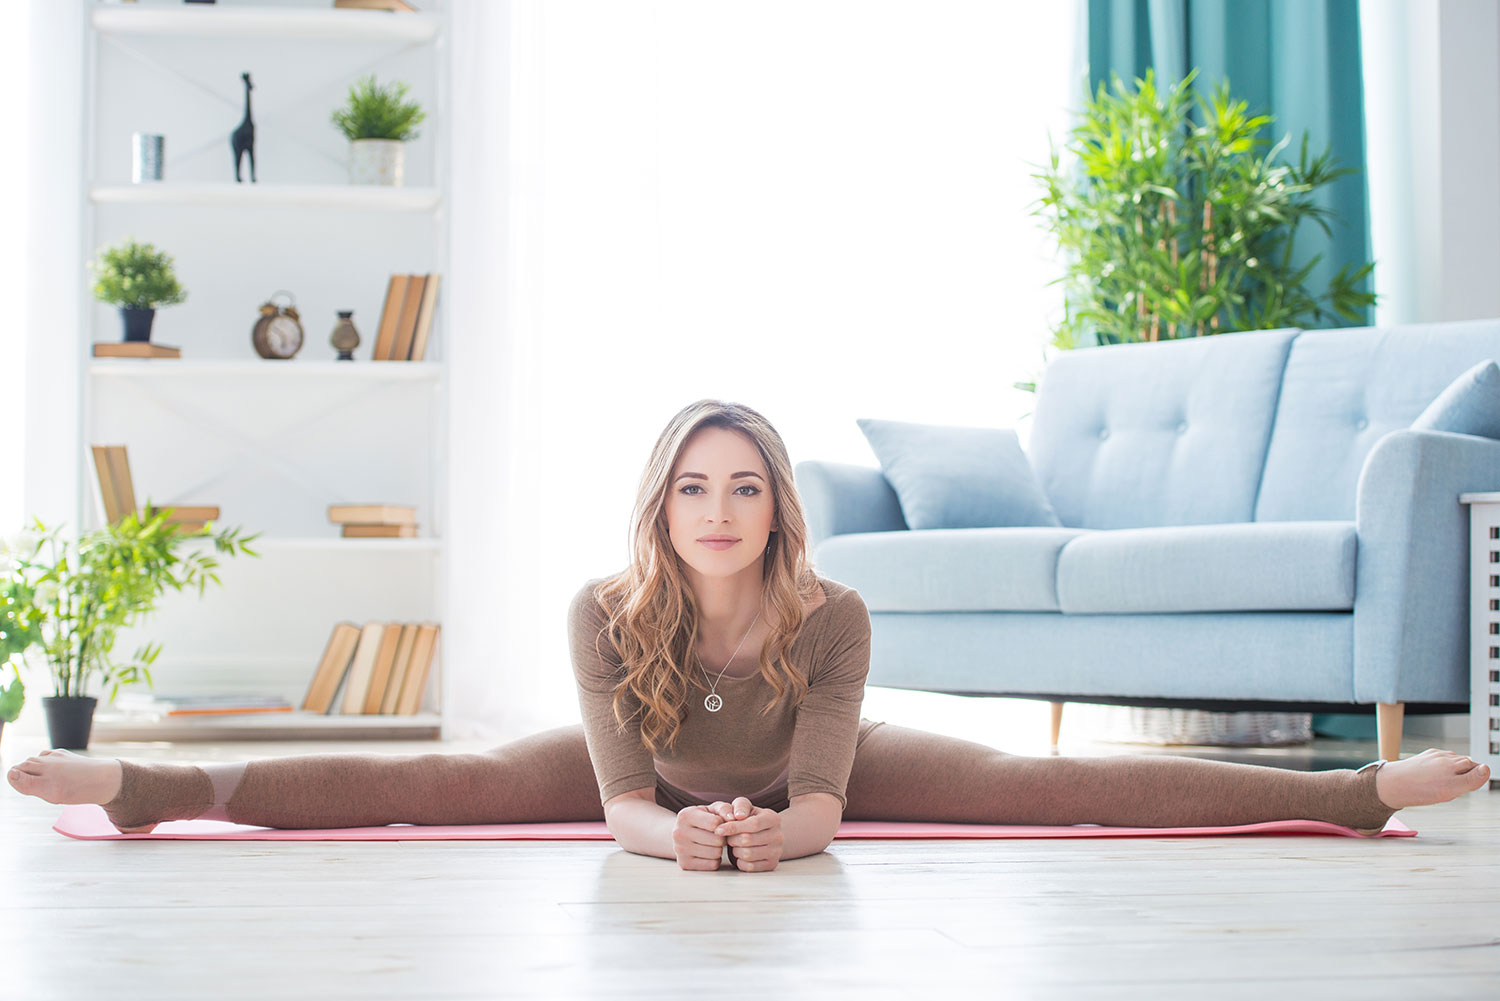
Upavistha Konasana/Straddle Split — Seated Wide-legged Forward Fold Pose

The best pose to prepare your body for Seated Straddle Splits, are straddle splits themselves! Start by simply sitting on the floor with your spine straight and elongated towards the sky. Flex your toes backwards towards your face and separate your heels as wide as you comfortably can. Focus on keeping this seated shape comfortably before you even begin adding in the forward fold.
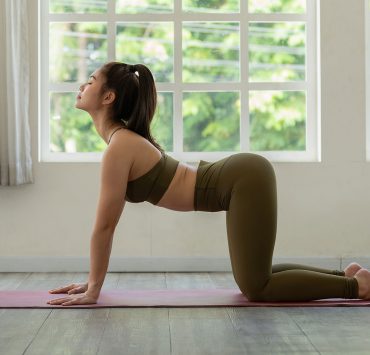
Chakrasana — Cat-Cows Pose

Cat-Cow stretches may come as a surprise for those wanting to deepen their straddle splits, however, they are important to keep as part of a well-rounded yoga asana practice. The stretches help you to synchronize your movement with your breath and allows you to gently strengthen and fire up the back, shoulders, and even core, and at the same time keep the belly supple to allow space to eventually fold forward from your hips with your back straight.
Paschimottanasana — Seated Forward Fold Pose

This pose puts more emphasis on the hamstrings without the stretch on the groin and adductors like a full straddle split. Start in Dandasana, or sitting with your legs straight and extended out in front of you. Keep your heels pushing forward and toes flexed back towards your face. Inhale, raise your arms up above your head, and when you exhale, keep your spine straight and core engaged as you fold forward to reach your toes. If you can’t quite touch your toes, use a strap to loop around your feet and hold on to the strap instead.
Uttanasana — Standing Forward Fold Pose

Uttanasana, or Standing Forward Fold, is actually just like Paschimottanasana, just from a different orientation. From a standing position, gravity can help you deepen the pose and it also puts less strain on your lower back. It is considered an inversion because your head is below the heart so you get the added benefits from practicing inversion postures. Instead of using a strap to touch your toes or the floor, use a block or a stack of blocks to bring the ground closer to your reach.
Prasarita Padottanasana — Standing Wide-legged Forward Fold Pose

This pose is a standing version of a Straddle Split without having to go too deep into the straddle and builds muscle in the legs while stretching them out at the same time. Ensure that your mat or the floor you are standing on has a good grip when you practice this asana. It may help to very slightly pigeon-toe your feet — that is, bring your toes to face inwards by just about an inch or less — to get a better hold on the floor. If you can’t quite reach the floor or the outside of your feet, depending on which version of this pose you are practicing, try widening your stance a bit more or, again, use as many block as needed so your hands can be supported by them.
Eka Pada Adho Mukha Svanasana — Downward Facing Dog Splits Pose

Regular Arha Mukha Svanasana, or Downward Facing Dog Pose, works to help lengthen your hamstrings and strengthen your arms and back. With one leg extended upwards towards the sky, (Eka Pada literally translates from Sanskrit as “one foot”) it also works on the groin, adductors, and challenges the balance in an asymmetrical position. It is reportedly an American addition to the modern yoga practice.
The set up and alignment for Three-Legged Downward Facing Dog, or Downward Facing Dog Splits, is pretty much the same as regular Down Dogs. Before lifting up one of your legs, you may choose to bring both feet together, rather than keeping them hip distance apart like in traditional Adho Mukha Svanasana. Lean forward to transfer as much as your weight into your palms as much as possible while keeping your fingers spread out to keep a good grip on the floor. Keeping your legs as straight as possible, begin to raise your right leg up to the sky, but only enough so that your hips remain level. If one hip side of your hip starts to rise up higher than the other, back of the pose a little bit and remain static in the level where your hips are still in one line.
Janu Sirsasana — Head-to-Knee Forward Bend Pose

This seated asana helps to lengthen your hamstrings one leg at a time. This helps to stretch the large tendons in the back of your leg in a more focused manner and may help you get deeper into other forward bends faster. To set up for this yoga pose, from a seated position on your mat, keep your right knee bent with your heel towards your groin. Extend your left leg forward and flex your ankle so that your left toes face straight upwards and back towards you. Inhale as you lift your arms up and lengthen your spine. Keep your spine straight as you exhale and fold forward over your left leg. You may be able to interlace your fingers over your left foot. If not, use a strap to loop over your foot to hold on to. Do the same with the opposite legs.
Supta Padangusthasana — Reclined Hand to Big Toe Pose

Similarly to Janu Sirsasana, Supta Padangusthasana is a reclined pose that also helps to lengthen your hamstrings while focusing on one leg at a time. If practiced with a strap, it is a more restorative pose, while practiced with more engagement in the core to make your forehead reach your knee and hold on to your big toe, it is much more active. To begin, lay on your back and hug your left knee towards your chest. Flex your foot and point your heel towards the sky as you extend your legs upwards. Either grab hold of your left big toe with your hand or any place on your leg to help support it. You may also use a strap to loop over your foot to help you hold it up as well. Do the same for the right leg in the air and the left leg extended on the floor.
Ananda Balasana — Happy Baby Pose

Ananda Balasana, or Happy Baby Pose, is a deep hip opener in a reclined position. It also helps to lengthen and relieve the spine of tension. Usually it is sequenced towards the end of a yoga class when your body is already quite warmed up and supple and ready to begin winding down to prepare for final Savasana. To practice Happy Baby pose, lie down on your back and hug both knees towards your chest. Separate your feet and knees and hold the outside of your feet, your big toes, or loop a strap over each of your feet to hold on to comfortably. Point your heels towards and the sky and bring your knees down and towards your armpits.
Supta Baddha Konasana — Reclined Butterly Pose

Supta Baddha Konasana, or a reclined version of butterfly, is a great pose to end a yoga class right before final Savasana. It opens up and relaxes the hip flexors and lower back. With various modifications and support, it can be adjusted to degreeing levels of hip and groin resistance. Other names for this pose are also Reclined Bound Angle Pose (the direct translation from its Sanskrit name) and Reclined Goddess Pose. Start to get into the pose by laying on your back with your lower back pushed into the mat. Bend your knees and bring your heels together towards your groin. Allow your knees to fall open. You may choose to prop your knees up with blocks, bolsters, or folded up towels or blankets to support you in the pose. Arms may be outstretched and relaxed to the sides or upwards over your head, or you may place your palms on your chest and belly.
Conclusion
Upavistha Konasana, or Straddle Splits, lay a good foundation for other yoga asana which require flexible hamstrings and hips. But the pose in itself, may already be challenging. These other poses will help target the muscles and joints needed to open up into Straddle Splits in a way that will make your practice more dynamic and interesting as your work your way into full Upavistha Konasana.