There are a lot of Yoga poses out there.
In the Hatha Yoga Pradipika, one of the ancient texts of yoga, it is said that there are 8.4 million asanas, or yogic postures. One theory is that this is roughly equal to all the different combinations of all the different planes of motion of each joint in the body.
So, in theory, anything could be a yoga pose.
These days on social media platforms like Instagram, people are constantly displaying new ways to contort the human body. These can be beautiful and inspiring to see, but they may also give people the mistaken impression that you’re not a yogi unless you can balance on one hand with your leg behind your head.
Sometimes it’s better to keep things simple.
If you’ve been doing yoga for a little while you’ll know that there are a handful of poses that you see all the time. No matter what style. No matter what skill level.
Beginner students work to learn them. Advanced students work to refine them.
They form the foundation upon which all the more visually impressive poses are built; but the big secret is that even the most advanced yogi’s sometimes get hurt, sick, tired or de-motivated. When that happens these are the poses they will fall back on.
When you’re not working on pushing the physical limits of your body you gain a bit more space to work on refining your breath, focusing your awareness and slowing down the thinking mind. Sometimes, the basic poses are the most transformative ones.
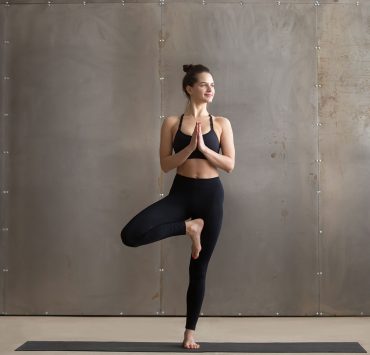
Tadasana — Mountain Pose

Tadasana, also known as Mountain Pose, is, from the outside, about as simple as it gets. You just stand up straight with your legs together and your hands by your side.
However, Tadasana is the pose where the alignment for all other standing poses is established. If you make the investment in a strong, intentional Tadasana early, it’ll pay big dividends later on.
Let’s start from the ground up.
Stand at the front of your mat with your feet together as close as possible. If you have big hips they may not quite come to touch but bring them as close as you can.
Create a strong arch in both feet, rooting down strongly through the mound of the big toe. Make sure the weight is evenly distributed between the front, back, and outside edge of the foot. Make sure the weight in the heel is in the centre of the heel and not falling to either side.
If creating the arch in the foot causes your hips to open so that your knees are tracking out to the side, internally rotate from the hip so the knee is tracking forward. Strongly engage the fronts of the legs to lift the kneecaps and gently squeeze the legs together.
Keeping that engagement in the legs, tilt the pelvis so that the tailbone tuck down and forwards and the top of the hipbone moves slightly back. Expand through the chest and the upper back at the same, without flaring the ribcage open.
Let the shoulders move down the back, but keep them wide. Straighten the arms without stiffness and gently squeeze the fingers together as you point the hand towards the floor.
Keep the chin level with the floor as you reach the crown of the head towards the ceiling. Relax all the muscles of the face.
Breathe slowly and deeply.
Hold for 10 – 20 breaths.
Trikonasana — Triangle Pose

From Tadasana, step out to the right about 3 foot lengths. Pivot on your heel to turn the right foot perpendicular to the left one, heels roughly in line. Create a strong arch in both feet, and engage strongly through the fronts of both legs to lift up the kneecaps.
Keeping the left shoulder in line and the chest open to the side of the room begin to bend over the right leg, hinging at the hips. At first, the hand can come to rest on the shin. Eventually it can move down the leg while pressing the back of the hand into the inside of the foreleg.
Resist the urge to place the hand on the floor or grab the big toe before the hips and hamstrings are open enough. If the chest is moving drastically towards the floor or there is a big bend in the spine consider going a bit less deep.
If the pose feels comfortable, lift the left hand towards the ceiling and the gaze towards the left hand.
Hold for 5 to 10 breaths.
Come back up on an inhale and repeat on the other side.
Virabhadrasana — Warrior I Pose

From Tadasana, step the left foot back, roughly 5 foot lengths. Place the heel on the floor with the foot turned out to a 45 degree angle relative to the front foot.
Bend the front knee and come into a lunging position, with the thigh roughly parallel to the floor. Continue to cultivate the arch in the feet, ensuring the balance point is kept in the centre of the heel.
Lengthen through the chest as the arms reach up over head, wrapping the shoulders forward, and allowing the hands to meet. Lift the gaze towards the thumbs by lifting the chin towards the ceiling, not by throwing the head back.
Hold for 5 to 10 breaths.
Step forward on an exhale and repeat on the other side.
Paschimottanasana — Seated Forward Bend Pose

Sit on the floor with the legs extended in front of you.
The legs and feet should be together if possible. Those with wider hips may find this difficult in which case it’s OK to just bring them as close together as you can.
On an inhale, press down through the sit bones, extending through the lower back. Expand the chest and lift the gaze.
On an exhale, fold forward, hinging at the hips. Strongly engage the fronts of the legs to lift the kneecaps up towards the hips. Take hold of the big toes with index and middle fingers or press the hands into the floor.
If the legs are stiff and the back is rounding, it is advisable to generously bend the knees and work on straightening the back before going deeper. Once you can bend forward with the back relatively straight you may begin to straighten the legs
Hold the pose for 10 – 15 breaths.
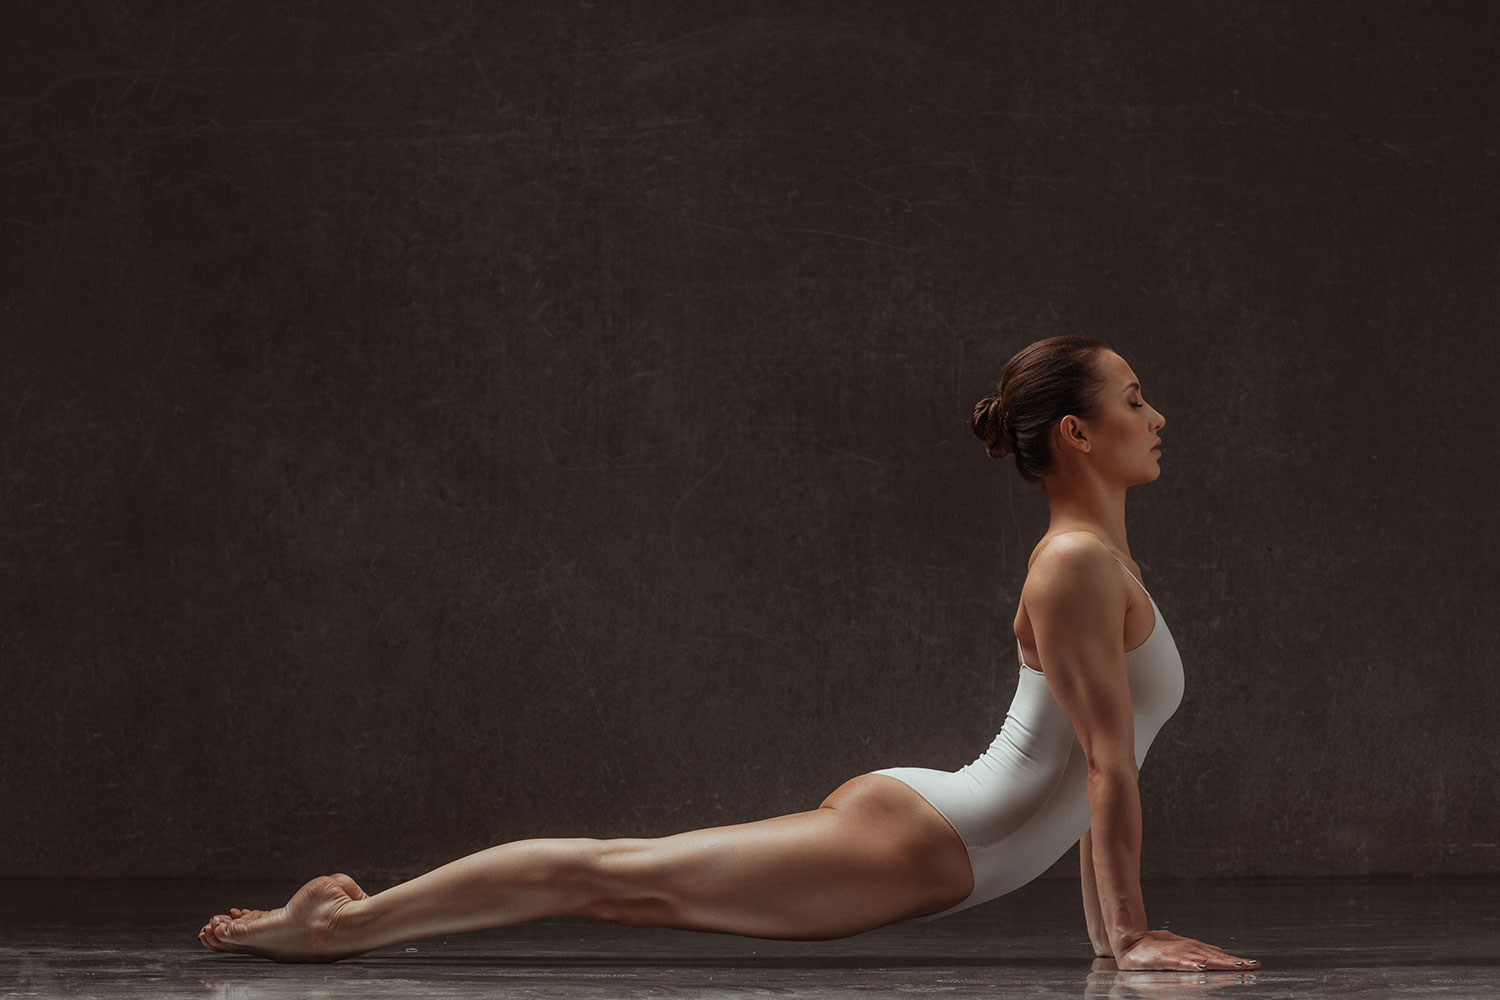
Bhujangasana — Cobra Pose

Lie down on your belly. Place your hands on the floor alongside the rib cage. Legs together
On an inhale, press strongly into the floor, lifting the chest up and forward into a back bend. Lift the gaze by lifting the chin up and forward, not by throwing the head back.
At first cobra should be done with bent arms and the hips pressing into the floor. Initially, as the arms begin to straighten, the hips will lift off the floor, gradually settling lower with continued practice.
Press the shoulders towards the floor and focus on lengthening the whole front of the body.
Hold the pose for 5 to 10 breaths.
Lower back to the floor on an exhale.
Shalabhasana — Locust Pose

Lie down on your belly. Extend the arms alongside the body, hands pointing towards the back of the room. Press the backs of the hands into the floor. Legs together.
On an inhale, lift everything but your hips off the floor. Focus on creating length through the front of the body. Keep the legs straight and together as much as possible. Lift your gaze by lifting the chin up and forward, not by throwing your head back.
Focus on maintaining a calm and consistent breath, relax all the muscles of the face.
Hold the pose for 5 to 10 breaths.
Lower back to the floor on an exhale.
Adho Mukha Svanasana — Downward Dog Pose

From a table top position, press into the hands and lift your hips towards the ceiling.
The arms should be straight but not hyper-extended. The neck should be long. Resist letting the head hang towards the floor.
Initially, the back may be quite rounded, in which case it is advisable to generously bend the knees. Focus on tilting the sitting bones up towards the ceiling to straighten the lower back.
After a while, once the back is a bit straighter, you may start to straighten the legs, allowing the heels to sink towards the floor. Strongly engage the fronts of the legs to avoid hyper-extension.
Hold for 5 to 10 breaths.
Salamba Saravangasana — Shoulderstand Pose

Lie on your back with legs together, arms extended towards the feet, palms facing up.
Lift your legs off the floor, sending the toes up and backwards until the back starts to lit up off the floor. Make sure the neck is loose and comfortable and ensure the chin is not pressing into the chest.
Press your hands into the lower back and then sink the weight of the body into the hands so that the weight is in the elbows and not the back of the head.
Initially, it’s advisable to remain in a slightly piked position, with a subtle bend at the waist to ensure the neck remains comfortable. Once the balance is refined, you may begin to reach the toes straight up towards the ceiling and straighten out the bend at the waist.
Hold for 10 – 15 breaths.
On an exhale, exit the pose by first hinging at the hips and allowing the legs to fall towards the back of the room. Gently and slowly roll out of the pose, lowering the feet to the floor.
Sirsasana — Headstand Pose

Headstand isn’t really a beginner pose, but most of the more traditional lineages of Hatha Yoga consider it to be foundational.
If a practitioner is unable to lift up into a stable headstand, it is advisable to take a preparatory version of the pose and gradually work towards the full expression of the posture. Those with neck or shoulder issues are advised to exercise caution and only undertake headstand under the supervision of an experienced teacher.
From a tabletop position, place the elbows on the floor shoulder width apart and interlace the hands. Place the crown of the head on the floor and cradle the back of the head with the hands.
Pressing strongly into the elbows, forearms and hands, lift the hips up towards the ceiling as if you were entering downward dog and start to walk the feet towards your head.
At this point most of the weight should be in your arms and not in the crown of your head. Press the shoulders down towards the floor and out towards your feet.
If the neck is comfortable, you may walk the feet in closer lifting one foot at a time and bring each knee in towards the chest.
If the arms are still strong and the balance feels good, try to bring both knees into the chest, balancing on the head in a tucked position. Once this position is stable you may begin to lift the legs up towards the ceiling.
If at any point the shoulders lose engagement and the weight starts to fall into the head, exit the pose or take an earlier preparation.
Hold for 10 – 20 breaths.
Lower the feet to the floor on an exhale. After headstand, it is a good idea to rest in Child’s Pose for an additional 10 – 20 breaths.
Savasana — Corpse Pose

Savasana is perhaps the most essential pose of all, and in many ways it’s the most challenging.
Simply lie down on your back, release every muscle in your body and don’t do anything for as long as you have time for.
It couldn’t be simpler. Yet sometimes it’s easier said then done.
This pose, more then any other, trains your nervous system to relax and allows the body time to reset and integrate after a strong practice. Make sure to allow plenty of time for it.
Most yoga poses, even the super complicated ones, are essentially variations or combinations of the basic postures.
It’s very important to establish a firm foundation of breath, alignment and internal focus in these basic poses before moving on to the fancy stuff.
So focus on the fundamentals. Concentrate on the details rather then trying to simply push into your depth. Make sure your breathing always comes first.
Mastering these essentials will set you up for a lifetime of practice!