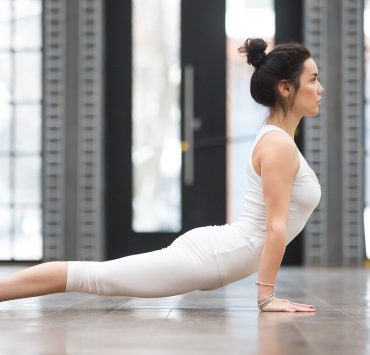
Yoga handstand has become an iconic pose amongst instagram followers and aspiring yogis alike. This advanced asana takes practice, dedication, and perseverance. There are several ways to approach any handstand, but first, you must master patience. It is okay and expected to make mistakes here! You will fall, and you will get back up again. After all, isn’t yoga the journey of learning more about the self rather than achieving perfection of the self? In this article, you will learn all about yoga handstand and the four techniques for a strong handstand.
Summary of Handstand
Posture Benefits

In yoga handstand (Adho Mukha Vrksasana), you utilize almost every muscle in the body to stabilize and hold yourself in an inverted position. Handstand strengthens and stretches the entire abdominal wall and spine, while activating and toning the shoulders. Any inversion posture stimulates the circulatory system, and increased blood flow to the brain can reduce stress and depression while rejuvenating the mind. Your more efficiently exchange oxygen and carbon dioxide through expansion of the lungs, too. In a more playful way, handstand encourages you to see the world from a new perspective and find the child inside yourself!
Warm Ups

You want to warm up the wrist and shoulders the most in handstand. To warm up the shoulders, take a yoga block and hold it straight out in front of you. Squeeze the block the entire time during this warm up, and take 5 breaths here. Raise the block 45 degrees and take 5 more breaths. Lift the block straight over the head and gaze up towards it. Hold for 5 breaths, then release.
To stretch the wrists, hold your right hand out in front of you like a traffic cop. With your left hand, gently bend the fingers on your right hand back towards you for 2 breaths. Invert your right hand down and press on the top of the hand to gently for 2 breaths. Release and repeat on the other side.
Safety Tips

Yoga handstand is contraindicated if you are pregnant, have high or low blood pressure, a heart issue, any shoulder, neck, arm or wrist injury, or migraine headaches. Always begin your practice against a wall to support you. If you are new to inversions or fear falling, you may wish to practice on a soft mat to cushion your fall. It is also important to tuck your head rather than stick out your neck while you are in posture. In addition, always make sure that there is nothing around you to avoid injury.
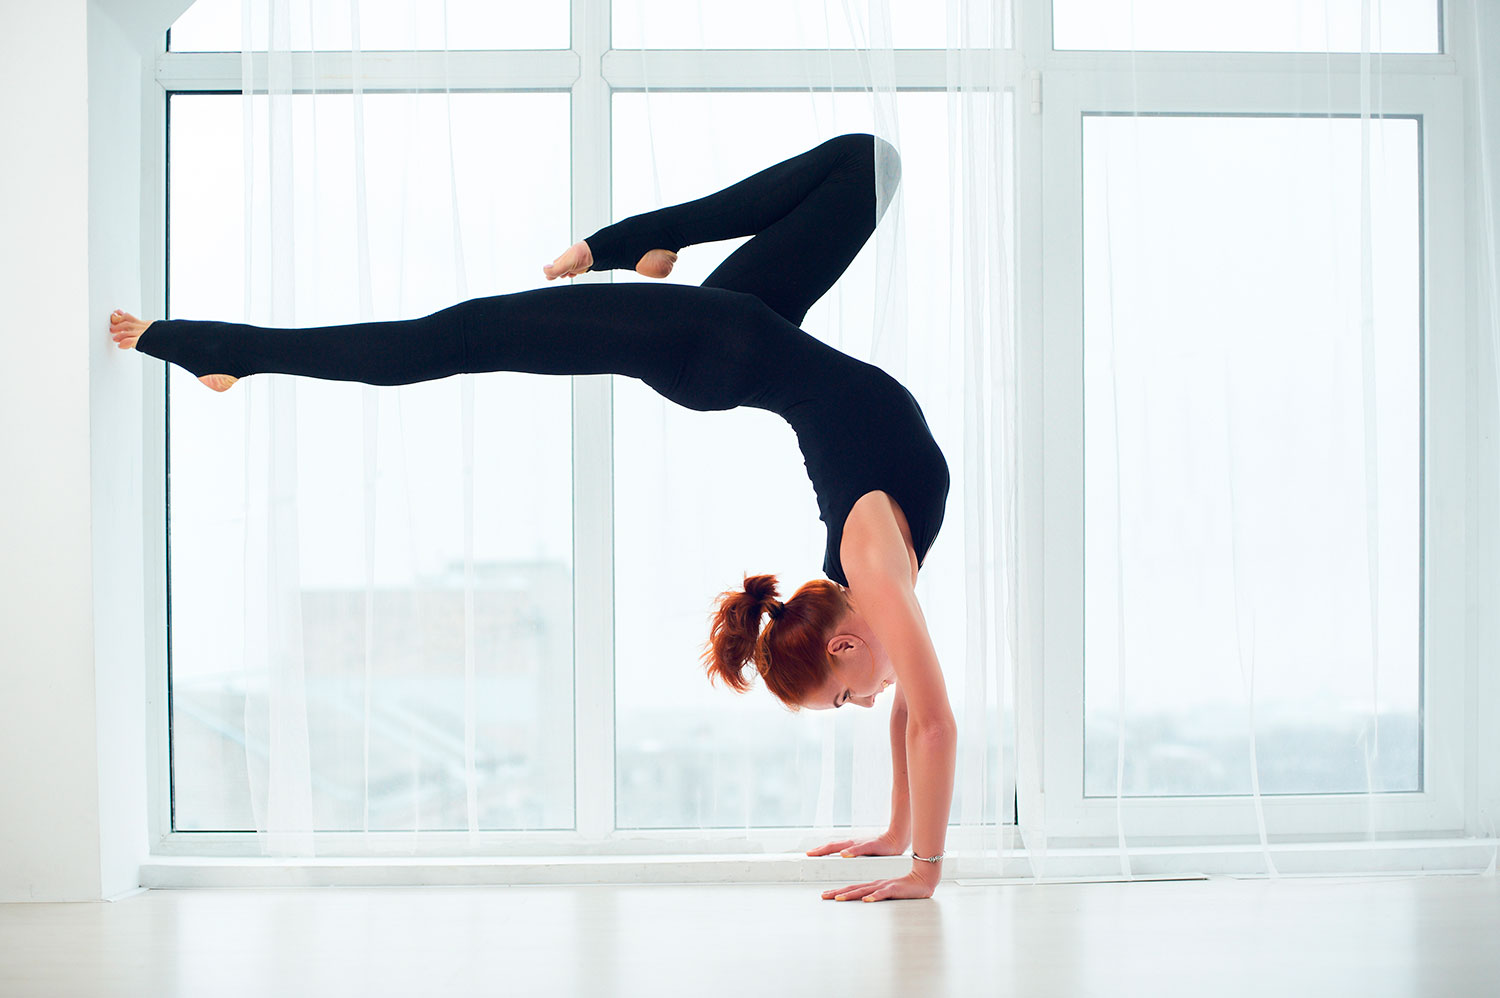
4 Techniques for a Strong Handstand
L-shape with wall

With your feet against the wall, you won’t feel like you are going to fall. This technique is excellent for any beginner wishing to learn handstand for the first time.
1. Bring the short end of your mat against the wall. Come into a table position facing away from the wall, and press your feet against the wall with toes on the mat. Your wrists are under your shoulders, shoulder distance apart, and knees under the hips, hip distance apart. Externally rotate the shoulders so that you have greater space in the neck and collar bones.
2. Lift your knees off the mat and come into a narrow downward facing dog with the heels against the wall, toes on the mat. Press firmly into the palms and with all fingers to grip the mat.
3. Bend your right knee and begin to shimmy your right foot up the wall until your heel is in line with your hip. As you press the sole of your foot against the wall, straighten your leg until your torso is now over the shoulders.
4. Lift your left leg up to meet your right, pressing both soles firmly against the wall. Your body is now at a 90 degree angle. Balance in this L-shape for 3 breaths.
5. Continue to activate your shoulders. Begin to lift your right leg off the wall and up straight to the ceiling. Activate your core and tuck your hips in to stabilize your center. Hold this one-legged posture for 3 breaths.
6. If you feel confident, take your left foot off the wall and straighten your leg to meet the other. Squeeze the glutes, core, and thighs together. You can always bring one foot back to the wall if you feel unstable.
7. To release, bring one foot and then the other back to the wall in your L-shape. Bend one knee and shimmy the foot back down towards your mat. Bend the other knee to meet your other foot. Come down into table position.
8. Take child’s pose for 5 breaths before attempting any more.
Against the wall

Using the support of the wall for your entire body can help you feel secure and stable. This technique is highly recommended for beginners.
1. Bring the short end of your mat against the wall. Face the wall and come into a table position with knees under the hips, hip distance apart and hands under the shoulders, shoulder distance apart.
2. Lift your knees off the mat and press firmly into your hands. Lift the sitting bones up towards the ceiling to pull yourself back into Adho Mukha Svanasana, downward facing dog.
3. Walk your feet in until your shoulders are directly over your hands. Lift your right leg, bend your left leg, and kick up onto the wall. Your right leg will come up first, followed by the left.
4. Flex the feet so the back of the heels are flush with the wall. Tuck your tailbone in and squeeze the legs together. The belly button comes in towards the spine to activate the core. Gaze straight ahead.
5. Experiment here with gently guiding your heels off the wall to see how it feels to be unsupported. Remember to keep your hands activated by pressing them into the floor. Hold this posture for 5 breaths.
6. To release, lower the left leg to the floor and the right leg will follow. Come into a table posture and stretch back into child’s pose for a few breaths.
One legged kick

This posture can help you get into handstand by utilizing the momentum of one leg to lift your body into a straight line.
1. Begin on your mat in table posture. Place your knees hip distance apart under the hips and the hands shoulder distance apart under the shoulders. Press the floor away from you and gently round the upper back.
2. Lift into Adho Mukha Svanasana, downward facing dog. Bring your right leg closer to your hands so that your foot is right under your hip. Guide your shoulders over your hands.
3. Press your hands into the mat and gaze between your hands. Rock from heel to toe to make sure your weight is forward.
4. Lift your left leg up into the air with a pointed toe and balance on your right toes. Inhale, press the hands into the mat and kick your left leg straight up. Your right foot will come off the floor.
5. Hug the right knee into your chest while your left leg straightens up to the ceiling. Keep the belly in towards the spine and tuck the hips.
6. You can let your leg fall back or exhale bring the right foot down, then the left. Continue to inhale, kick up, exhale, then lower the feet back down as many times as you need to.
7. Once you catch your balance, hold here for 2 breaths. Lift the right leg slowly to meet the left. Squeeze the legs together and keep the toes pointed.
8. To release, lower one leg and then the other and come back to table posture.
9. When you feel you have mastered this side, try kicking up the right leg while bringing your left knee to the chest. Do this as many times as you need to, then try to straighten both legs.
10. Take a child’s pose for 10 breaths after trying this posture.
Knees to chest

While this is the most challenging of all the handstand techniques, it will help align your body into a strong posture that will help you maintain core balance.
1. Begin on your mat in a table posture. Shoulders are over the hands and knees are under the hips. Press into the shoulders and round the upper back to open the shoulder girdle.
2. Lift into a downward facing dog pose. Bring your feet closer to the hands in a shortened posture. The shoulders are directly over the hands here. Tuck the tailbone, come onto the toes, and press into the hands.
3. Inhale, bend the knees and jump off the mat, keeping the knees bent, tucked and together. Bring the feet close to the buttocks as you lift your legs up into the chest. Let the feet fall back to the mat and repeat as many times as necessary.
4. Once you have mastered this jump, try to find your balance after jumping. Keep the knees as close to the chest as you can while tucking the tailbone and activating the core. Hold here for 5 breaths.
5. If you can balance here, begin to slowly straighten both legs up to the ceiling while pointing the toes. Keep your abdomen activated the entire time to align the spine. Hold for 5 breaths.
6. To release, bring both feet down to the mat. Take child’s pose for 10 breaths before moving on.
There are many ways to approach a yoga handstand. To summarize, you can try L-shape against the wall, legs up against the wall, one legged kick up, and knee to chest jump. Try all of these techniques and see what works best for you. These techniques are listed from easiest to most challenging, so if you are a beginner, try out these poses in order. Practice, practice, practice as much as you can. And most of all, have fun! Let yourself play in handstand and enjoy the journey of discovering life upside down.