When getting started with power Yoga beginners should keep a few things in mind. First, always practice ahimsa, translated from Sanskrit meaning do no harm. Regardless of how physically challenging a practice is, at no point should a practitioner feel like they are unsafe or take a no pain no gain philosophy. Secondly, while practicing ahimsa try to hold postures for longer periods of time versus moving through them quickly. When practicing with correct alignment, holding postures for longer periods of time will help build strength in the body. Finally, consciously be aware of the breath. If the posture becomes so physically challenging that you can no longer practice pranayama, then take a break or a child’s pose before moving on to the next posture.
Power Yoga Workout
Start with Centering

To keep your power yoga practice from becoming just a workout, take a few moments to get centered.
Start in sukhasana, also known as easy seated pose, sitting with the ankles crossed while the knees lowered down with a neutral spine. Letting the eyes close take in some slow deep breaths to ground down into the present moment. If any thoughts or distractions arrive become aware of them as they happens and then try to guide your awareness back into your breath.
After a few minutes of grounding, set an intention for the practice. Create a short and simple statement, perhaps reflecting the strength of the practice. Examples can be “I am strong” or “I embrace my power”. However, intentions can be whatever you would like to cultivate out of your practice and perhaps practice off of the mat. Repeat the intention several times to yourself, imagine taking it in with each inhalation and then sending it out into the world with each exhalation
Practicing pranayama, begin to practice ujjayi breath. Take a few minutes to sit, working on control the breath until you feel like you can both move while maintaining it. Continue practicing ujjayi breath as best as you can throughout the practice.
Salamba Balanasana — Child’s Pose

Child’s pose is a place of rest and can be done at any point during the practice. To start, to stretch the body though coming to child’s pose letting the toes touch. The knees can either be together or separated. Lengthen the neck and let the forehead release down towards the match. Extending arms forward trying to keep them in line with the shoulders.
Marjaryasana — Cat/Cow Pose

Cat-cows can help warm up the spine. In tabletop, take a deep inhale and release the belly downward as the gaze goes forward. On the exhale, bring the chin towards the chest rounding in the upper back and lifting the tailbone. Go back and forth with the breath between cat and cow for several rounds.
Adho Mukha Svanasana — Downward Facing Dog Pose

Downward dog will help strengthen the body while stretching it out simultaneously. Walk the hands about two or three handprints forward from table top. Curl the toes under while lifting the hips up towards the sky. Next press the hips towards the back of the mat. Create more length in the spine while activating the legs. Hold for 5 to 10 breaths.
Standing Postures
Standing postures will build strength in the body when practiced correctly. It is important to not just place the feet or body parts where they should go but to activate the muscles associated with the posture.
Virabhadrasana I — Warrior I Pose

Warrior 1 not only strengthens the legs arms and shoulders but it also increases stamina. From a standing position, step the right foot forward and the left foot back. Rotate the back foot to about 45 degrees well the front foot has the toes facing forward with no angling of the foot. Bend into the front knee, creating a 90-degree angle with the leg. Reach the arms overhead with the palms facing each other. Activate the quadriceps, hamstrings, and glutes to help build leg strength. Hold the posture for 5 to 10 breaths before repeating on the opposite side.
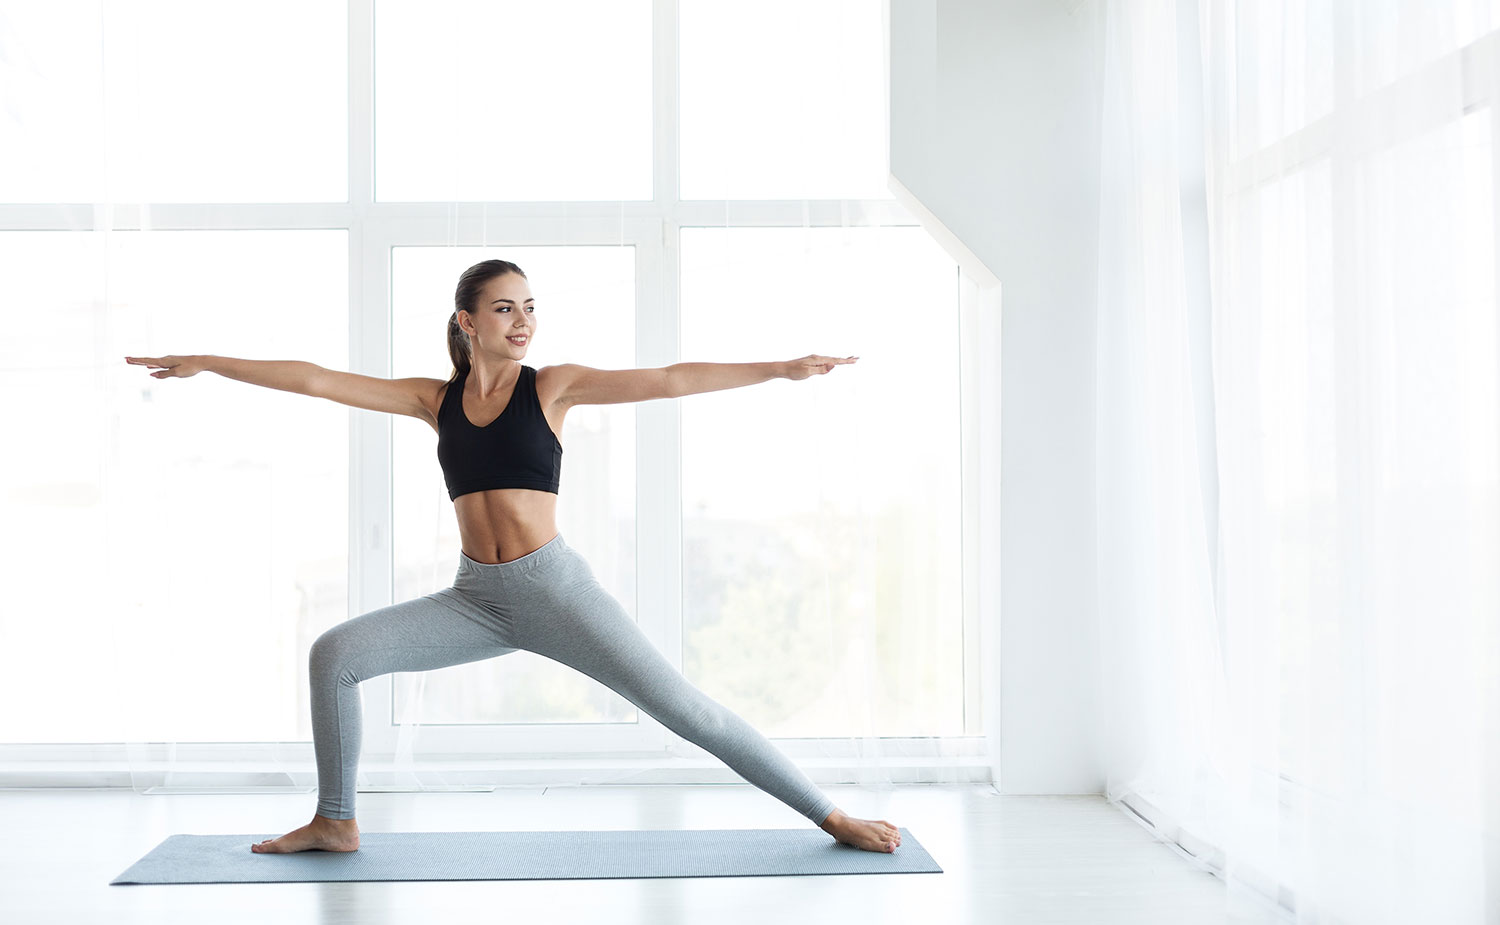
Virabhadrasana II — Warrior II Pose

Like Warrior 1, Warrior 2 increase his stamina while strengthening the legs specifically the thighs. It will also help open the hips when practiced correctly.
From a standing position, step the feet out wide. Extend the arms outwards while keeping them in line with the shoulders. The feet should be almost as wide as the arm spread. Rotate the right foot 90 degrees and then bend the right knee 90 degrees. Keep the weight balanced on all four corners of both feet. Be mindful of the torso and keep the shoulders above the hips. Engage the thighs while rotating them externally. Hold the posture between 5 and 10 breaths before repeating on the opposite side.
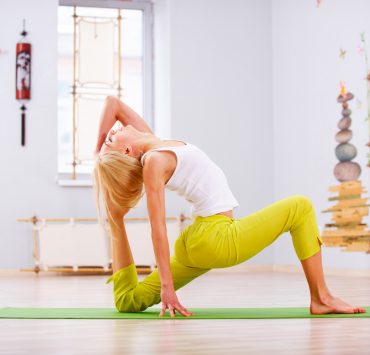
Anjaneyasana — Crescent Lunge Pose

Crescent lunge not only strengthens the thighs and calves but will also increase balance. From a standing position, step the right foot forward and the left foot back. The right knee will bend. The left heel should lift up off the floor. Neither foot should be angled. Extend the arms towards the sky with the palms facing each other while the gaze stays forward. Hold for 5 to 10 breaths before repeating on the opposite side.
Virabhadrasana III — Warrior III Pose

A serious balancing pose that builds strength and balance, Warrior 3 can help strengthen the legs in addition to the spine, core and the shoulders.
From crescent lunge, begin to lift the back foot up while the torso begins to lower and parallel with the floor. Reach the arms forward creating a “T” shape with a body. Power up the glutes and extend through the legs and the arms while keeping the front of the body parallel with the floor. Hold for 5 to 10 breaths before repeating on the opposite side.
Hip Openers
Stretching is still necessary is power yoga to have a well-balanced practice. In addition, it helps to open the body up to get deeper into more powerful postures posture.
Utthan Pristhasana — Lizard Pose

Lizard Lunge helps stretch the hamstrings, quadriceps, and hip flexors. To start, come on all fours in tabletop and bring the right hand closer to the left. Step the right foot forward next to the hands and extend the left leg farther back. If possible, slowly lower the forearms down towards the floor without rolling into the right glute. The lower back should remain balanced. Hold for 10 breaths before repeating on the opposite side.
Core strength
A power yoga practice is not complete without some major core exercises. While holding for a certain amount of breaths is suggested, hold for longer periods of time if the body is able to.
Phalakasana — Plank Pose

Plank pose helps build total body strength. From tabletop posture, keep the hands where they are and step the feet back so the legs are straight balancing on the toes. Engage the core so the hips neither sag or are pressed up higher than the lower back. Keep the gaze between the hands. Hold the posture for 10 breaths or longer if possible.
Paripurna Navasana — Boat Pose

Boat pose helps strengthen the core, back, and the legs. From a seated posture with the feet planted into the floor and the knees bent, press the hands into the floor beside the hips. Lean the torso back but keep the chest broad while engaging the belly and lengthening the spine. Gently left the feet so they are in line with the knees or extended towards the sky. Begin to lift the hands off of the mat and reach them forward to the front of the mat.
Seated Postures
After the leg strengthening from the standing postures, stretching the legs will help keep a well-rounded practice.
Paschimottanasana — Seated Forward Bend Pose

Sitting on the floor extend the legs forward. Gently flex the feet and keep the backs of the legs pressed onto the floor. Sit upright, engaging the back while lengthening the spine. Take an inhalation and fold forward at the waist while keeping the chest open.
Reclined Postures
Reclined postures help take the energy down from a powerful practice. They are a great transition before final relaxation.
Supta Matsyendrasana — Reclined Spinal Twist Pose

Lying on the back, bring the knees towards the chest. Extend the arms out to the sides and let the tops of the hands rest on the floor in line with the shoulders. Release the knees to the righthand side of the floor while taking the gaze towards the left. Hold for 5 breaths then bring the knees and head back to center before repeating on the opposite side.
Savasana — Corpse Pose

The most important posture in any yoga practice regardless of if it is a power yoga practice or restorative practice is savasana. After completing the postures, lie down in corpse pose. Let the feet release outward. The arms come to the side of the body with the palms facing up. Close the eyes and allow the body to relax for several minutes without falling asleep.
Summary
Short 20-minute power yoga practices can help build strength in the body, increase stamina, and help integrate the practice. Practice several times a week to get the most out of your power yoga practice.