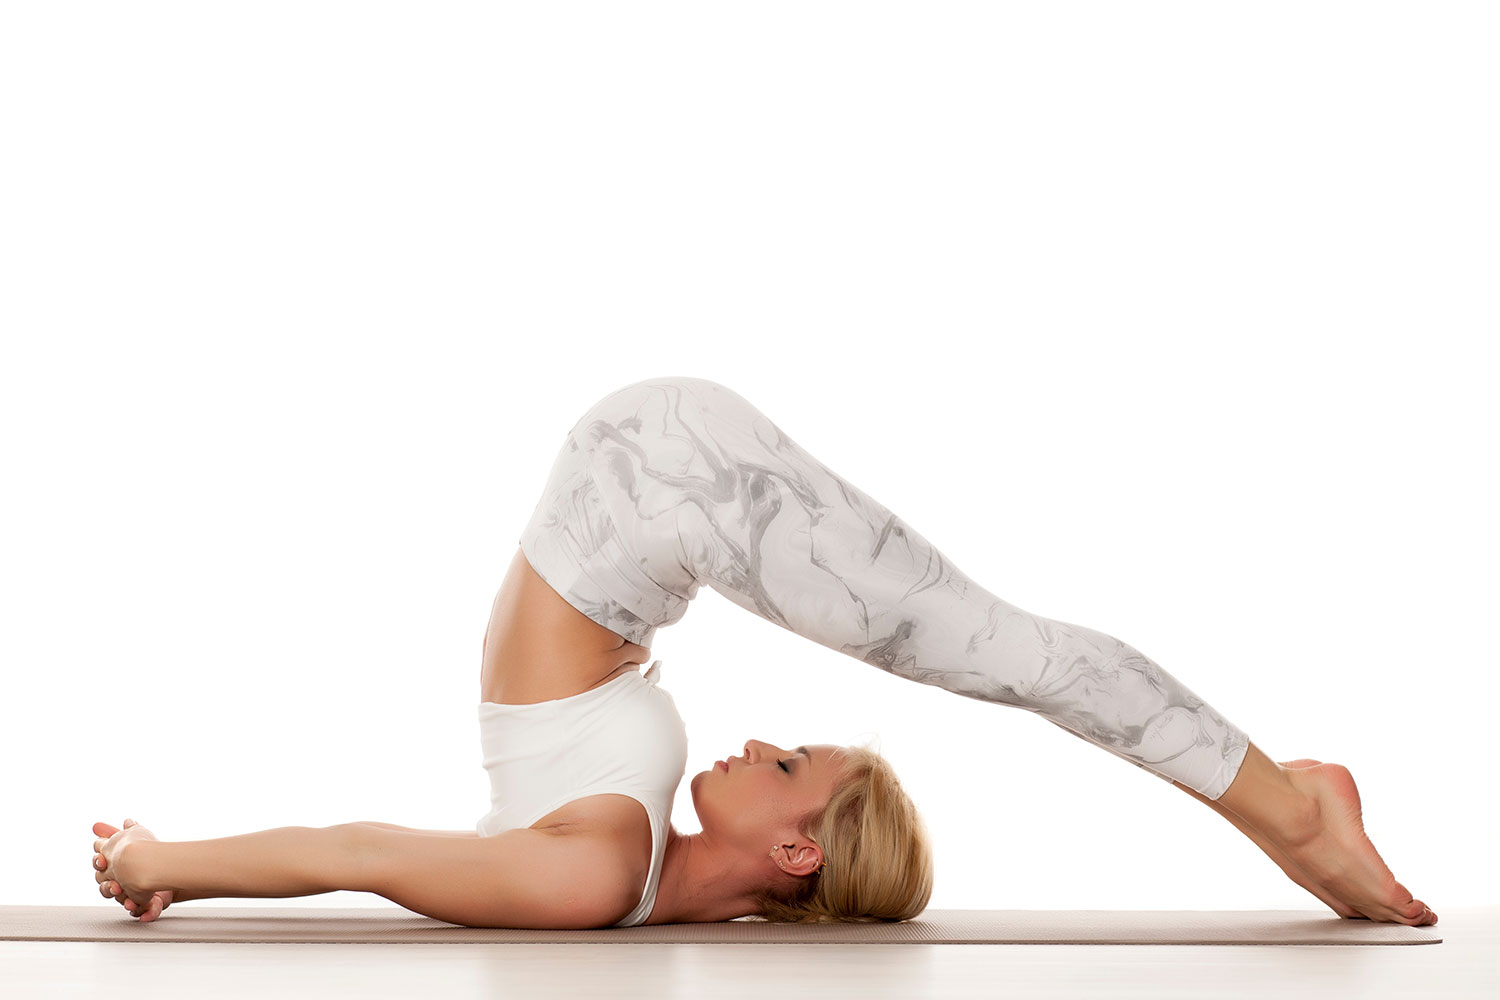
Yoga, meditation, and spirituality are at the top of the…
Even if you don’t consider yourself a full-blown yogi, any athlete can benefit from working yoga poses into their physical routine. These poses are perfect for athletes who are looking to build power, stretch their muscles, and bring variety to their workout.
Marjaryasana — Cat/Cow Pose

Cat/Cow Pose, or Marjaryasana, is a gentle backbend pose that brings movement to the spine, helping to release any built up tension in the back and neck, as well as warm up your body for more intense movement.
Instructions:
Begin on all fours, with your palms and knees on the ground. Ensure your hands are stacked directly underneath your shoulders, and your knees underneath your hips.
On an exhale, move into Cat. Round your spine up towards the ceiling while tilting your tailbone down, and tuck your chin down towards your chest. While your head is tilting down, ensure you are still elongating through your neck and leaving space between your chin and your chest.
On your next inhale, move into Cow. Raise your head and face forward, and tilt your tailbone up, creating a curve in your back. Ensure you don’t tilt your head back too far or over arch your back, as it can result in strain.
Continue slowly alternating between the poses a handful of times, breath to movement.
Uttanasana — Standing Forward Fold Pose

Standing Forward Fold, or Uttanasana, uses your own body weight to release tension in the back and shoulders, as well as stretch the hamstrings, making it an excellent targeted stretch for athletes.
Instructions:
Start standing with your feet hips-distance apart, and hinge forward at your hips. Bring your hands to the ground, and bend your knees as much as you need to. By bending your knees, you are putting more of the stretch in the back and neck, while straightening them will add the stretch to the hamstrings. If you are unable to reach the floor with straight legs, you can use blocks to bring the ground closer to you.
Release any tension in your neck and find stillness in the posture. Hold the position for about 30 seconds to a minute, and slowly roll up to get out of the pose.
Prasarita Padottanasana — Wide Legged Forward Fold Pose

Like Standing Forward Fold, Wide Legged Forward Fold, or Prasarita Padottanasana, uses your body weight to release tension in the back and stretch the hamstrings.
Instructions:
Start standing. Step your feet wide apart from each other. On an inhale, elongate your spine, and on an exhale, begin to bend forward from your hips, until your hands reach the ground. If you can’t touch the ground, use blocks to make up the space. Let go of tension in your neck and relax your gaze behind you.
Your weight should be focused more forward in your toes, rather than back into your heels. Breath in this posture, and continue to lengthen towards the ground on each exhale. Hold for 30 seconds to a minute, and then slowly come up with your arms out to a ‘T’ or your hands on your hips. Ensure your spine is straight as you rise.
Trikonasana — Triangle Pose

Triangle Pose, or Trikonasana, is beneficial for athletes because it builds power while restoring the muscles. The pose strengthens the thighs, ankles, and core, while stretching the legs, groin muscles, hips, and shoulders. The twist of the pose releases tension in the back and spine.
Instructions:
Start standing at the top of your mat, and turn to the side so that your right foot is closer to the front edge of the mat. Step your left foot out about three to four feet.
Turn your right foot 90 degrees, so that your toes are pointing towards the top of your mat. Turn your left foot slightly in, so that it is at a 45 degree angle. The right heel should be in line with your left heel or arch.
Raise your arms to your sides, so that they are parallel to the ground with your palms facing to the side of the room. On an exhale, begin to reach forward with your right hand in the direction of your right foot. Shift your hips back, so that your tailbone tilts towards your left foot.
On that same exhale, begin to tilt your torso down towards your right foot, while still keeping your hips squared towards the side of the room. As you tilt, shift your arms so that they create a vertical line towards the ground.
Place your right fingers on the ground. If you are unable to reach, you can also place your palm along your shin or ankle, or on a block. Regardless of where you place your palm, be sure not to put too much weight into your hand.
You can bring your gaze down to the ground, or up to your left hand. Continue to elongate your spine on the inhale, and lightly twist up on the exhale. Hold for 30 seconds to a minute, and then come back up on an inhale. Repeat on the opposite side.
Virabhadrasana II — Warrior II

Warrior II, or Virabhadrasana II, helps to build stamina while strengthening the legs, core, and arms.
Instructions:
Begin standing, with the outer edge of your left foot paralleling the front edge of your mat, so that you are facing the side of the room. Step your feet about 3 and a half to 4 feet apart, keeping them aligned.
Turn your left toes about 90 degrees, so that your toes are pointing towards the top of the mat. Turn your right toes slightly in, so that they are at a 45 degree angle.
Lift your arms up to shoulder height, with your left arm pointing forward and right arm pointing back. Your palms should be facing down, and your arms should be engaged.
On an exhale, bend into your left knee, working towards creating a 90 degree angle with your shin perpendicular to the floor and your thigh parallel. Your knee should align directly over your left ankle.
Your hips should be squared towards the side of the room, and your gaze should be in front towards your left finger tips. Push through the outer edge of your right foot, and ensure that your torso is upright and not leaning forward. Bring awareness to your shoulders, ensuring they are not creeping up towards your ears.
To release, straighten your left knee, release your arms, and step your feet back together to repeat on the opposite side.
Eka Pada Rajakapotasana — Pigeon Pose

Pigeon Pose, or Eka Pada Rajakapotasana, is wonderful for any athlete who runs. The pose opens up the hips, thighs, and groin muscles, which can all get tight with a consistent running routine.
Instructions:
Start in Downward Dog. On an inhale, lift your right leg up behind you, keeping your hips squared to the ground. On on exhale, bend your knee and bring it into your torso, towards your right wrist. Place your entire right leg on the ground, creating a ‘7’ shape.
Keep your right foot flexed. Your left leg should be on the floor directly behind you, with the top of your foot touching the ground. Drive your right hip down towards the floor. If there is a lot of space between your right glute and the ground, you can place a block there for support.
Continue to elongate through your spine as you breathe through this posture. You can remain with your torso upright, or you can do down into Sleeping Pigeon for a deeper stretch: begin to walk your hands out in front of your, lowering your torso to the ground. Place your forehead on the ground or on a block.
Remain in this pose for 30 seconds to a minute. Release back into Downward Dog, and then repeat on the opposite side.
Parsva Balasana — Thread the Needle Pose

Thread the Needle, or Parsva Balasana, is the perfect option for any athlete who needs a stretch in the upper body. The pose moderately twists the spine, which in turn stretches the shoulders and upper back while releasing tension the spine and neck.
Instructions:
Start in a table top position, with your palms and knees on the ground. Your wrists should be aligned directly under your shoulders, and your knees under your hips. Bring your head in a neutral position, with your gaze downwards.
On an exhale, lift the weight off your right hand and slide your right arm underneath your left arm, with your palm facing up. Your right shoulder should rest down on your mat, along with your right ear, with your gaze now facing left.
Your left arm can be bent or extended out in front of you, and your hips should remain raised. Bring awareness to your shoulders, neck, and lower back, and let go of any tension as you breathe through this pose. To release, bring your left hand back in line with your head if you extended it. Slowly push through your palm, return to table top, and repeat on the other side.
Virasana — Hero Pose

Hero Pose, or Virasana, helps get an easy stretch in the quadriceps, as well as the knees and ankles, which can often be neglected in a stretching routine.
Instructions:
Start on your knees, with your glutes off your heels and the tops of your toes touching the ground. Keep your inner knees together, but begin to guide your feet away from each other, slightly wider than hips-distance apart.
On an exhale, slowly sit back, bringing your glutes between your heels. If it is uncomfortable to bring your glutes all the way down to the ground, you can place a block or folded blanket beneath you for support.
Rest your hands comfortably on your thighs, and breathe through the posture. Keep your shoulders away from your ears and spine elongated. You may choose to soften your gaze as your stay here for 30 seconds to a minute. To release, bring your palms to the ground and gently guide yourself back up.
Palakasana — Plank Pose

Plank Pose, or Palakasana, is an all-over body workout that is perfect for any athlete. It engages the core, as well as the arms, legs, back, and spine.
Instructions:
Begin in a table top position on your hands and knees. Your wrists should be stacked underneath your shoulders. Your palms should press firmly into the mat.
Tuck your toes and step your legs back, so that you are in a straight line from your head to your heels. Your neck should be active but relaxed, with your gaze down at the mat.
Bring awareness to your hips, and make sure they are in line with your body, rather than sinking or coming up too high. Ensure that your shoulders are still stacked over your wrists, and focus on pressing through the thumb and index fingers.
Continue to press your thighs up towards the ceiling, while still maintaining a straight line, and drive your tailbone towards your heels.
Try holding for at least 30 seconds, but hold for longer if possible to build up more strength and stamina. To release, carefully lower back down to your knees.
Adho Mukha Svanasana — Downward Facing Dog Pose

Downward Facing Dog, or Adho Mukha Svanasana, allows you to get a deep stretch in your calves and hamstrings, while simultaneously building strength in your legs.
Instructions:
Start from a tabletop position, with your hands below your shoulders and knees below your hips. On an exhale, engage your core, curl your toes, and lift your knees off the ground, working towards straight legs. Stretch your tailbone back and up towards the ceiling.
Your head should remain active, with your gaze focused in between your legs. Continue to push through your index fingers and thumbs.
Before settling into stillness, allow yourself to focus the stretch on the back of your legs by bending one knee and then the other. You may also choose to bend both knees at the same time, and then push back through your heels towards straight legs. Once still, hold the pose for 30 seconds to a minute, and release back down to your knees.
Urdhva Mukha Svanasana — Upward Dog Pose

Upward Facing Dog, or Urdhva Mukha Svanasana, opens the chest and shoulders, and also strengthens the side body and arms. It stretches out the spine, which can take a beating during intense physical activity, and encourages proper posture.
Instructions:
Lie on your stomach, with the tops of your toes pressed into the floor and your gaze facing down. Place your hands on the side of your body near your waist, with your palms pressing into the floor and elbows pointing up.
On an inhale, press your palms firmly into the ground and begin push your torso slightly forward and then up. Lift your head, torso, hips, and knees, so that your weight is on your hands and the top of your toes.
Be mindful of your shoulders, ensuring they are rolled back and away from your ears. Your gaze should be forward or slightly up, being sure not to force your head back too far.
Breathe through the pose for about 30 seconds. You can release by rolling back down to your stomach, or push back into Downward Facing Dog.
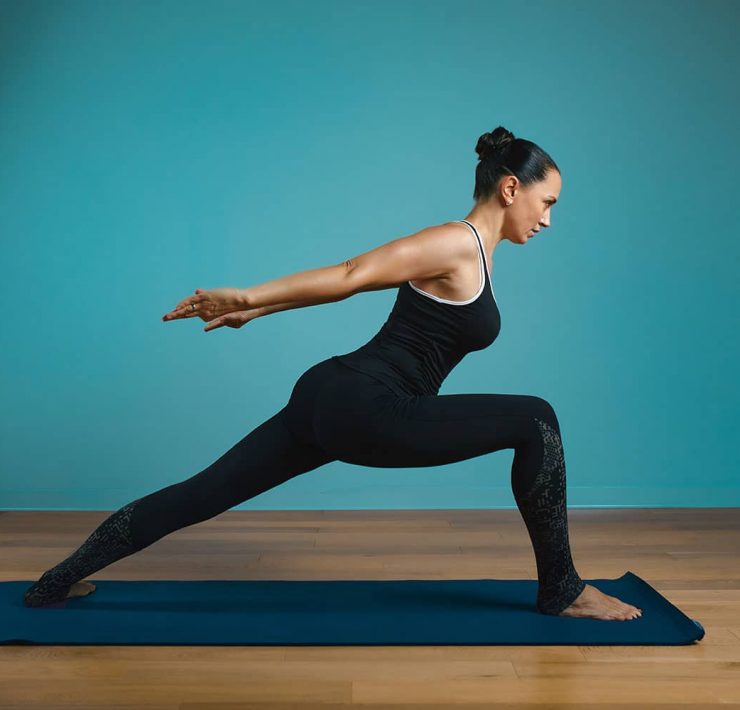
Anjaneyasana — Low Lunge Pose

Low Lunge, or Anjaneyasana, focuses on the lower body by stretching and strengthening the hips and quads.
Instructions:
Begin in Downward Facing Dog. On an inhale, sweep your right leg up behind you, reaching your foot up towards the back corner of the room. On your next exhale, step it forward between your hands. Bring the left knee down to the ground. If necessary, slide it back so you feel more of a stretch in the quads. Your back foot should be untucked.
Ensure that your right knee is stacked over the ankle. On an inhale, engage your core and begin to lift your chest, sweeping your arms up beside your ears. Elongate your spine, and drive your tailbone down. Keep your gaze forward.
To release, bring your torso forward and palms back down to the ground on either side of your foot. Lift your back knee, and then step back into Downward Facing Dog. Repeat the pose on the opposite side.
Anjaneyasana — Runner’s Lunge Pose

Runner’s Lunge is similar to Low Lunge, but takes the stretch in the hips much further. You may need a block for this pose.
Instructions:
Move into Low Lunge as outlined above, with your right foot in front and leaving your palms down on the mat. Start to move your right foot up and out towards the top right corner of your mat, and bring your right palm down to the mat on the other side of the foot, so that both palms are aligned to the left of your right foot.
You can leave your back foot tucked and knee off the ground for an active stretch, or bring your knee down and untuck your toes for a more restorative pose.
You can stay here if the stretch into the right hip is deep enough. If you would like to take it further, you can bring your forearms down to the ground, with your hands clasped or forearms parallel to each other. If this is too deep, you can also rest your forearms on a block.
Stay in whichever position you choose for 30 seconds. Come back up to your hands and move into Downward Dog, and then repeat on the other side.
Gomukhasana — Cow Face Pose

Cow Face Pose, or Gomukhasana, provides a deep stretch along the entire upper back and arms, making it a great option after any strenuous physical activity in the upper body. You may need a prop, such as a strap or towel, to make this pose accessible.
Instructions:
Start in a seated position. Bend your right arm behind your back, so that your hand is between your shoulder blades. Raise your left arm above your head, and bend your elbow so that your hand is behind your back.
Try to hook your hands together behind your back. If you are unable to do this, you can use a strap or towel to make up that extra length. Hold the pose for about 30 seconds to a minute, being mindful that you are keeping your spine straight and breathing deeply. When you are done, release and repeat on the other side. Both sides can be different, so you may find that you only need the strap on one side.
Garudasana — Eagle Pose

Eagle Pose, or Garudasana, is a difficult posture that challenges the entire body. It engages your core, tests your balance, and stretches your legs, arms, and upper back.
Instructions:
Start standing, and begin to bend your knees, as if going into Chair Pose. Put your weight into your left leg, and bring your right bent leg over your left above the knee. You can wrap your foot around the left ankle, let it hang in the air, or have it on the ground for extra support.
Sweep your arms up by your ears, and then bend your elbows. Bring your arms towards each other in front of your face, and then bring your right elbow under your left and twist your arms together. Try to work towards bring your palms to touch. Your elbows should remain at shoulder height, and you should actively push your arms away from your face.
Ensure that your hips remain squared to the front of the room, and that you are elongating through your spine. Be mindful of your shoulders, being sure they are not moving up towards your ears.
Stay in this pose for approximately 30 seconds, and then release and repeat on the opposite side.
If you are an athlete looking to expand your workout routine, give these yoga poses a try to see how they enhance your body and physical practice.
What's Your Reaction?
Yoga, meditation, and spirituality are at the top of the list for writer and former nutritionist Amanda Carter. This devoted practitioner enjoys writing about health and wellness just as much as she enjoys living it.



Great list of yoga poses, did you know that yoga is very important for athletes cause it tones the muscle, helps improve flexibility and aids in avoiding injuries.