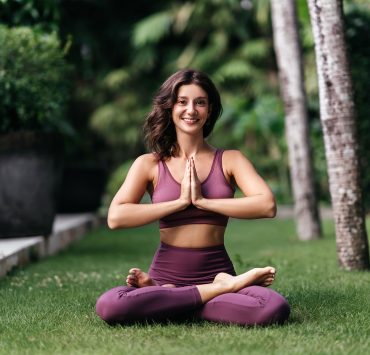
Yogic poses all fall within a range from visually approachable to those that appear virtually impossible. Peacock, Firefly, and Crow poses are just a few of those more daunting asanas. Yet many of these more advanced yoga poses become much more approachable when we break them down. When we look closer at what these poses really require, we find that they each call for an often overlooked and under practiced skill – that is, they call for arm balancing.
Learning arm balances requires more than arm strength; it requires patience, stability, and engagement of many different areas of the body. In order to improve our ability to perform arm balances, we can consider what other areas need to be addressed. For starters, our arm balances improve as we strengthen our wrists and improve their range of motion. Our wrists are not used to carrying our body weight and therefore need to develop strength and flexibility in order to support us (https://www.yogajournal.com/practice/5-tips-improve-arm-balances). Building shoulder strength also helps to support the entire body in these more advanced poses, as does core stability. As we practice arm balancing poses, keeping these areas in mind and engaged will help to support and strengthen them, nudging us further in our practice slowly and gently.
Poses to Learn Arm Balances
Arm balance can take time to work up to, but often, the time that is required is less than what we may have thought initially. Starting with basic poses that increase arm, shoulder, and core strength will provide us with solid ground to move further from. Investing in the entire body, specifically in those areas mentioned, will help us to reach Firefly and the others sooner than we may have thought. As you work towards these more advance arm balancing poses, move slowly and with control. As with any exercise program, consult with an advanced practitioner before pushing your body beyond what it is accustomed to. Some poses have contraindications; a healthcare practitioner can help to address these potential issues.
Utkata Konasana — Goddess Pose

This empowering pose tones the core muscles while also strengthening the arms and shoulders.
- Begin in a neutral standing position in the center of your mat facing lengthwise. Step each foot out to create about three feet of distance between the two. Turn your toes outwards so that they are facing the corners of the mat in front of you.
- Bend your knees, slowly bringing your pelvis down to the height of your knees, or as close to this as possible. Adjust the distance between your feet so that your knees do not jut out past your ankles.
- Extend your arms out to either side, parallel to the floor. Bend your elbows so that fingertips point towards the ceiling and palms face forward or towards one another. Engage your abdominal muscles and tuck your tailbone slightly forwards.
- Hold here for 45 seconds and before releasing.
Dandayamana Bharmanasana — Balancing Table Pose

This pose helps to build abdominal strength and improve balance. It strengthens focus and concentration, useful tools in achieving arm balancing poses.
- Begin on your hands and knees in Table pose, hands beneath your shoulders and knees beneath your hips. Your head is in a neutral position, looking towards the mat.
- On your next inhalation, raise your right leg behind you so that it is parallel with the floor, toes reaching backwards. Engaging your core for balance, raise your left arm up on your next inhalation. Fingers point forwards.
- Hold here for 20 seconds before slowly releasing both arm and leg back to the mat, returning to a neutral Table position. Rest here for a few full breaths.
- Repeat on the opposite side, raising your left leg followed by your right arm. Hold for another 20 seconds before releasing.
- Repeat this sequence for two more rounds, taking a moment’s pause between each round.
Vasisthasana — Side Plank Pose

Side Plank is a great core strengthener, specifically engaging the side abdominals. It also promotes our sense of balance and strengthens the arms.
- Begin in Plank Pose. From here, step your feet together and shift your weight to be supported by your right hand and arm. Slowly and with control, turn your body to the right so that the outer edge of your right foot rests firmly on the floor. Your left foot can pile on top of the right.
- Lifting through the hips, engage the thighs to form a straight line from toes to head. When you are stable, extend your left arm up to the ceiling, keeping both arms engaged.
- If comfortable, turn your head to gaze up towards your raised hand. Engage the core, arms, and legs to find stability. Find strength in the wrist as well.
- Hold this pose for 20 to 30 seconds and then slowly reverse the motion to come back into plank. Rest in Child’s Pose for a few breaths before repeating on the opposite side.
Tolasana — Scale Pose

Scale Pose is one of the arm balancing poses that builds and requires strength in the arms and core. It also helps to bring flexibility to the wrists and hips.
- Begin in a cross-legged position with each foot resting on the opposite thigh. Place each hand on the floor beside respective hip. You may wish to use supportive blocks beneath the hands if this helps.
- As you exhale, press your palms into the ground and engage your core. Lift your legs and buttocks off of the ground slowly and with control.
- Hold this pose for 20 seconds and then slowly come back down to the mat. Be mindful of the wrists, moving slowly and with control.
- Switch the cross in your legs and repeat once more, holding again for 20 seconds if accessible.
Bhujapidasana — Shoulder Pressing Pose

Shoulder Pressing Pose strengthens both arms and core. It is an intermediate arm balancing pose.
- Stand with your feet shoulder-width apart and the come into a squat position. Lean the torso forward to bring the body in between the thighs. Lift your hips slightly.
- Bring your upper left arm and shoulder to your inner left thigh. Place each hand on the mat against the outer edge of each respective foot.
- As you press firmly into the floor through your hands, shift your weight into your arms. Gently raise your feet off of the floor and allow your right ankle to rest on top of the left.
- Gaze forward and hold this pose for 20 to 30 seconds. To release, bend the elbows and gently bring the feet back down to the mat as you come into a seated position.
Mayurasana — Peacock Pose

This advanced yogic pose requires focus and concentration. It strengthens the wrists, forearms, and abdominal muscles.
- Kneel on your mat, bringing your buttocks to rest on your heels. Keep the knees wide as you extend forward, bringing both palms to the mat. Turn your fingers outwards, rotating them back towards your body.
- Bend your elbows to create a right angle. Your left pinky finger and forearm should touch those of the right.
- Draw your knees to the outside of your arms. Lean your torso gently onto the back of your arms, letting your elbows nestle into your stomach. Engage your core.
- Bring your forehead down to the mat. Extend your legs behind you, letting the tops of your feet rest on the floor for now.
- Engage your buttocks and shoulders as you raise your head to gently look forward. Shift your weight so that it moves onto your arms as you gently allow your feet to rise off the mat. Your body should be parallel to the floor.
- Hold for ten seconds and then slowly lower back down through the knees, feet, and head.
Kakasana — Crow Pose

Crow Pose strengthens the wrists, forearms, and upper arms and works the core. It requires balance and concentration.
- Stand at the top of your mat with your arms at your sides and then step out so that your feet are as wide as your mat. Bend your knees and come into a squat position.
- Your thighs should be wider than your torso and your feet as close to one another as possible. You might wish to put a folded blanket beneath your heels if they rise off the ground.
- Bring your torso forward just a touch and bring your upper arms inside of your thighs. Bring your palms together in prayer at the heart as your press your elbows against the inside of your knees.
- From here, press your palms into the ground, shoulder-width apart. Spread your fingers for support.
- Bring your knees towards your underarms and press your shins into the back of your upper arms. Engage the core as you come onto the balls of your feet, leaning forward. Focus on the floor between or hands for stability.
- Moving forward slowly, lift your feet off the mat. Pull your heels towards the buttocks. Your torso and legs can find support through balancing on the back of your upper arms.
- Start to straighten your arms just a little bit, pressing firmly into your hands. Engage your wrists carefully to support you. Your knees should stay pulling in towards your underarms and your forearms pulling in towards your center.
- Big toes can come to touch as you continue to engage the core. Hold here for 30 seconds or as is comfortable. To come out of the pose, slowly bring your feet back down, reversing the motion and coming to a comfortable seated position.
Parsva Bakasana — Side Crow Pose

This pose builds strength in the arms and helps to promote balance.
- Begin in a squat position with thighs parallel to the floor. Heels should rest on the floor. Twist your torso slightly to the right so that your lower left ribs come towards your right thigh.
- Bring your left elbow to the outside edge of your right thigh. Your underarm should be close to the outer edge of your thigh. Bring your right shoulder back a little bit further.
- Slide your upper left arm towards your right hip, pressing it into your right thigh. Hold this pose firmly.
- From here, squat down so you are almost resting on your heels. Your left hand comes to the floor outside of your right foot, palming resting flat. Lean forward slightly so that you can also place your right palm on the floor about shoulder-distance away from the left.
- Continue to maintain contact between your left arm and right thigh as you slowly raise your pelvis up and over to the right, turning your core closer towards the space between your hands.
- Your weight will naturally shift to your hands slowly. Keep your feet together and gently press through them. As you exhale, draw the left hip down and gently raise both feet. Straighten your left arm as much as you can; a slight bend is okay and will protect the elbow. The same goes for the right.
- Lift your right shoulder, your chest, and your head slightly. Hold the pose here for 20 seconds and then steadily lower the feet back down. Take a few breaths in a neutral position and then repeat on the opposite side.
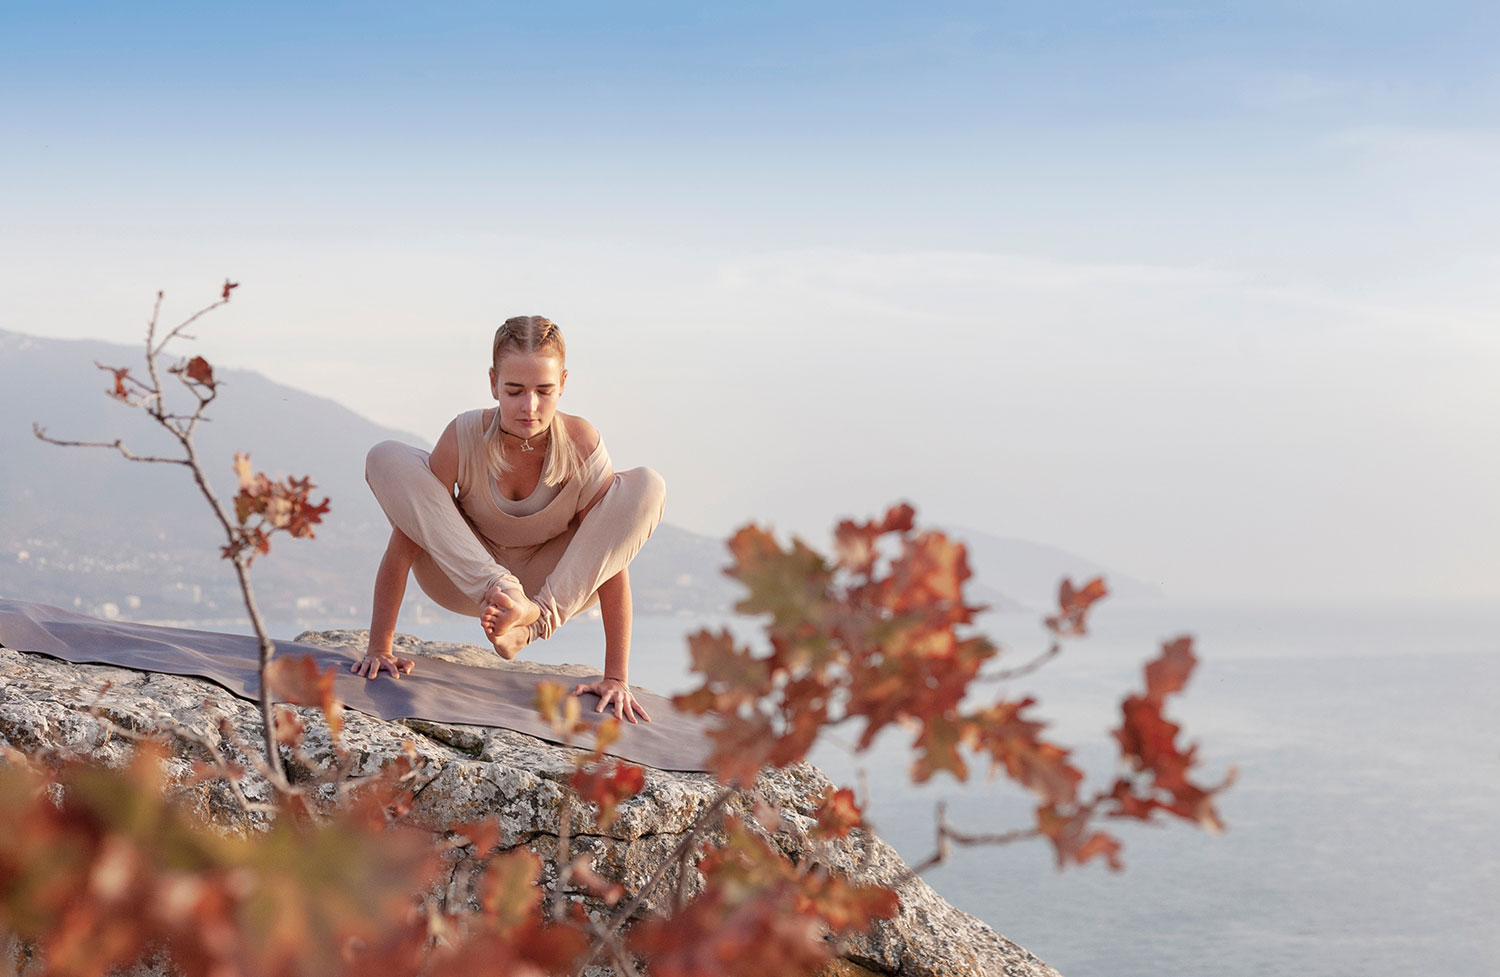
Astavakrasana — Eight-Angle Pose

This yogic pose is an advanced arm balance. It strengths arms and wrists and improves balance. This pose requires a very strong and engaged core.
- Begin in a comfortable seated position before bringing your left leg around and onto the left shoulder. Press your leg into your arm to help secure this positioning.
- From here, press your hands into the floor on either side of the hips. Cross the right foot over the left so that the ankles are hooked. The left leg should remain secure above the shoulder but if it falls, keep it fixed as high up on the forearm as possible.
- On your next exhalation, slide your hips backwards and bring your torso down to the floor. Gaze forward and lift your shoulders up to open the chest. They should be in line with your elbows.
- Maintaining this shoulder position, press your top leg onto your arm to raise your hips. Squeeze your legs together and bring your feet forward slightly. Ensure the shoulders remain engaged and steady and the core is activated.
- Hold this pose for 15 seconds and then bend your knees to lower back down. Pause for a few breaths and then repeat the pose on the opposite side.
Tittibhasana — Firefly Pose

By the time you reach Firefly, you should have worked up considerable arm balance and strength and have built a strong core.
- Begin in a squat position with feet about shoulder-distance apart or just closer. Bend forward to bring your torso between your legs. Stay low as you straighten your legs just enough so that your pelvis is at the same height as your knees.
- Thread your left hand beneath the left thigh so that your upper arm comes beneath the thigh as well. Place your left palm on the floor, fingers facing forward and resting against the outer edge of your foot. Repeat or the right side.
- Press your hands into the mat as you gently shift your weight from feet to hands. Slowly and with control, raise your legs off the floor. Keep your inner thighs against the most upper part of the arm.
- Breathe as you slowly extend your legs outwards, bringing them as parallel to the ground as possible. Press through your feet and keep the core engaged.
- The shoulders should remain as open as possible and the arms straight. A slide bend at the elbow is okay for extra protection for these joints.
- Raise your head to look forward without straining the neck. Hold for fifteen seconds and then gently release your feet back down to the mat, slowly coming out of the pose.
No matter what level you are at, there are accessible yoga poses to help get you closer to these last ones. Through developing arm, wrist, and shoulder strength, core support, and wrist flexibility, we become capable of some of the more out-there poses we thought were reserved for someone else. As you try some of these out, remember to take them slowly. Trust your body and focus on strengthening all those muscle groups that lead to successful arm balances. Eventually, Firefly be that out of reach.